Another week and another awesome Addicted to Stamps and More challenge!
Sponsor this week is the one and only
who offers $15 gift certificate to the winner
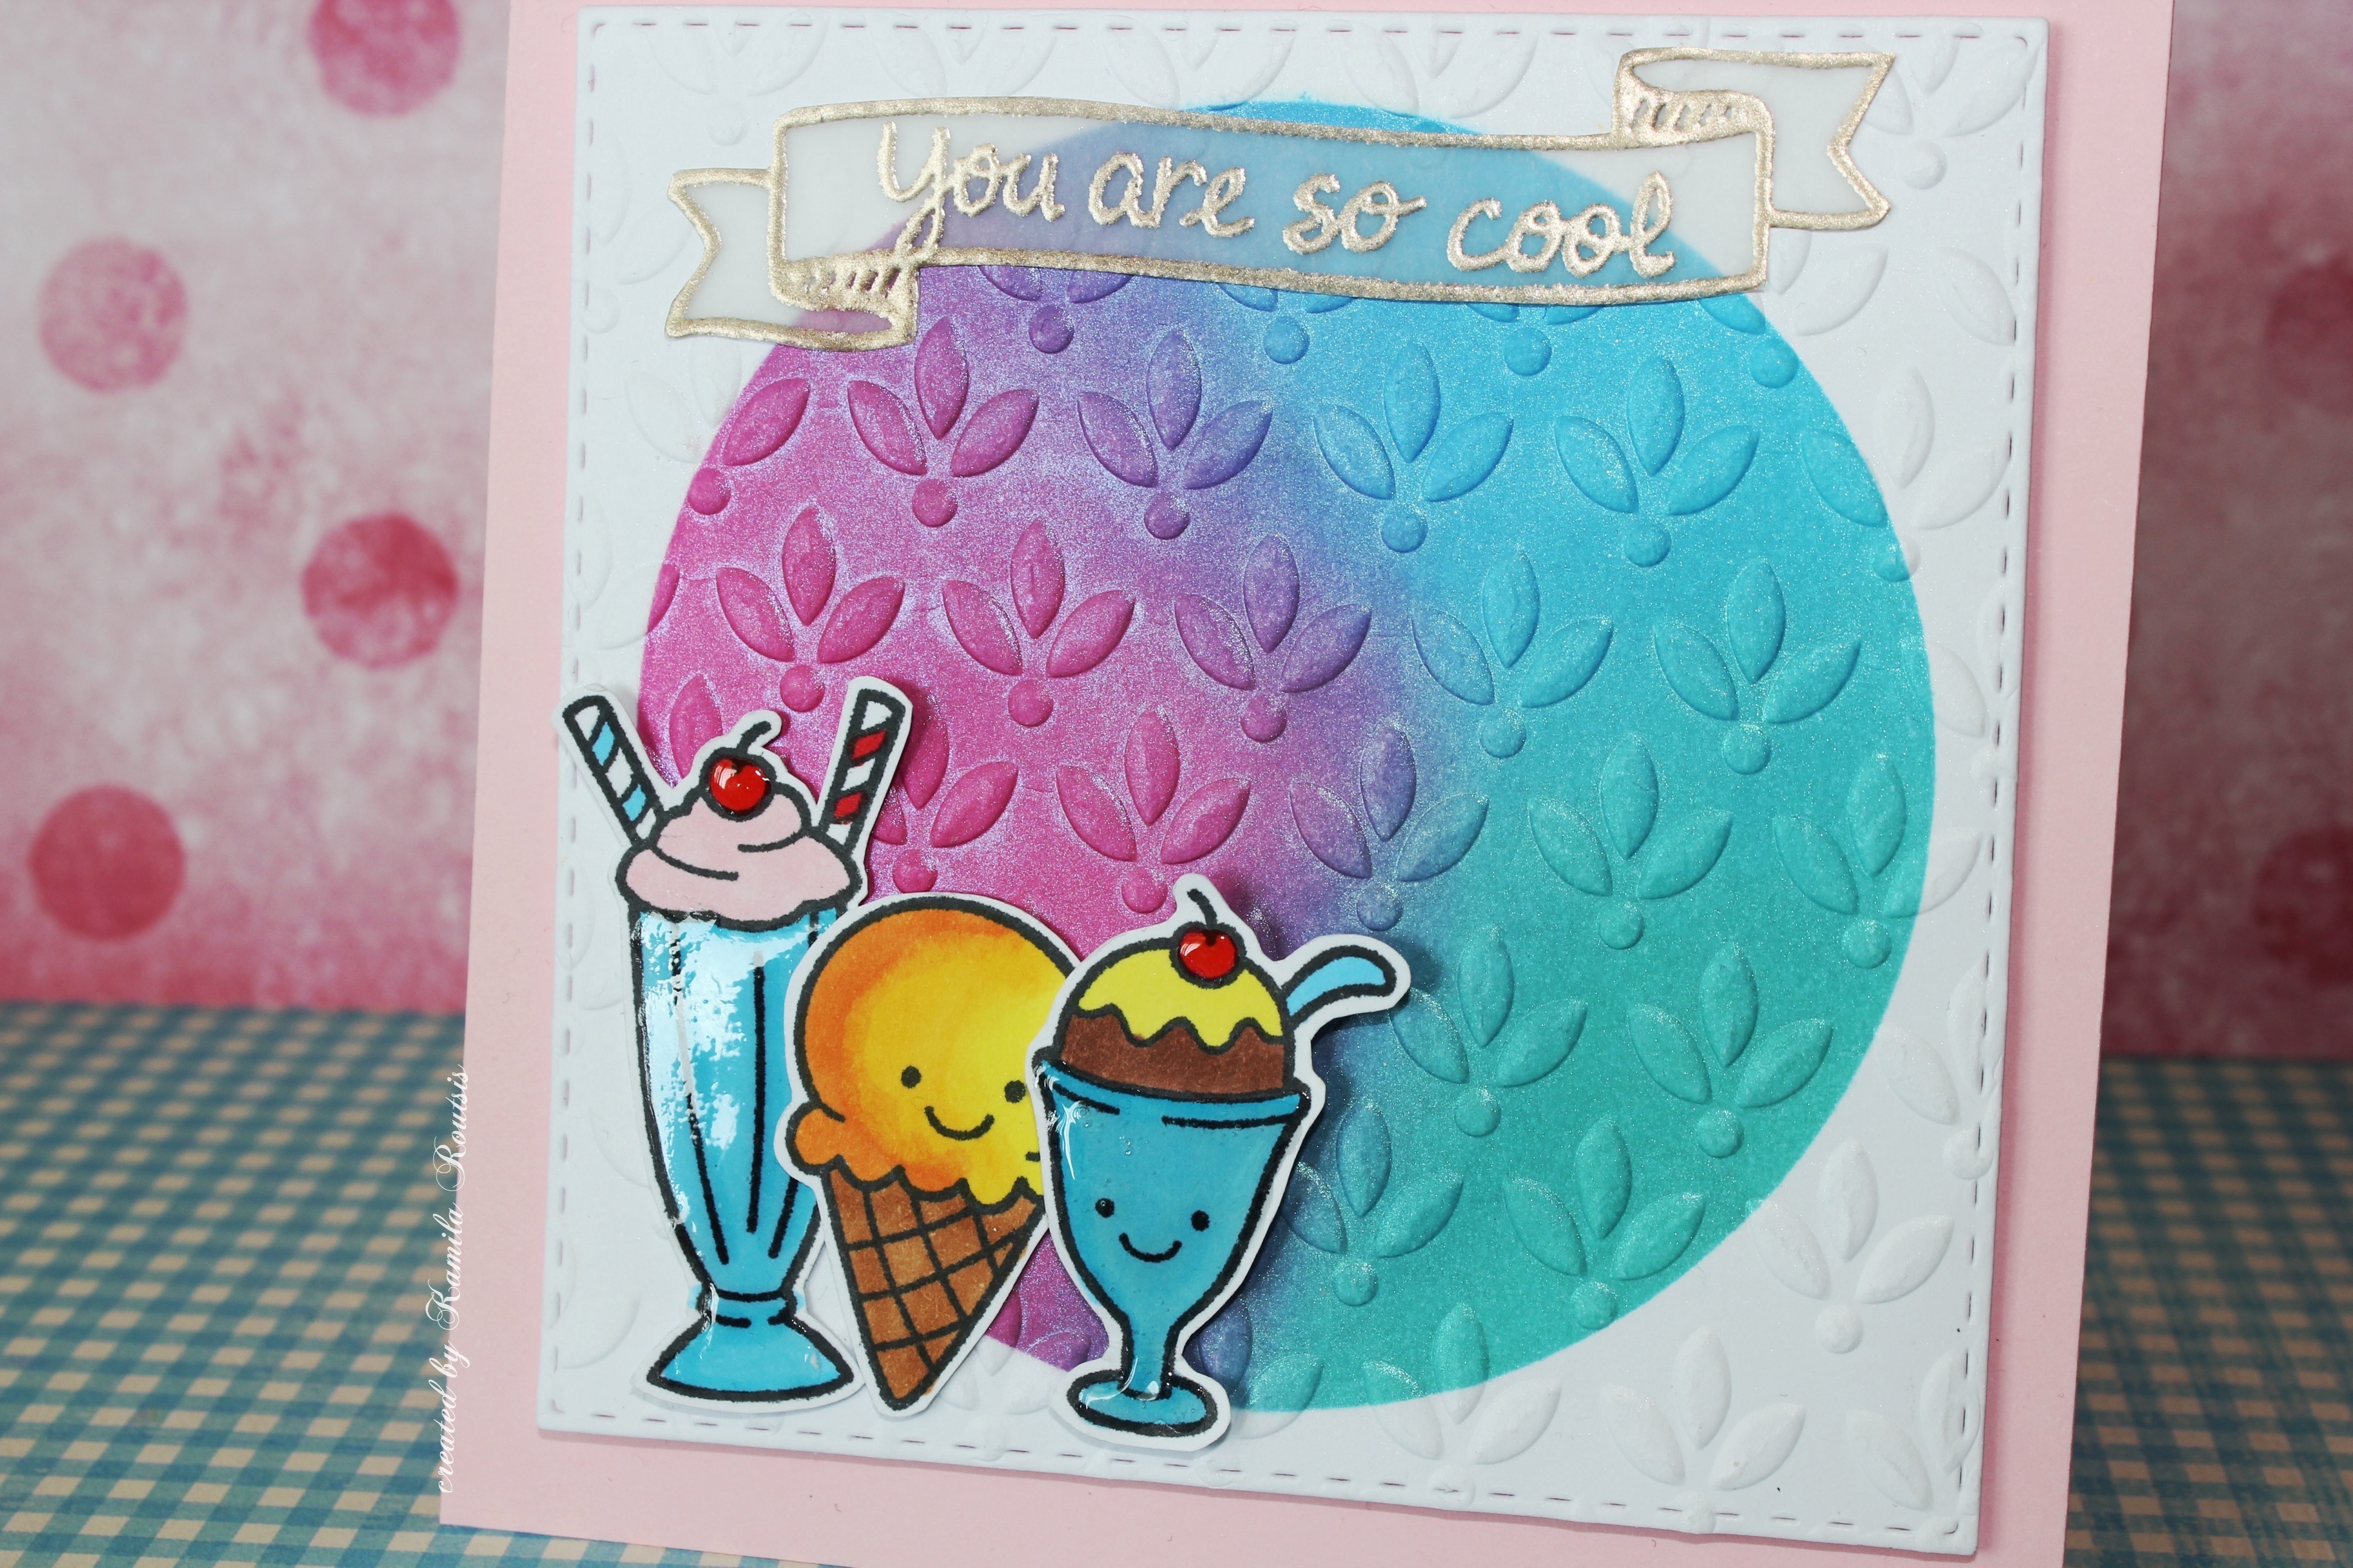
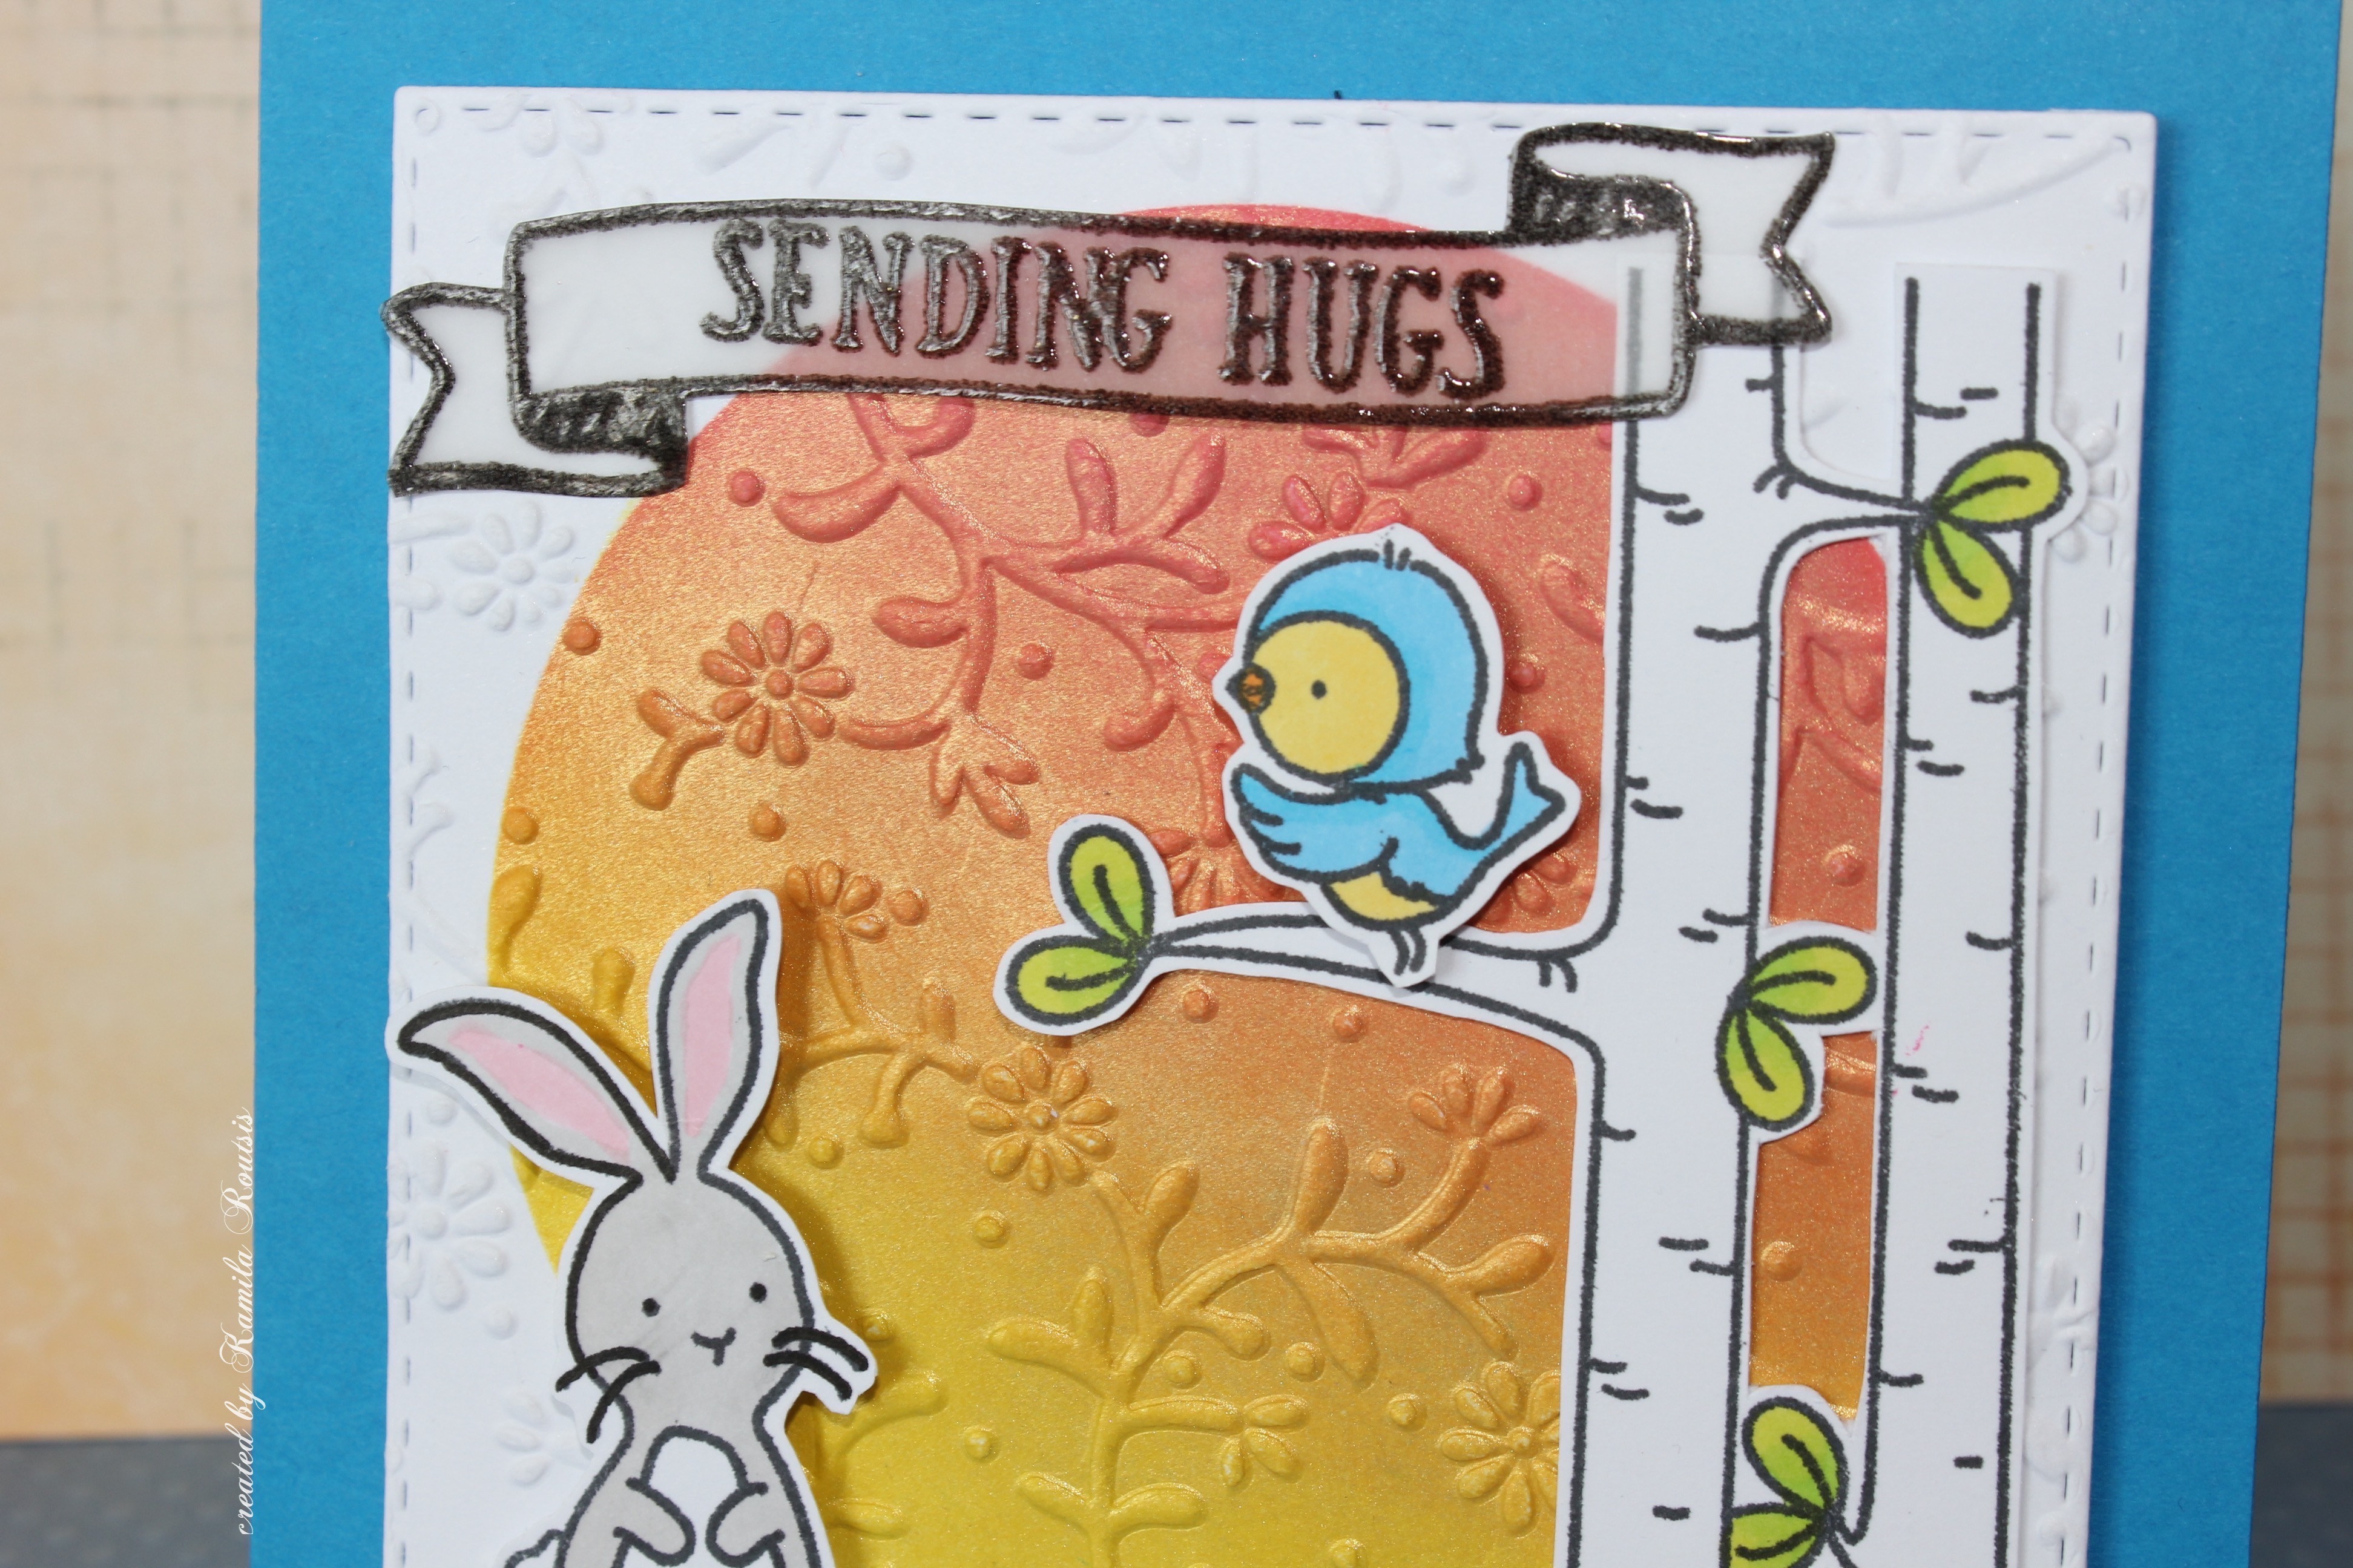
Here are my DT cards, this time two as I could not make up my mind which one to pick 🙂
I really like how they turned out. I used the technique I previously presented in one of my videos – here where I blend distress inks and then add some perfect pearls on top. Then I run my panel through my Big Shot die cutting machine using an embossing folder.
For my two cards I used Avery Elle stamp set – Woodland Wonders and Lawn Fawn stamp set – Here’s the scoop, which I coloured using Pro Markers. I stamped both my sentiments on vellum and heat embossed them. I used Versa Mark ink and Hero Arts platinum embossing powder on one and Versa Fine Onyx Black ink and clear embossing powder on the other.
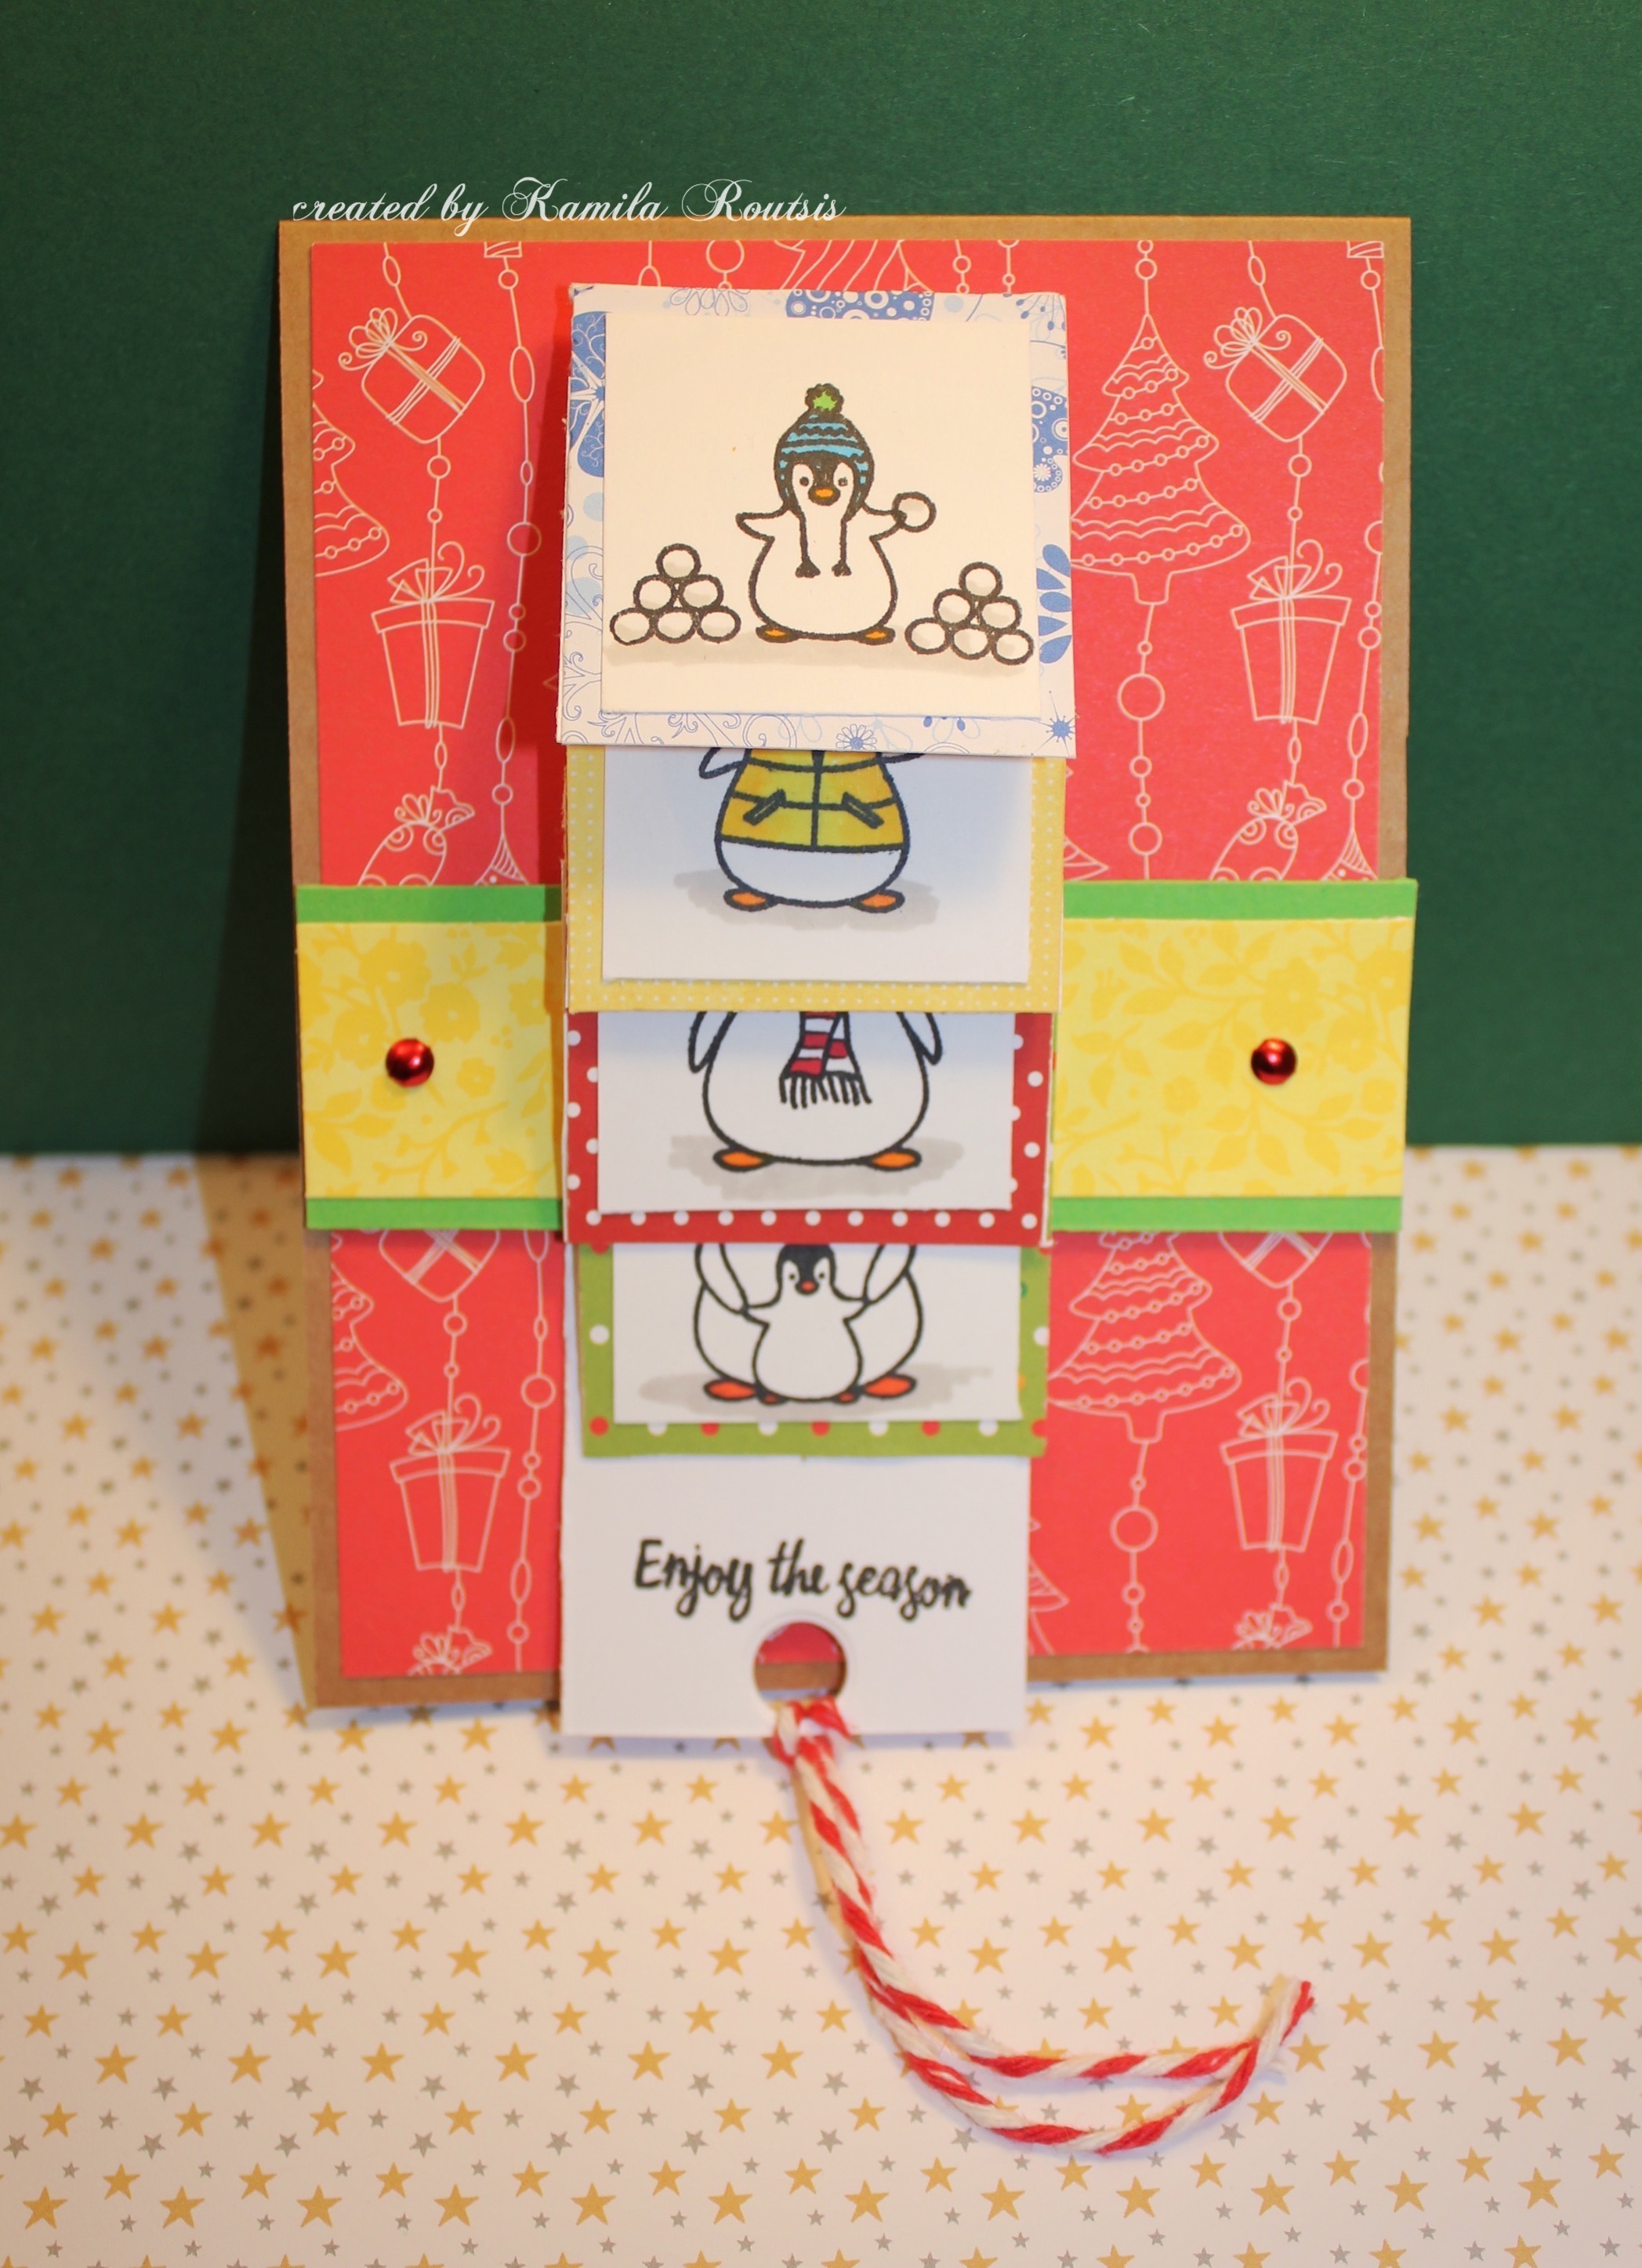
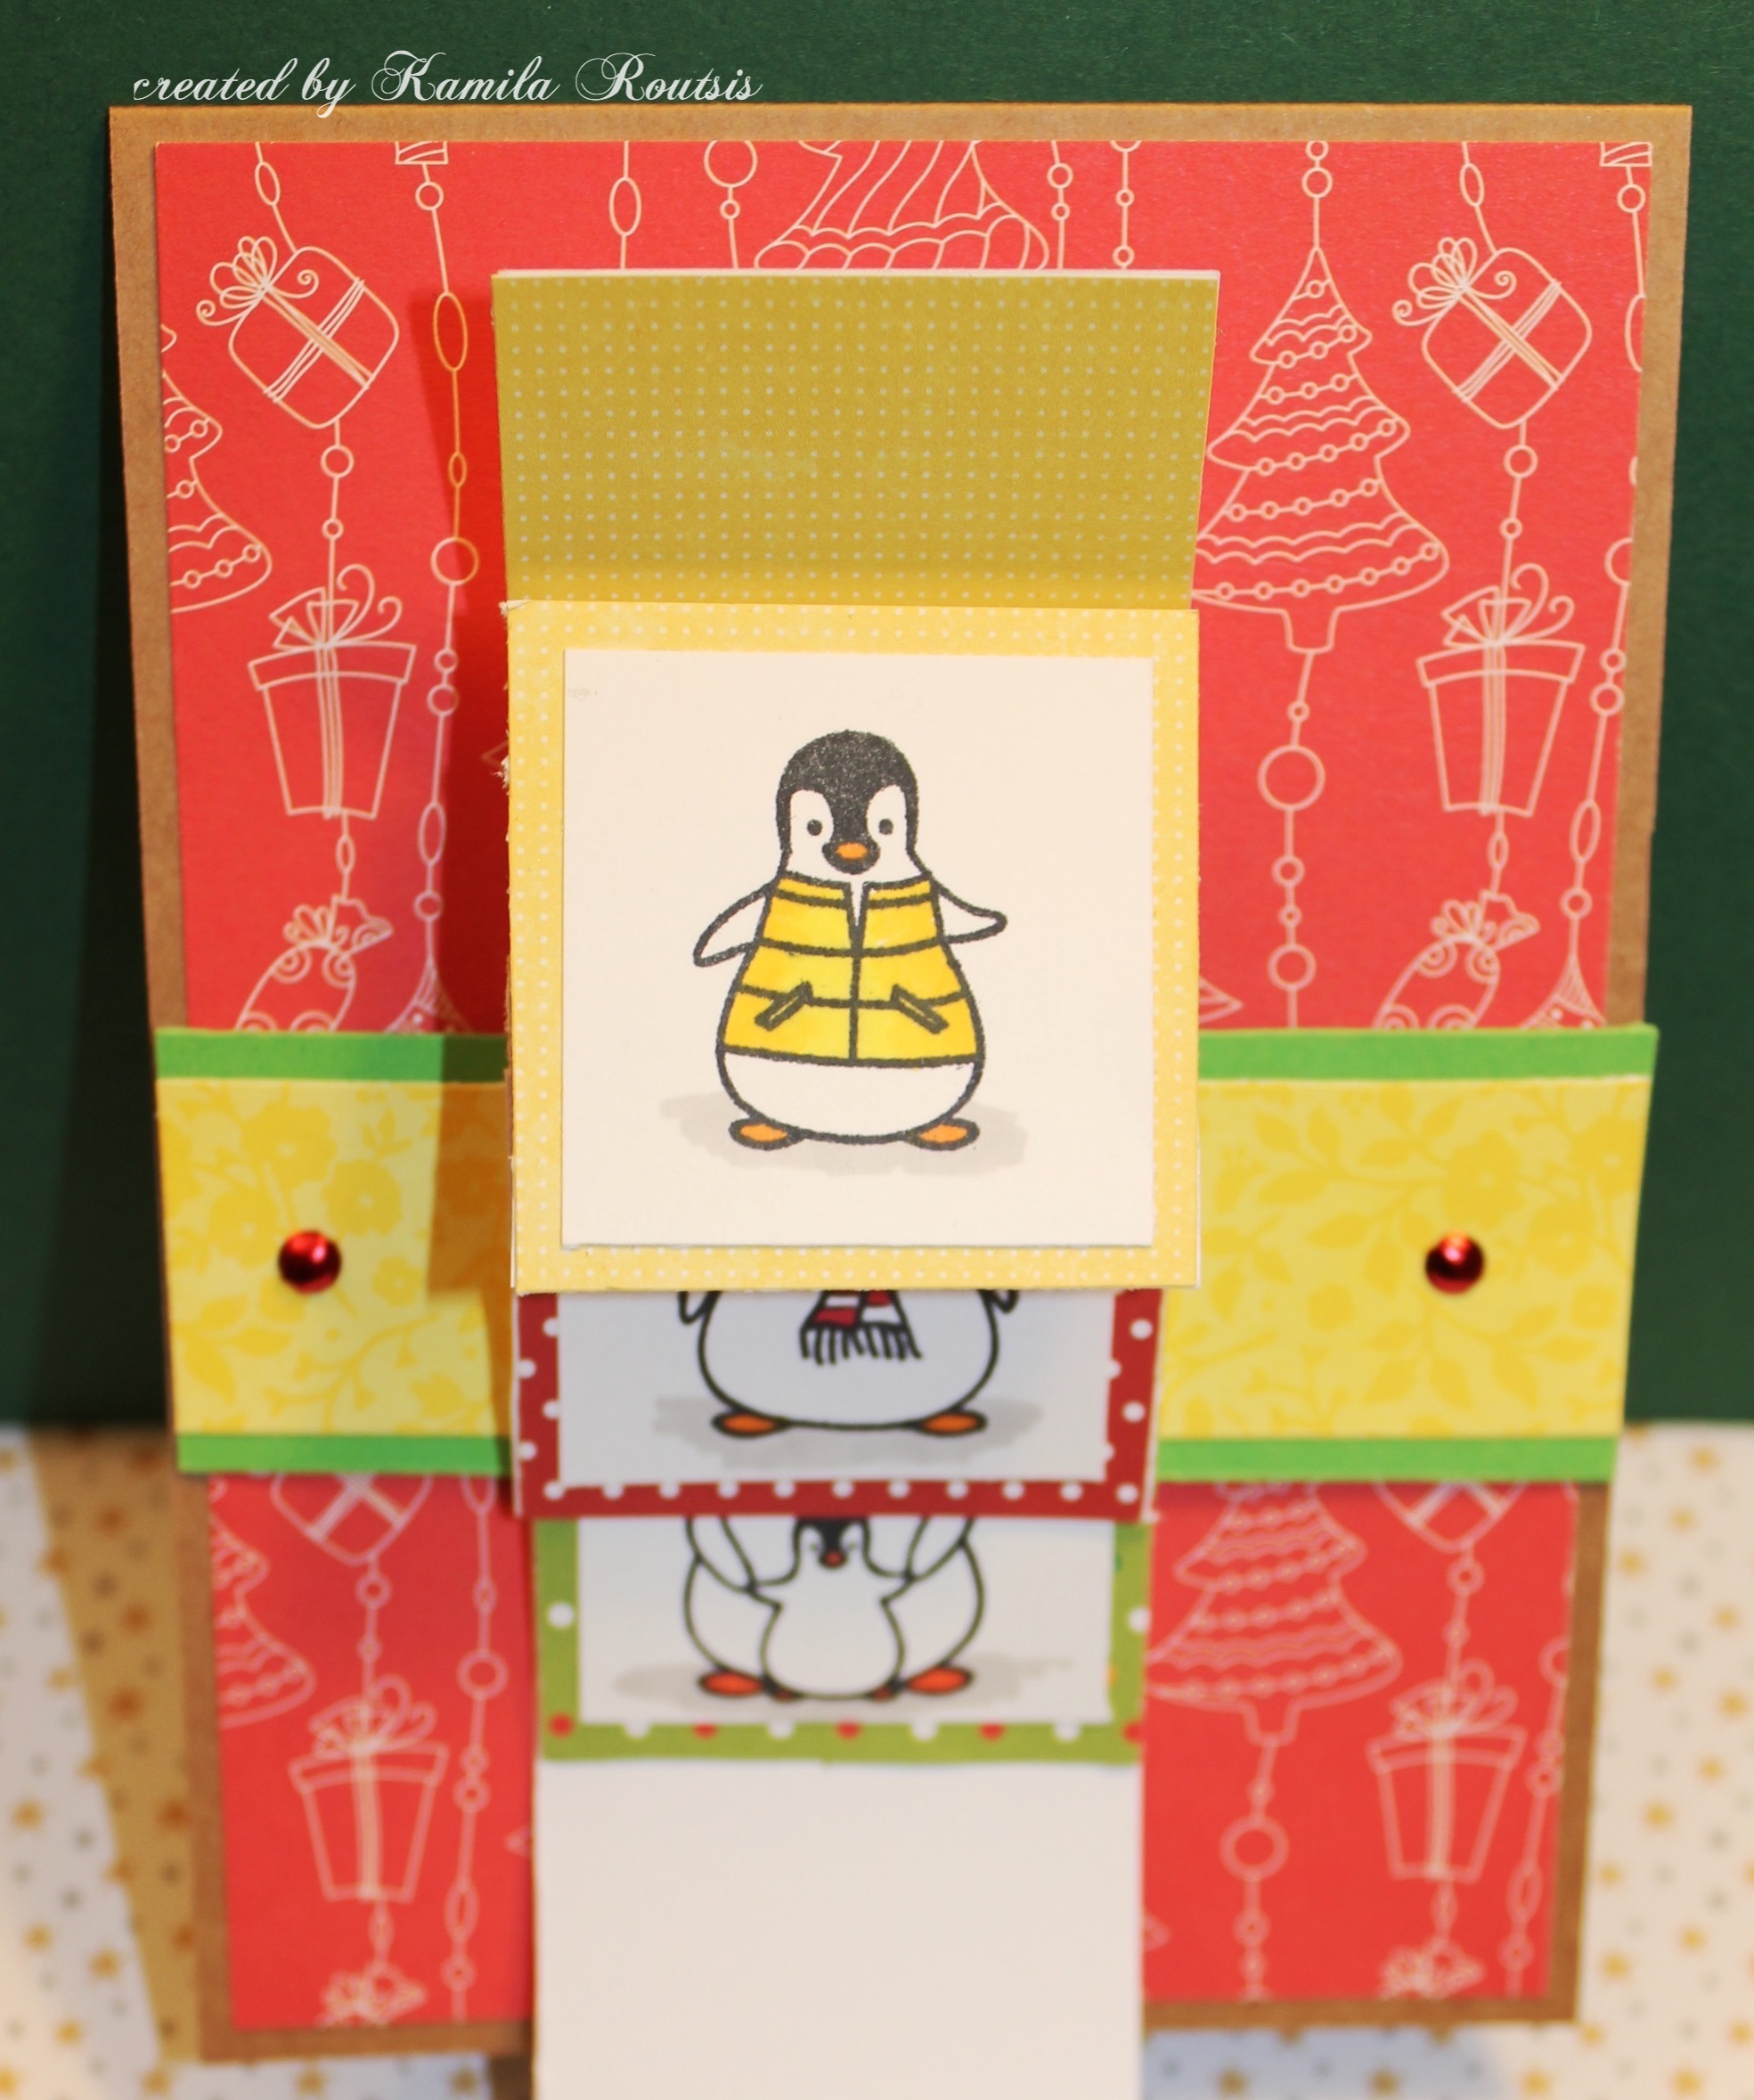
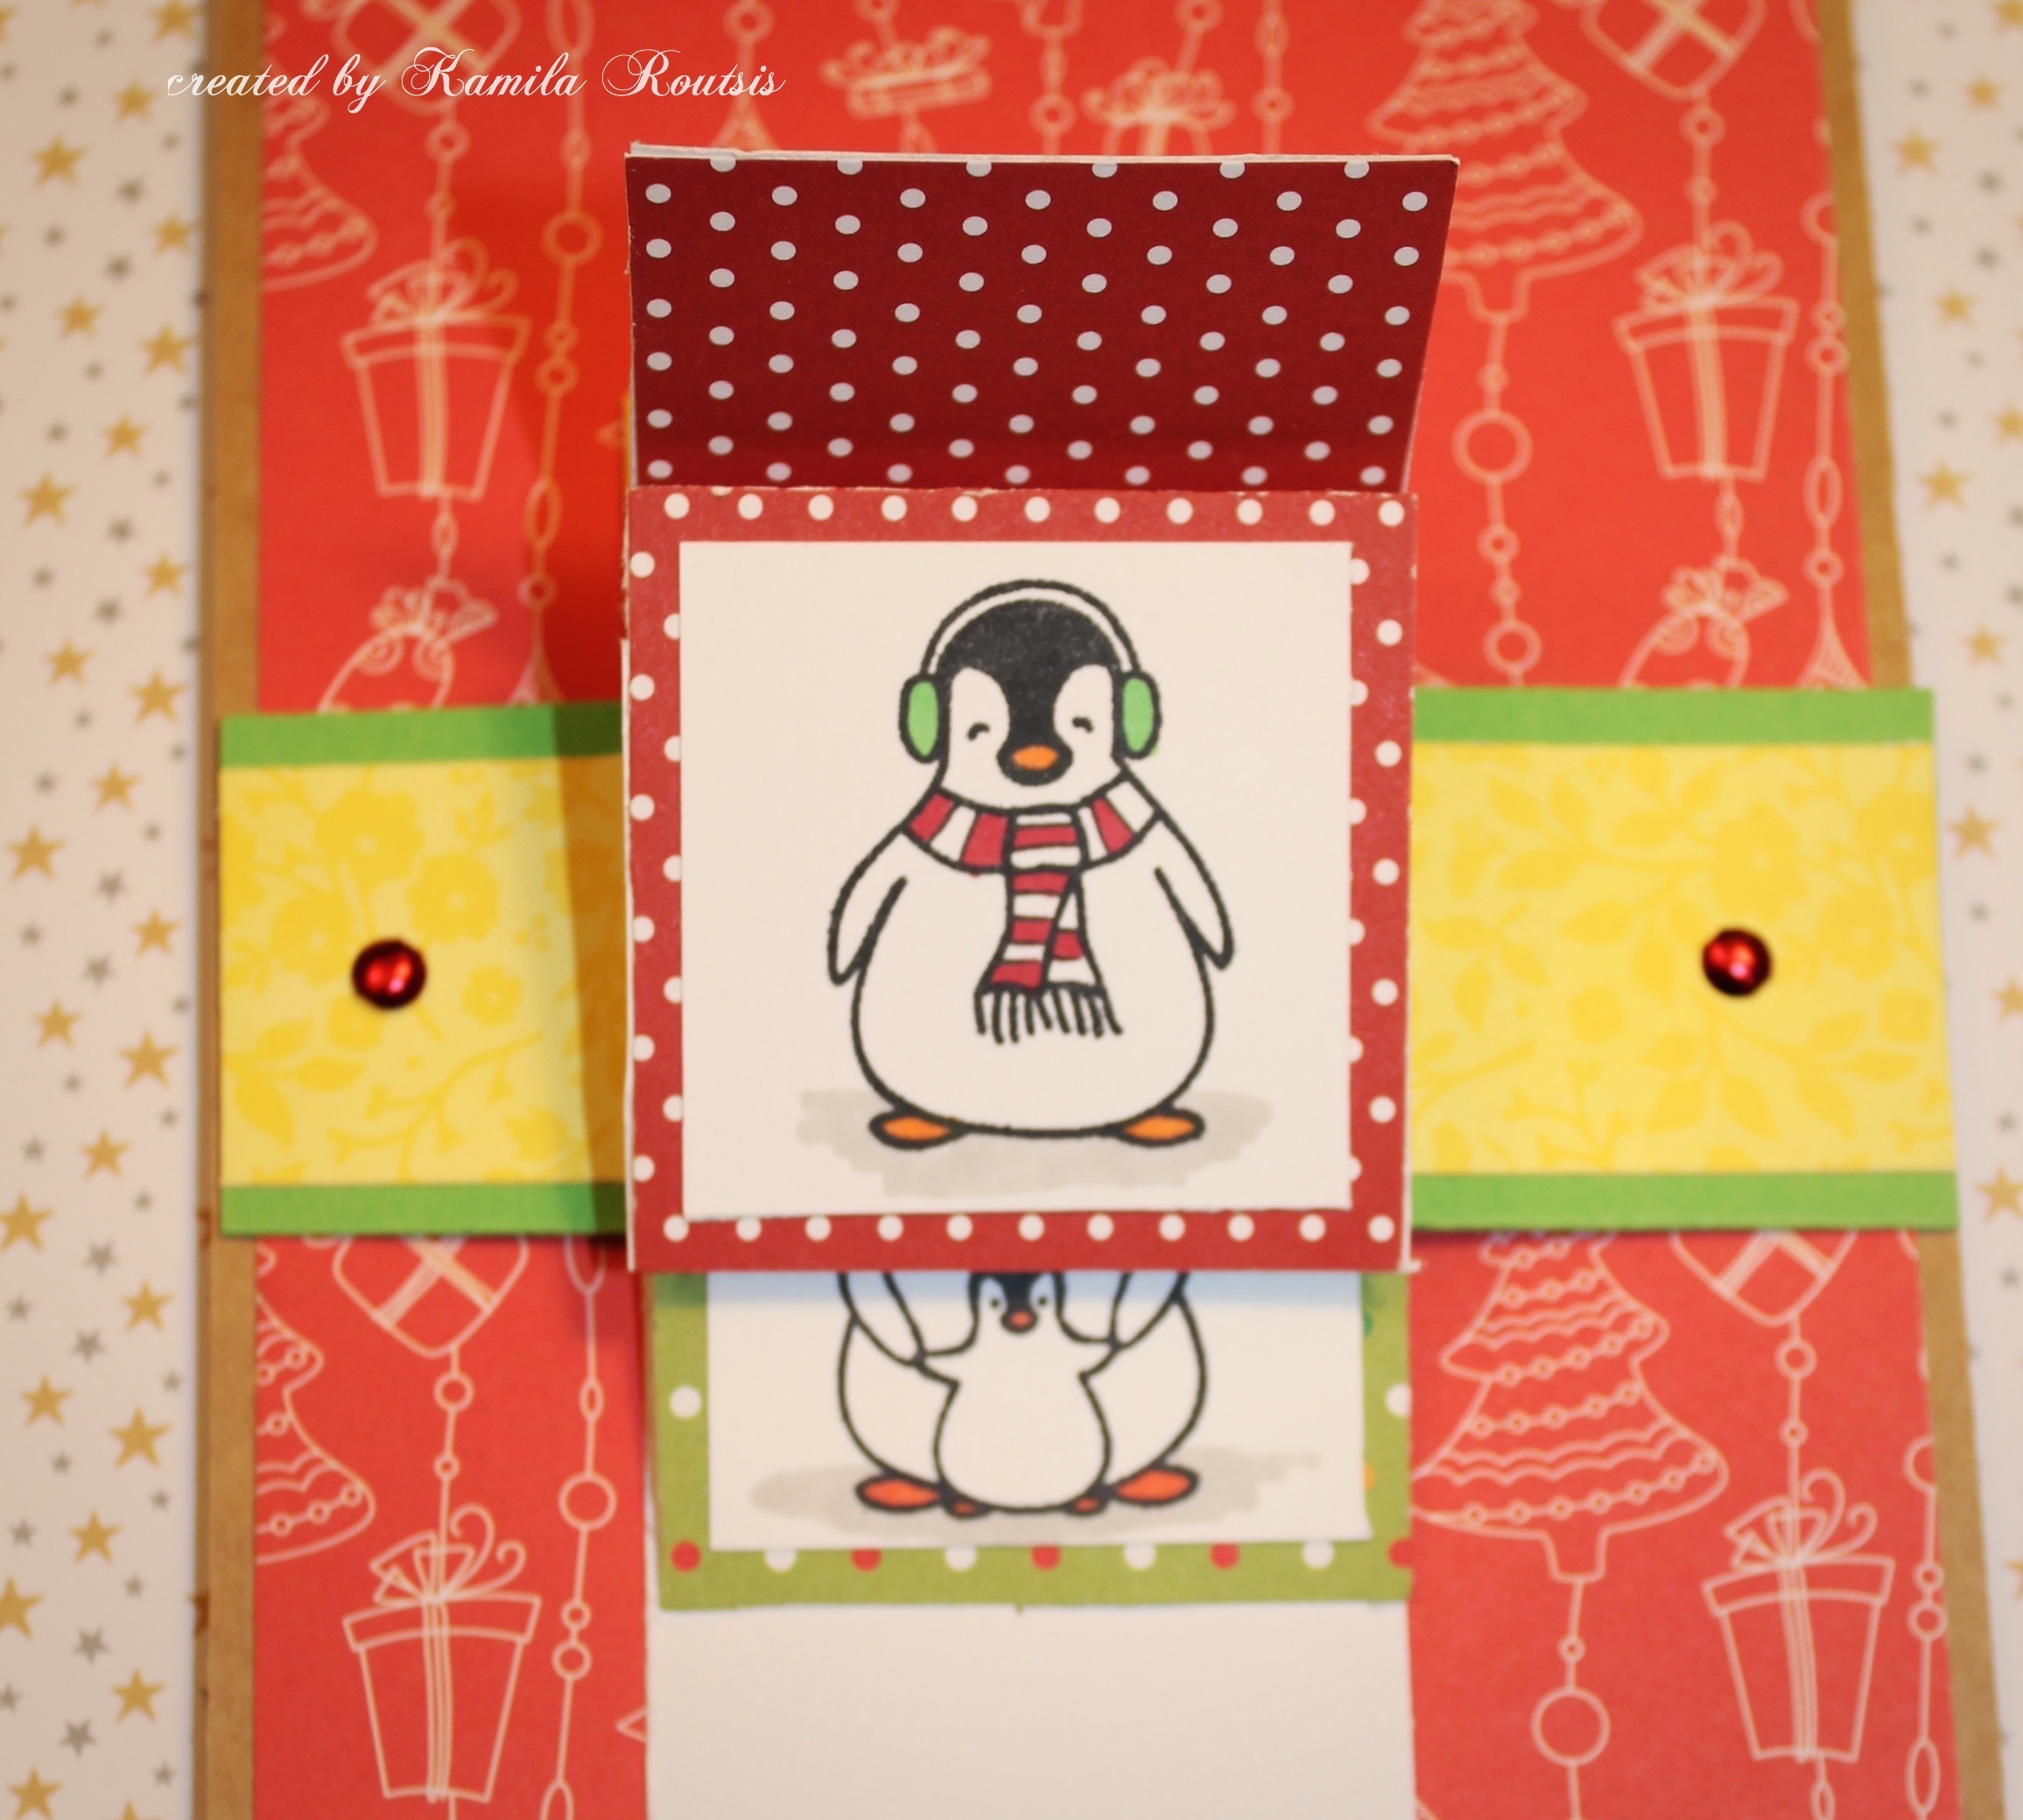
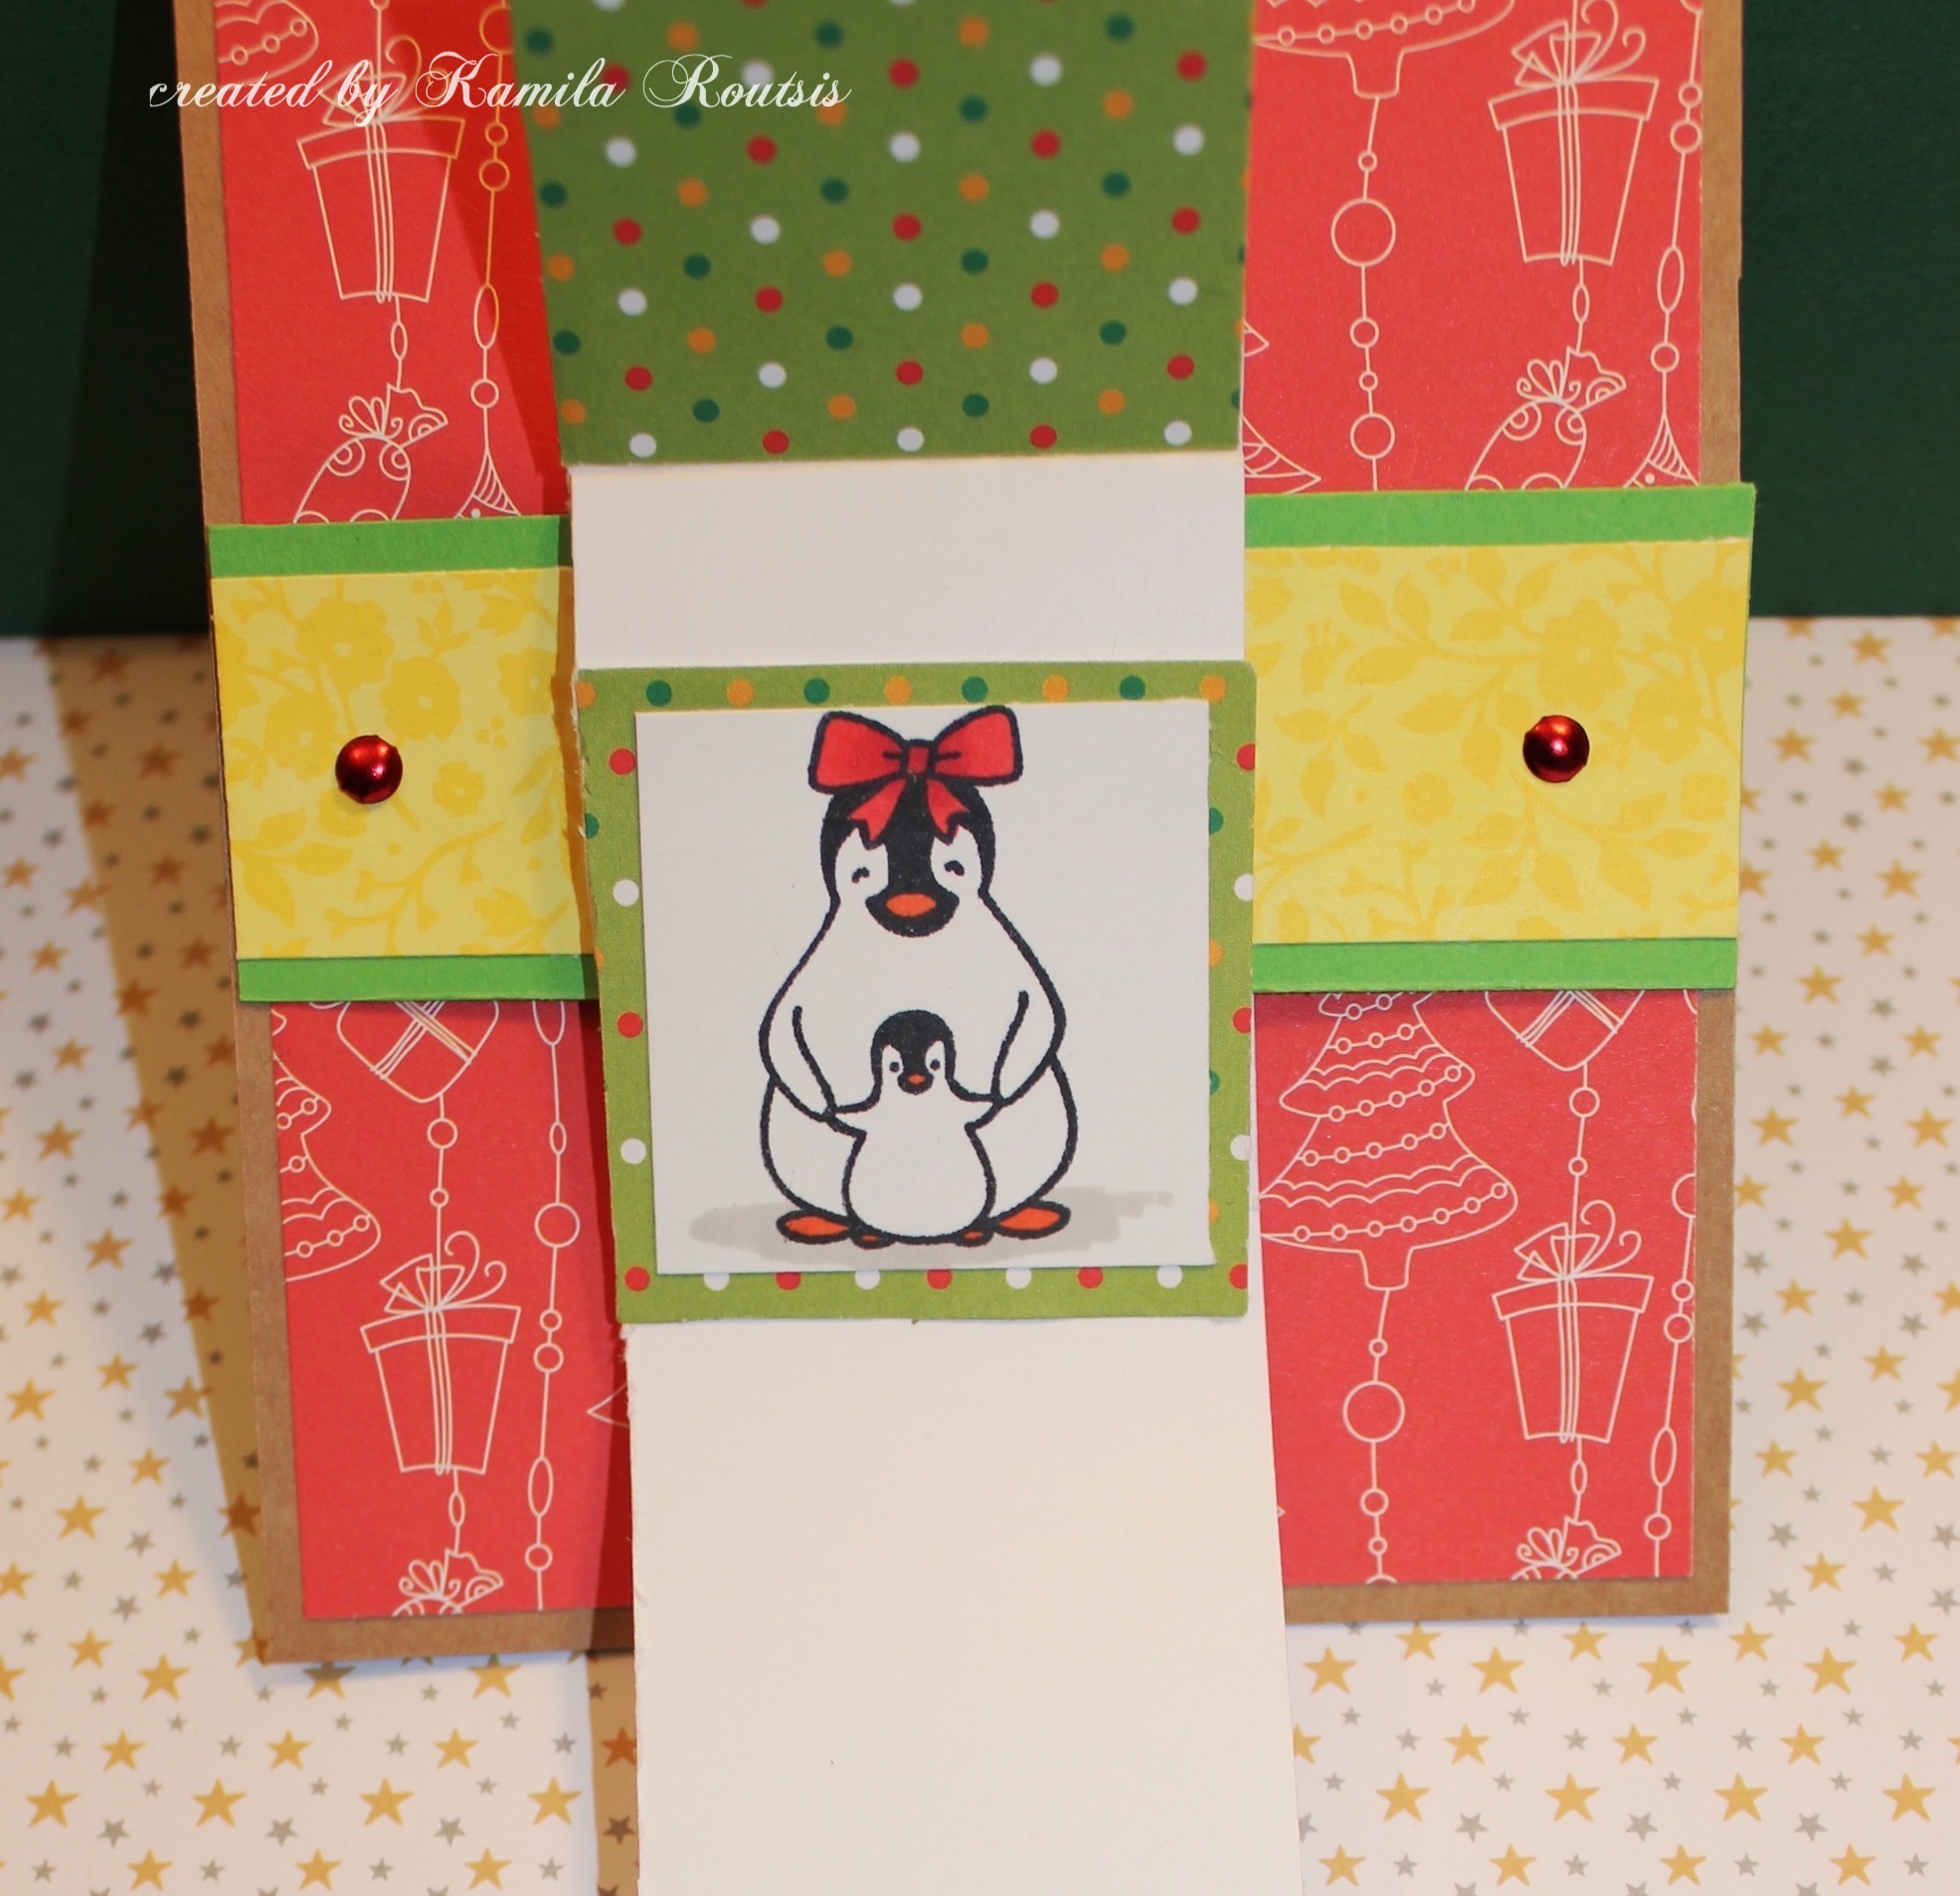
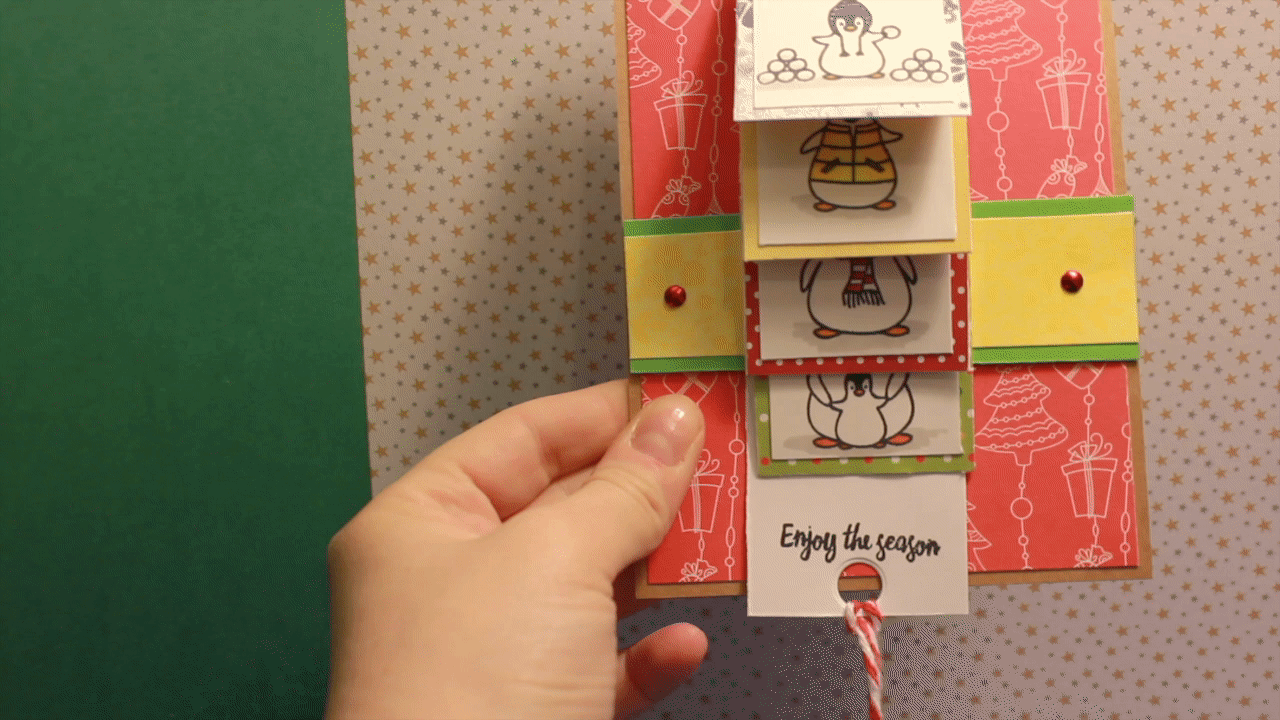
Today I have a card I made after being fascinated by Tracy Mae awesome video where she makes a waterfall card! Super cool design and very creative and interactive!
Hello Dear friends and crafter or non crafter from around the world!
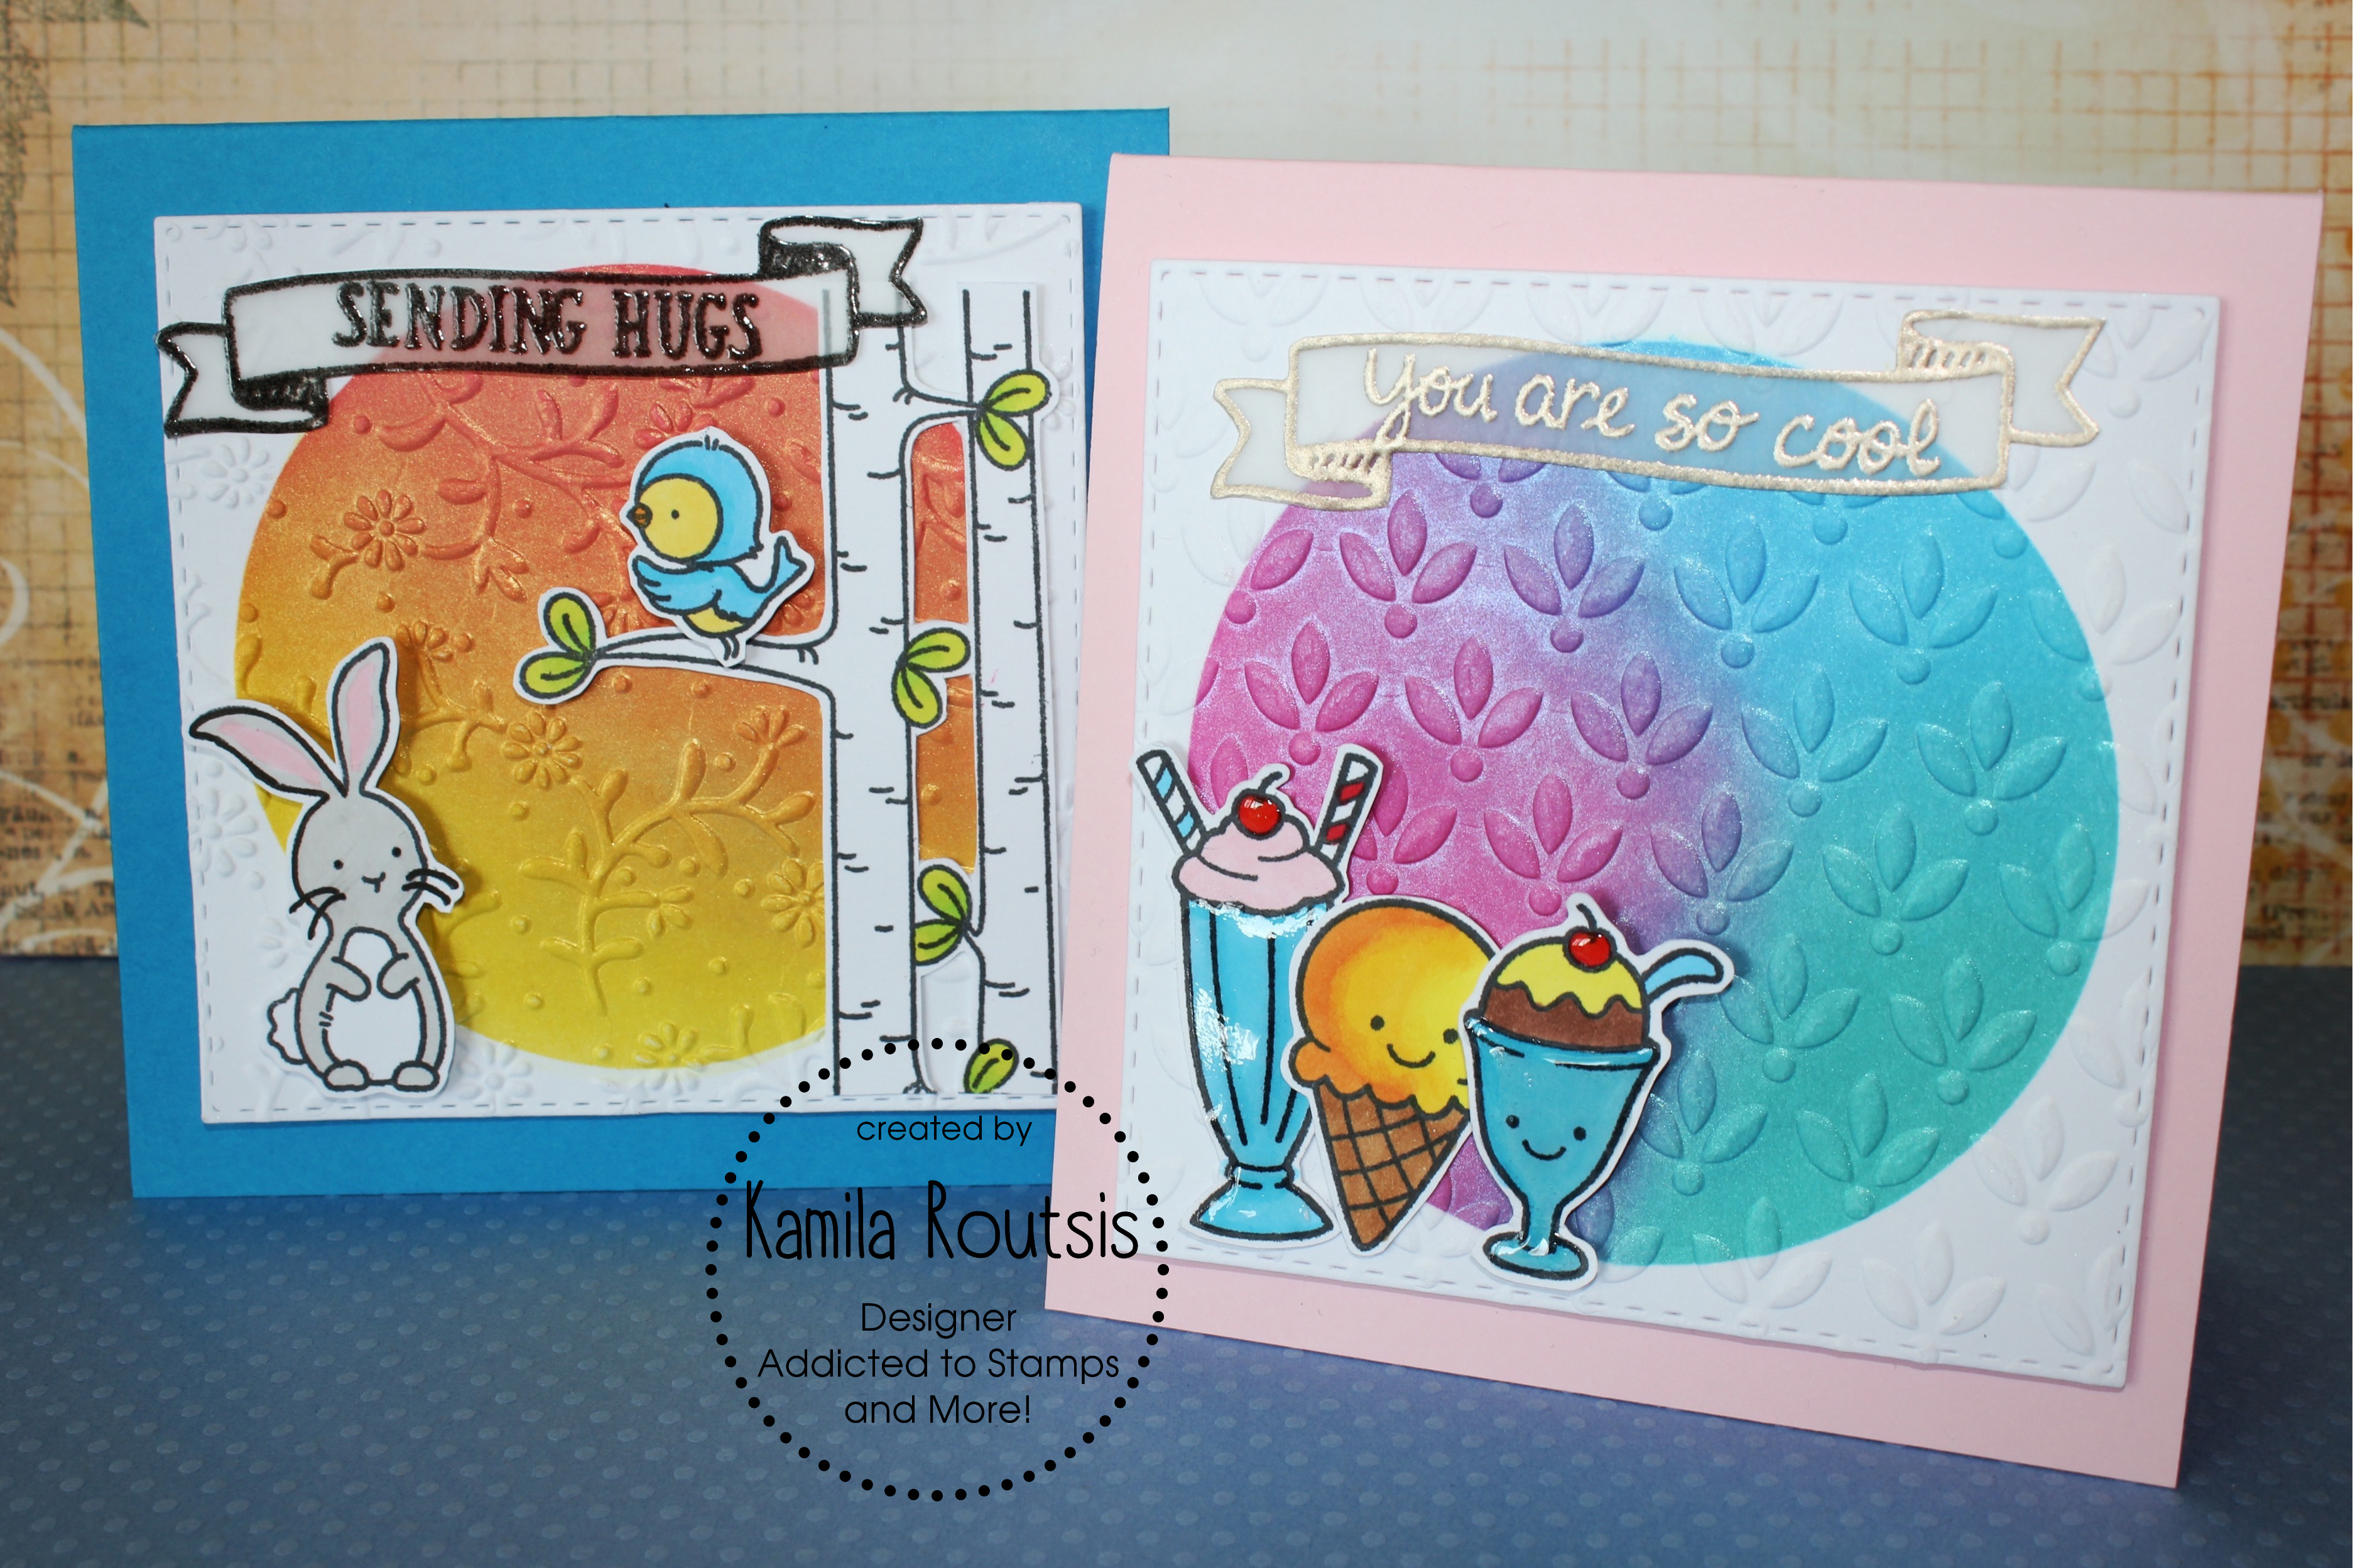
I am so happy to be back with another video tutorial! This time I have the total of 5 cards I am making using Dreamweaver embossing paste and Distress Inks, continuing my Distress Ink series as promised. I am sorry for being absent for a while but there was a lot of things that needed my attention after I came back from holidays.
Here are the cards I am creating in the video:
Here is the video:
And some more pictures of the cards in case you do not have time to take a look at the video although I really hope you do 🙂
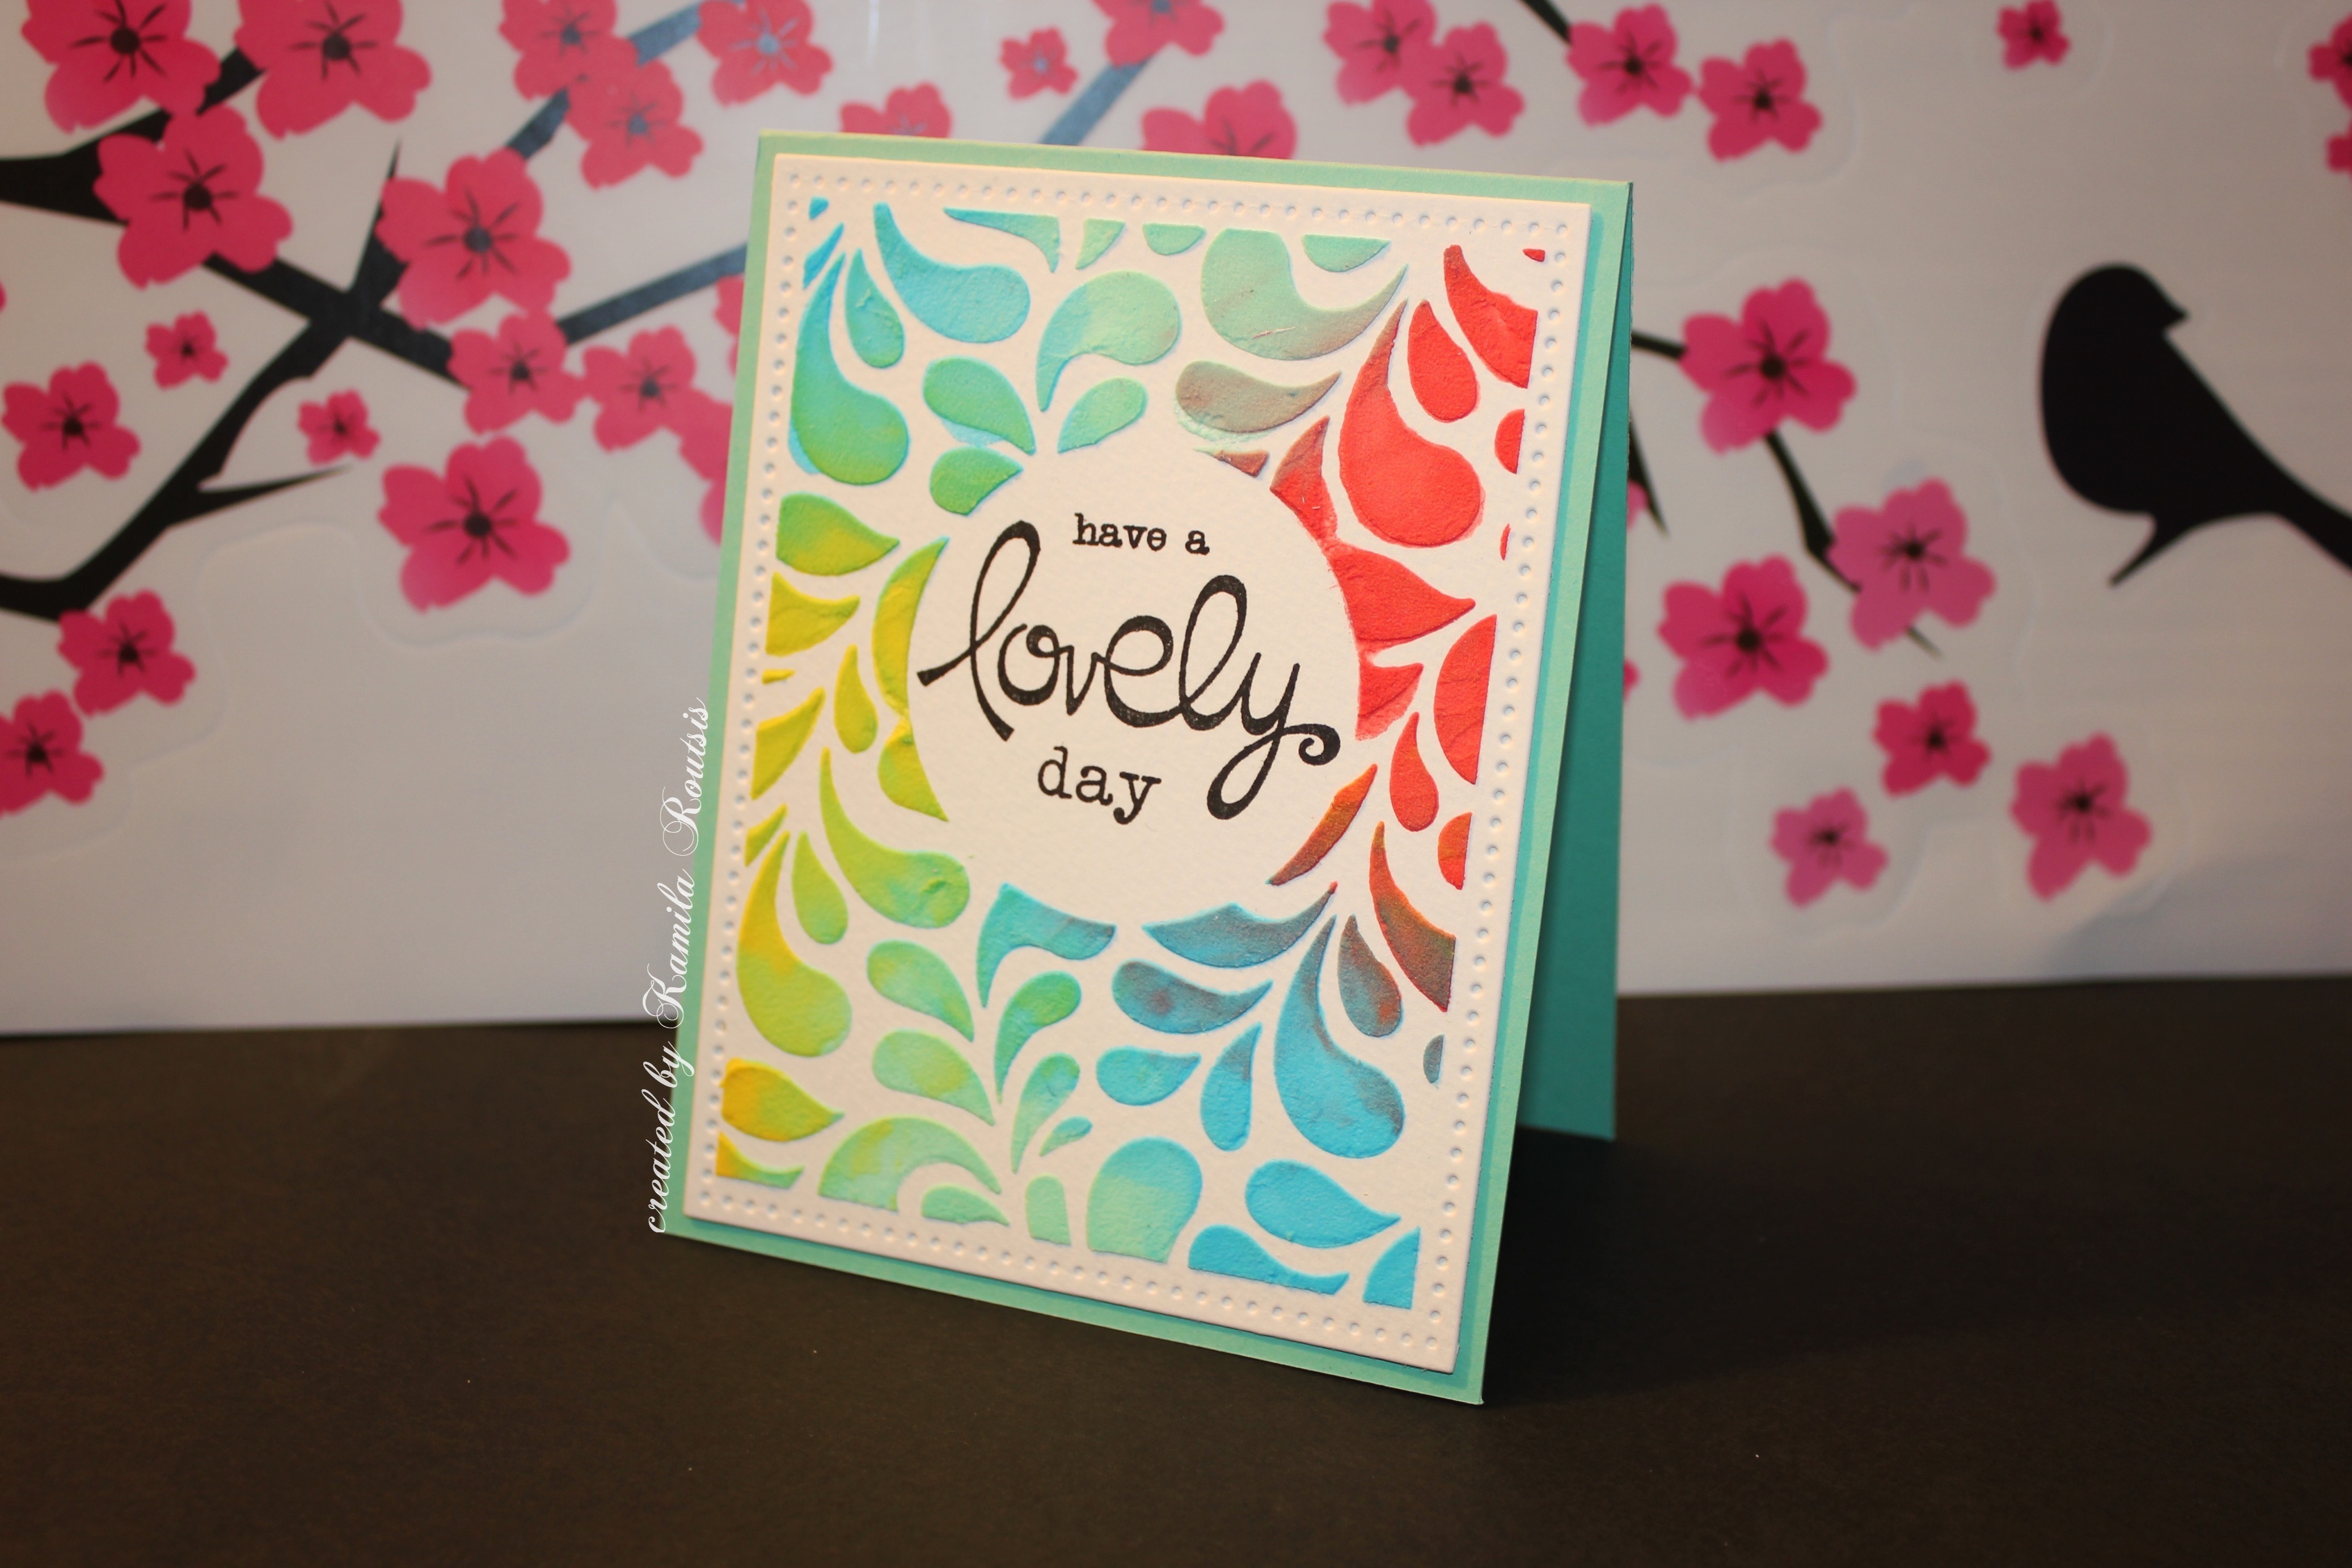
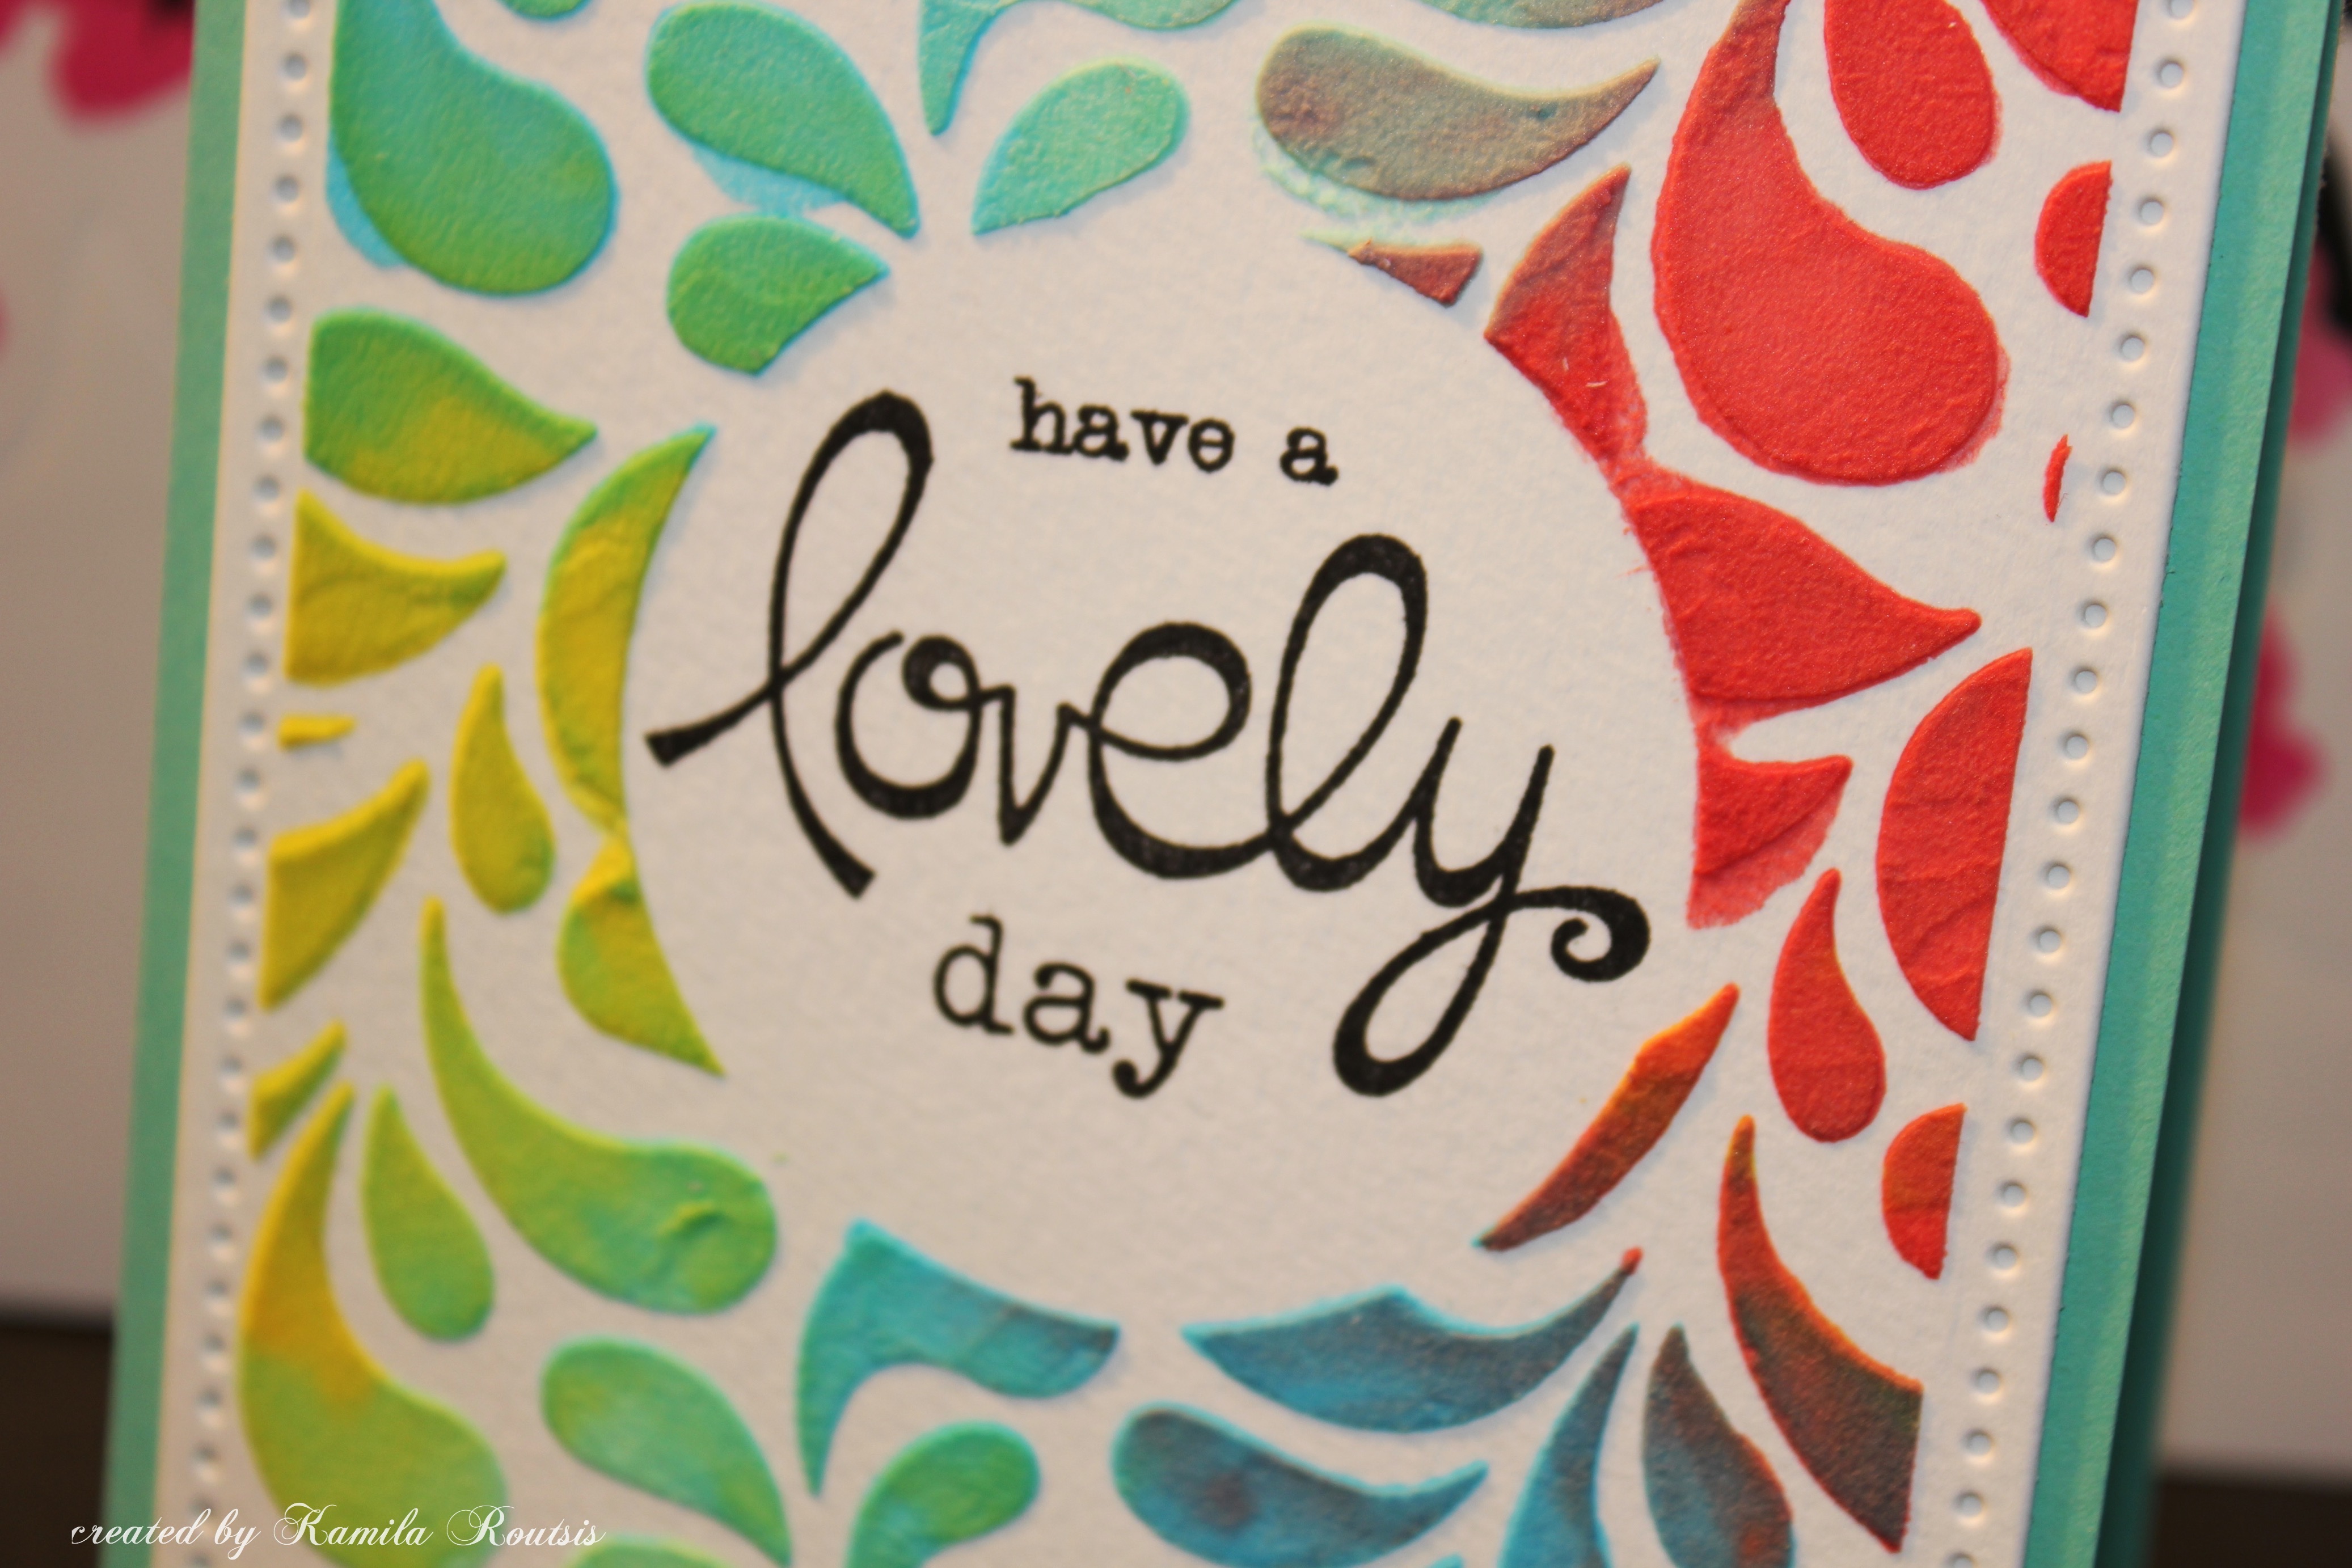
For the first card I used Barn Door, Marmaid Lagoon, Crushed Pistacchioi and Mustard Seed Distress Inks mixed with the embossing paste. I masked off the middle area to then stamp there the sentiment. I chose the sentiment have lovely day from Paper Smooches stamp set – Blossoming Buds which I stamped with Versa Fine onyx black ink. I use here scrapberry’s stencil petals but since it is impossible to get in anywhere but Europe I found an alternative with My Favourite Things – Bold Paisley stencil.
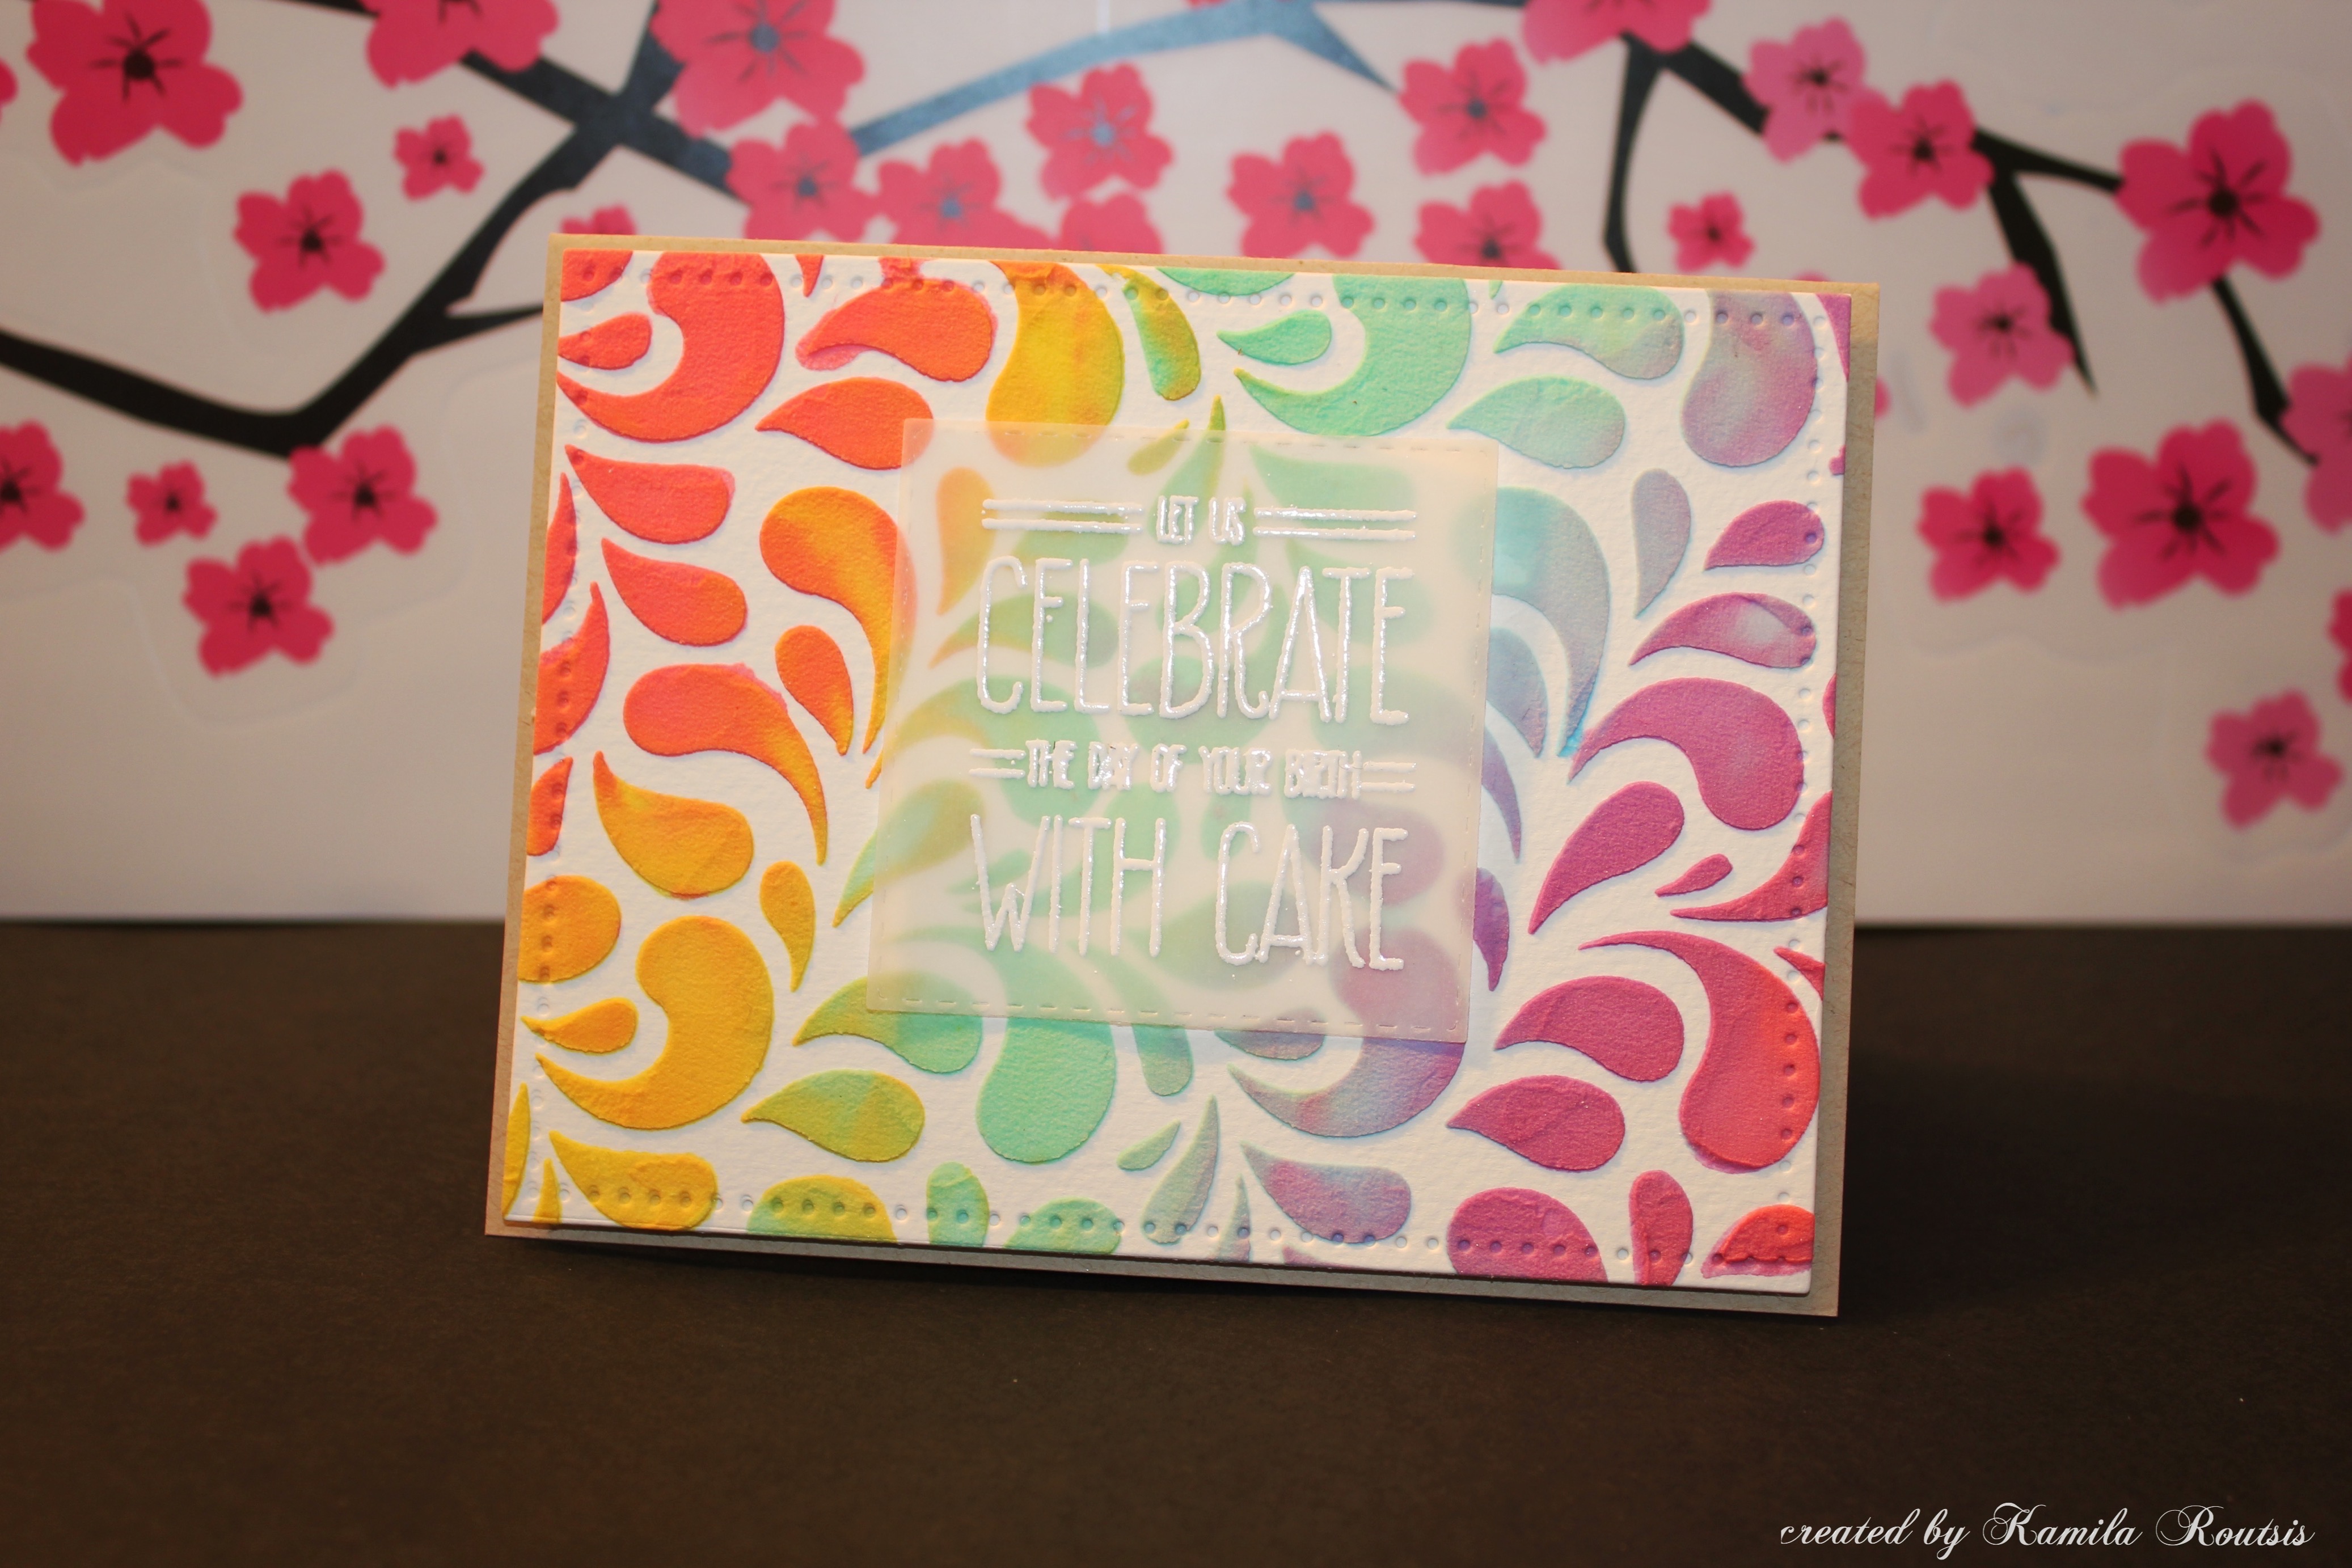
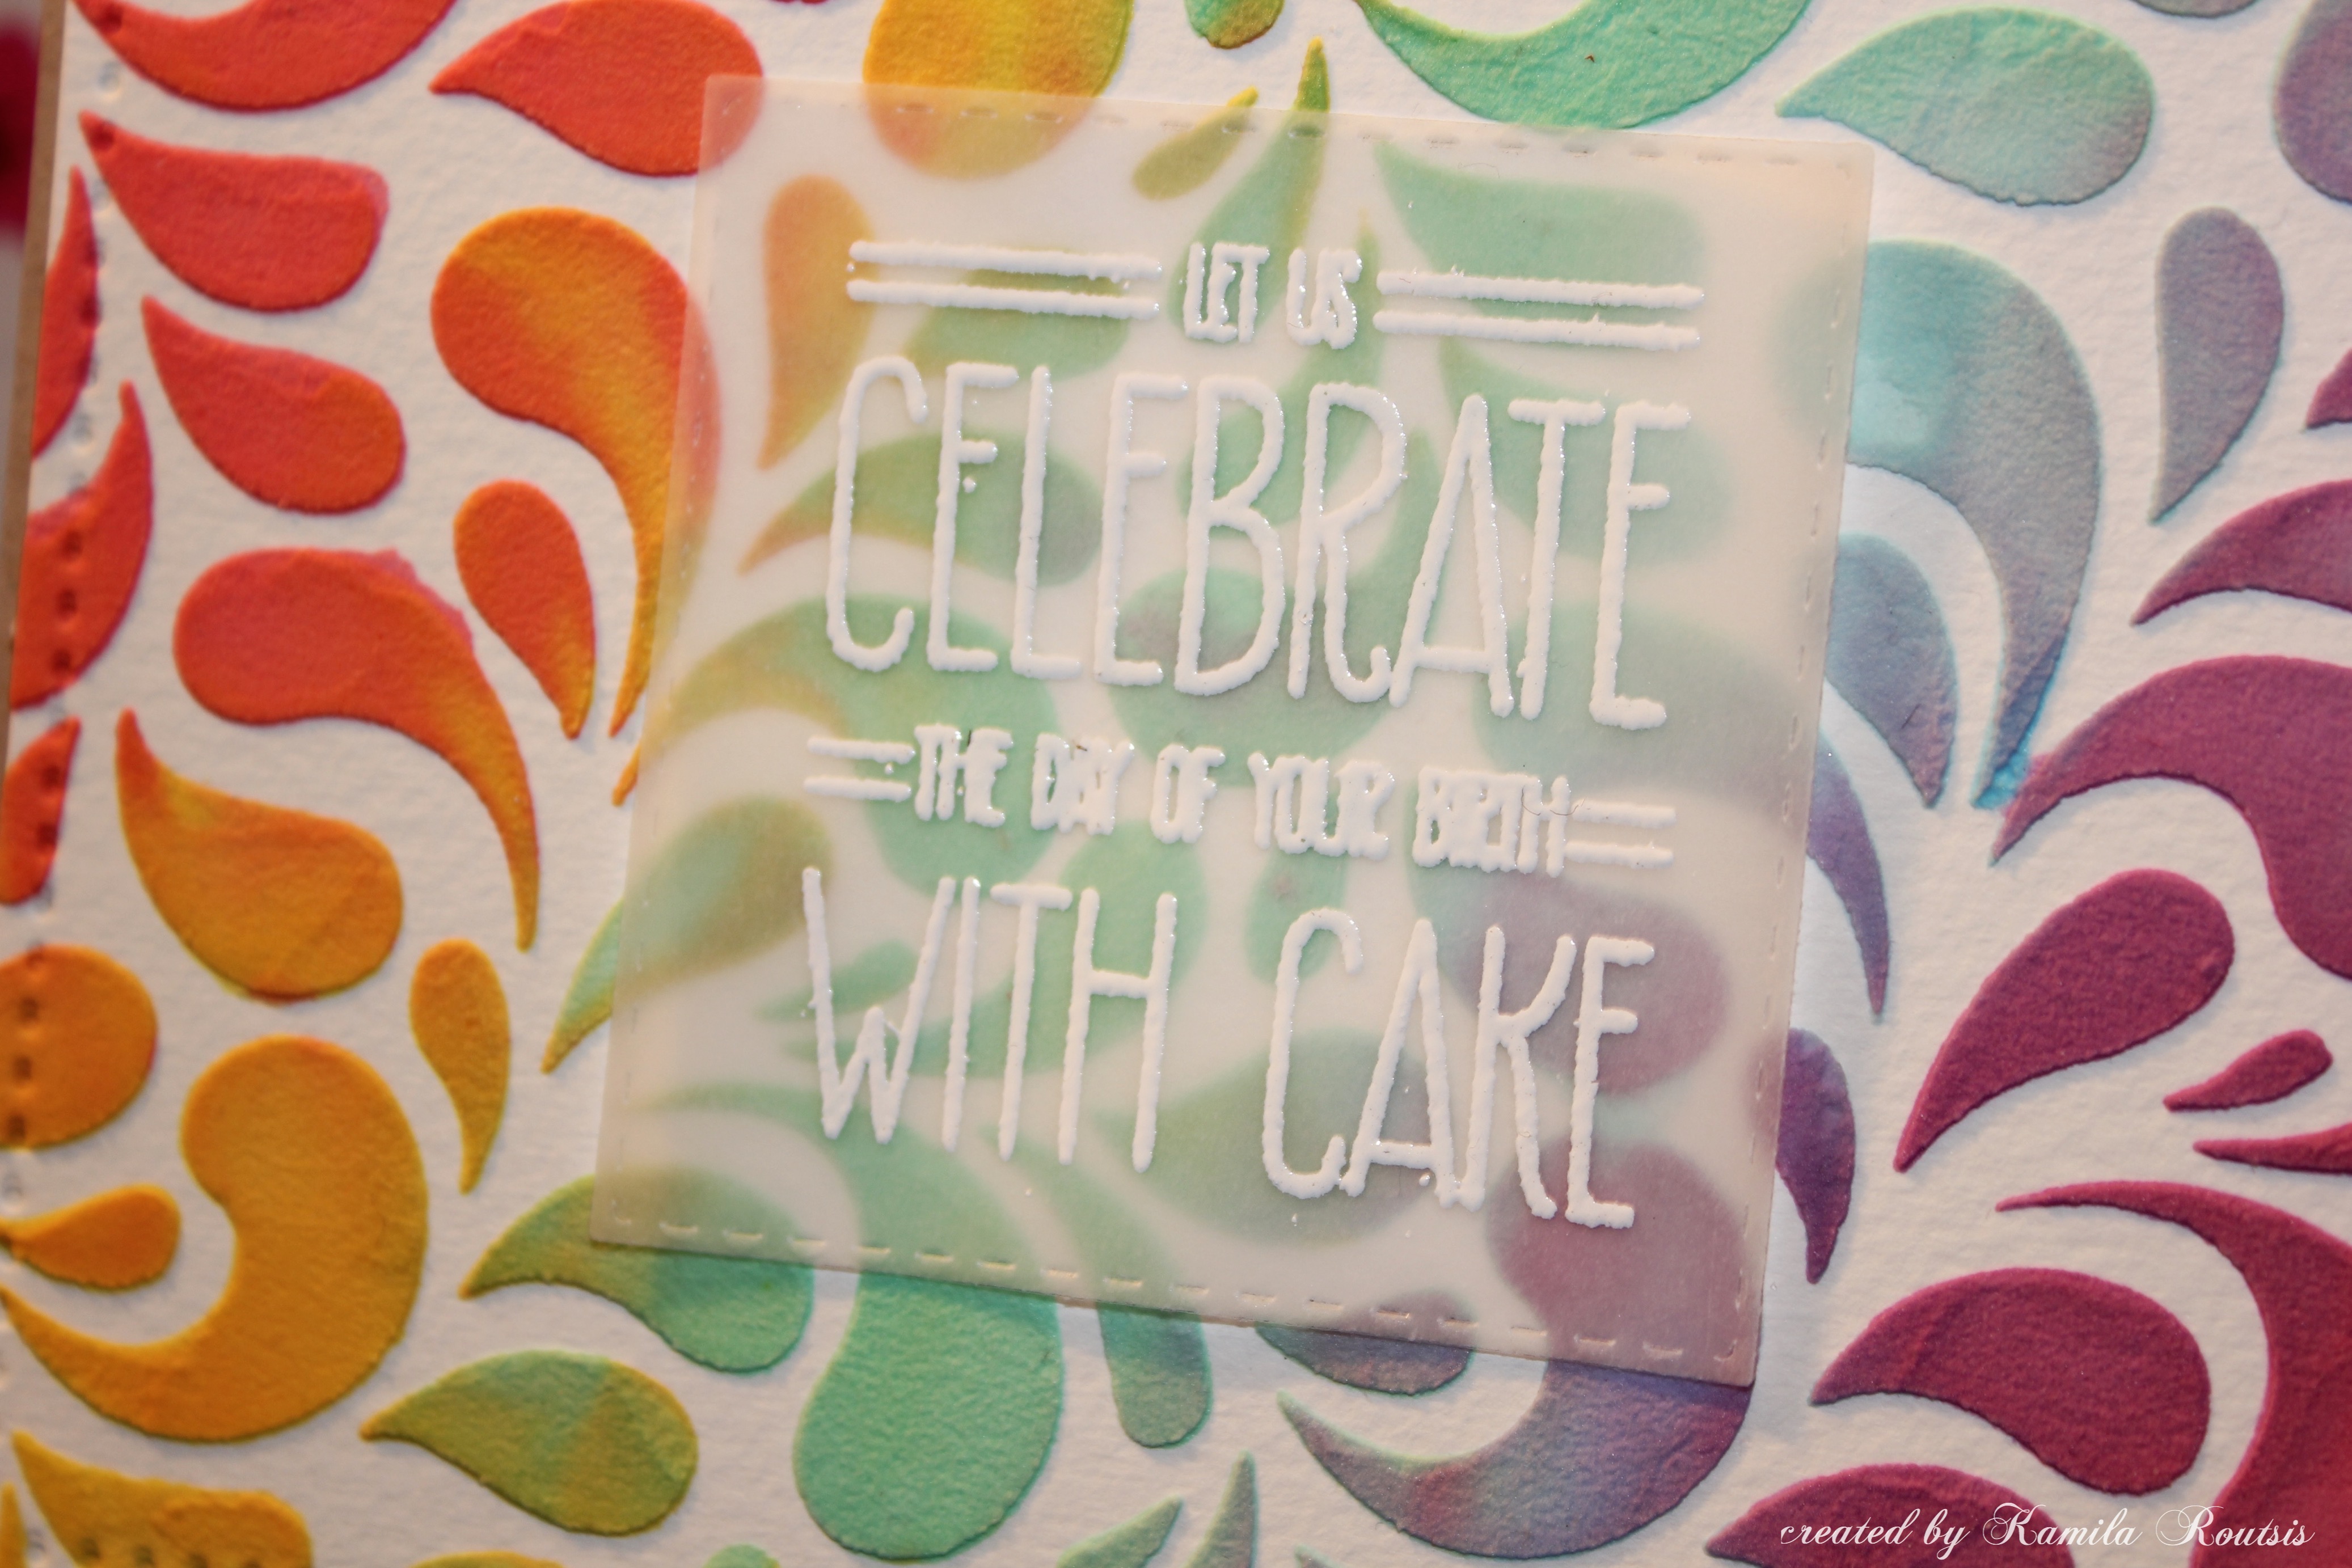
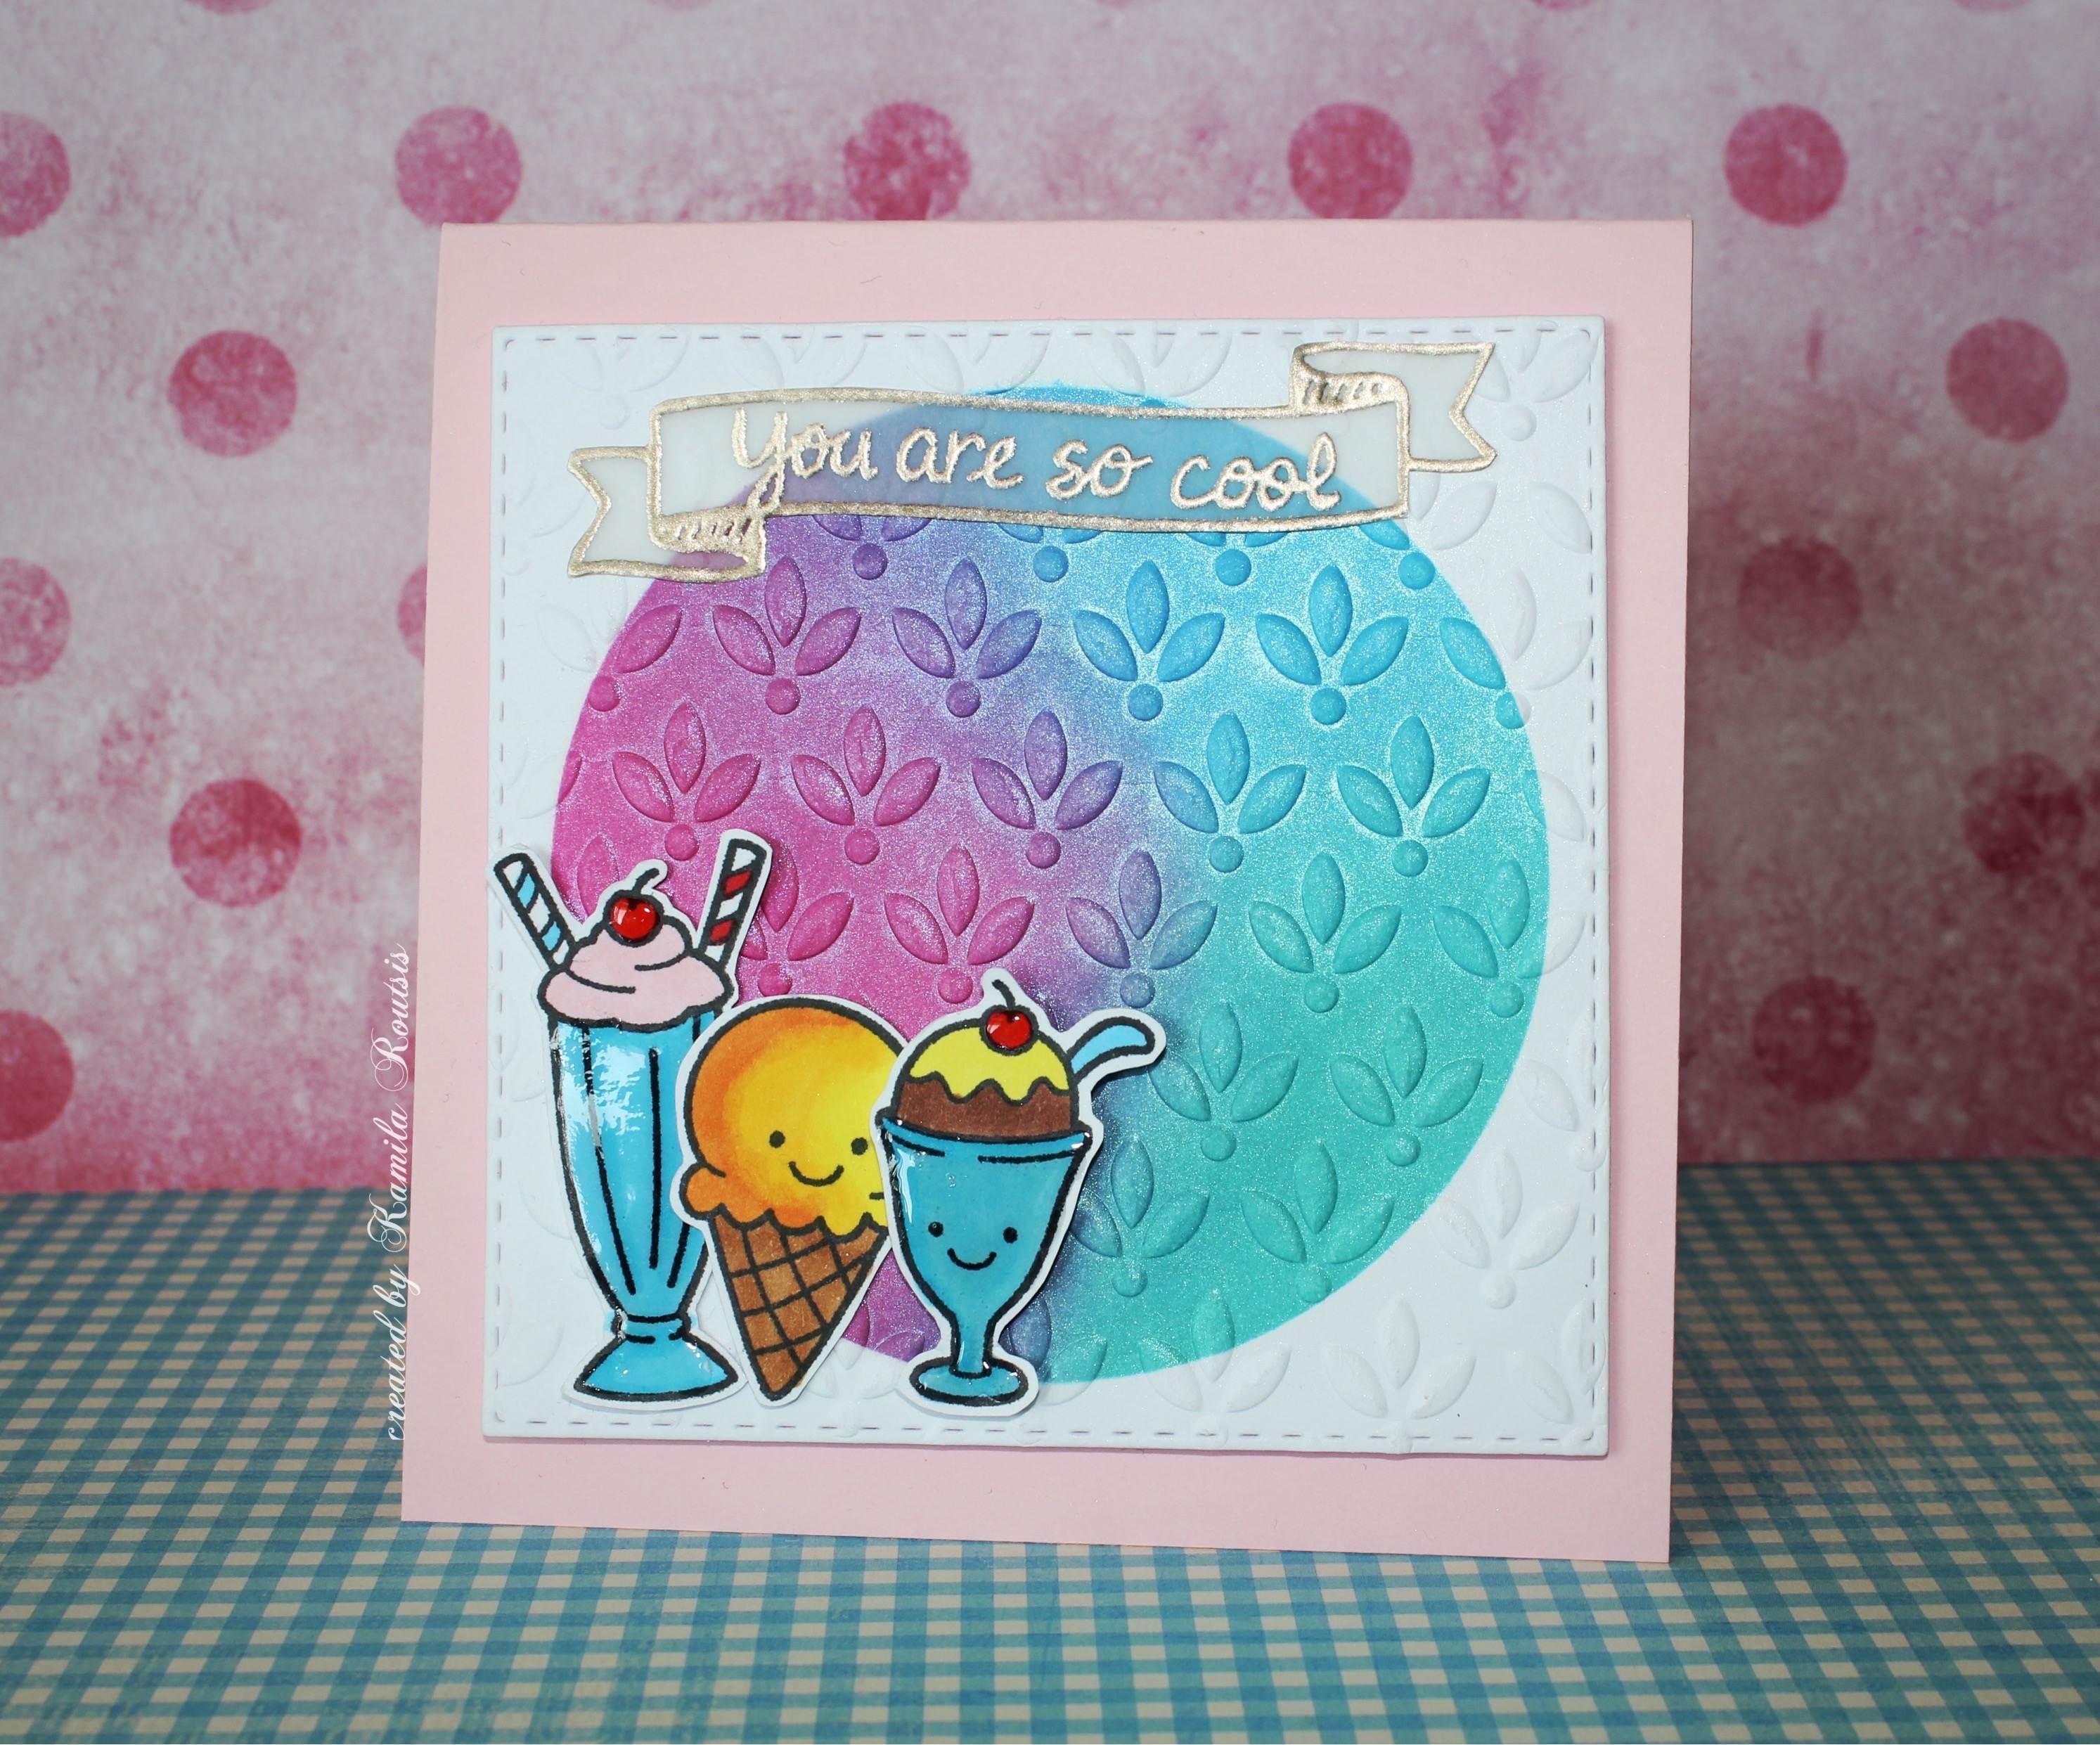
For the second card I used this beautiful Stamplorations stencil – Bold Florals. The colours I used are Spiced Marmalade, Festive Berries which turned into this lovely peachy pastel colour, Picked Raspberry and Mowed Lawn for the leaves. I really like how this card turned out as it was quite a lot of work. My tip here would be – use a smaller spatula or palette knife whatever you call it :)! Mine was not small enough and it was hard to manoeuvre around those small stencil areas. For the sentiment which I stamped in Versa Fine ink and heat embossed in clear embossing powder on vellum is from Aver yElle Cake and Candle stamp set. I also use the Avery Elle dotted ELLE-ments die to frame my card front.
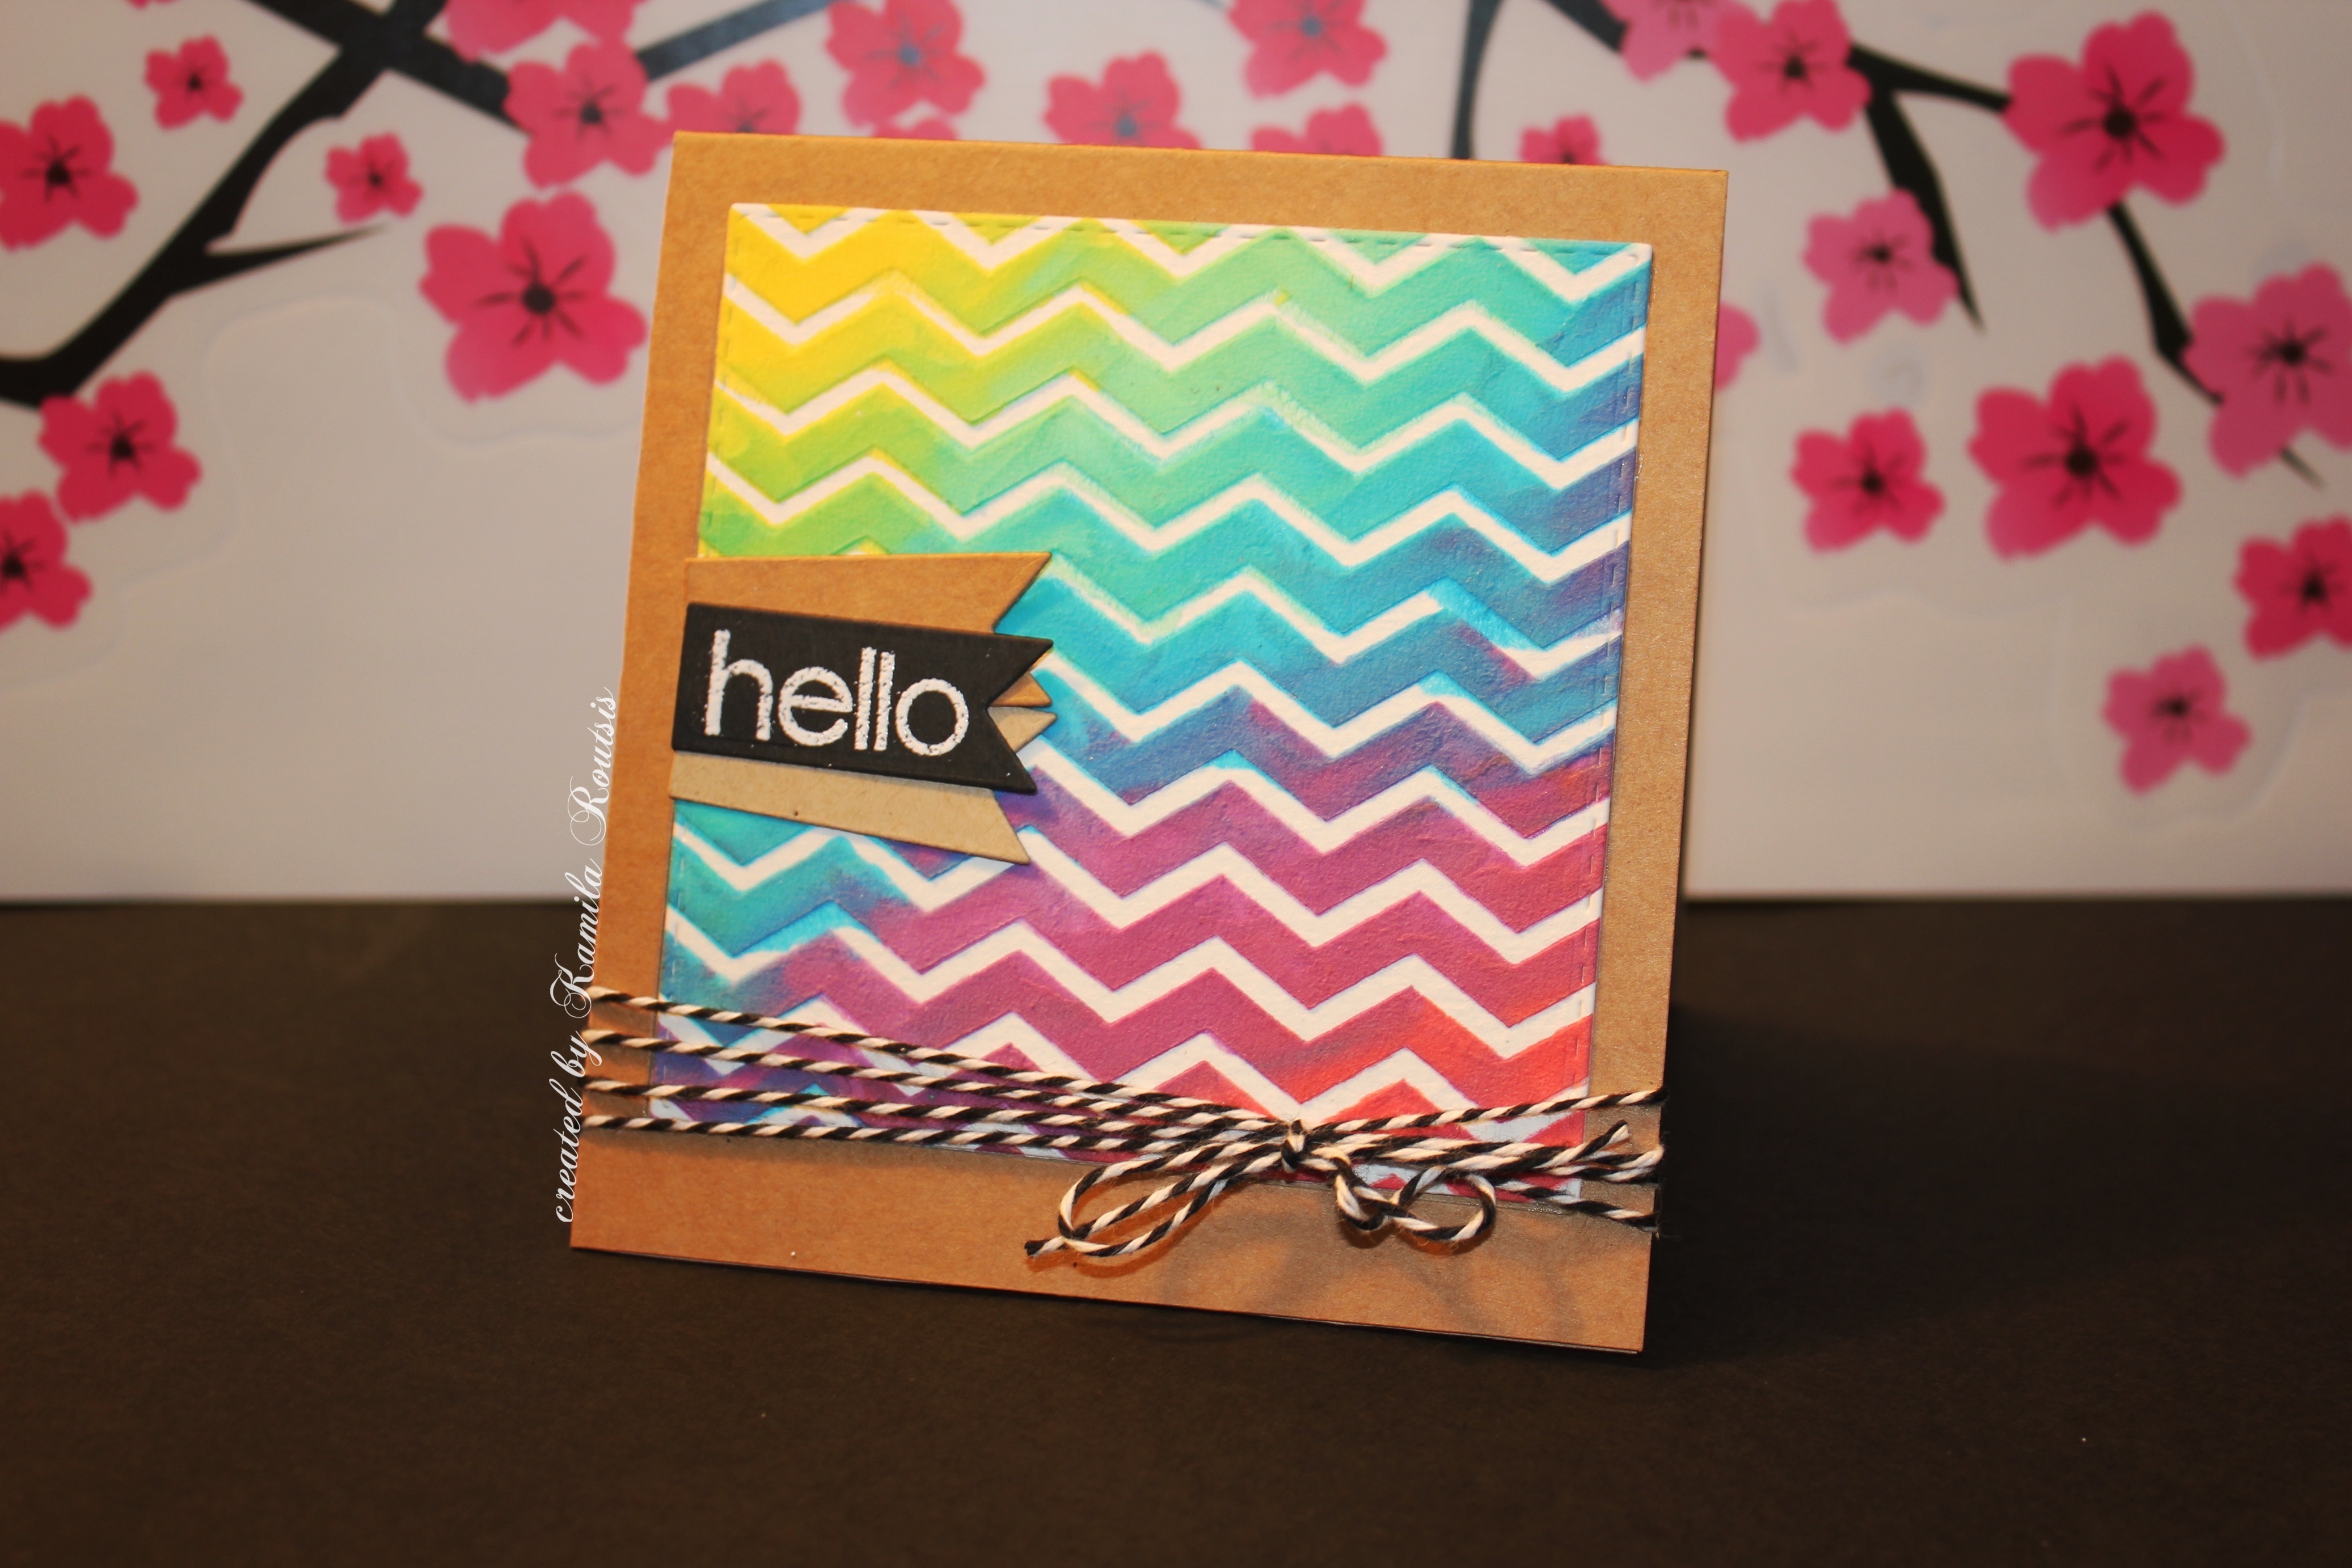
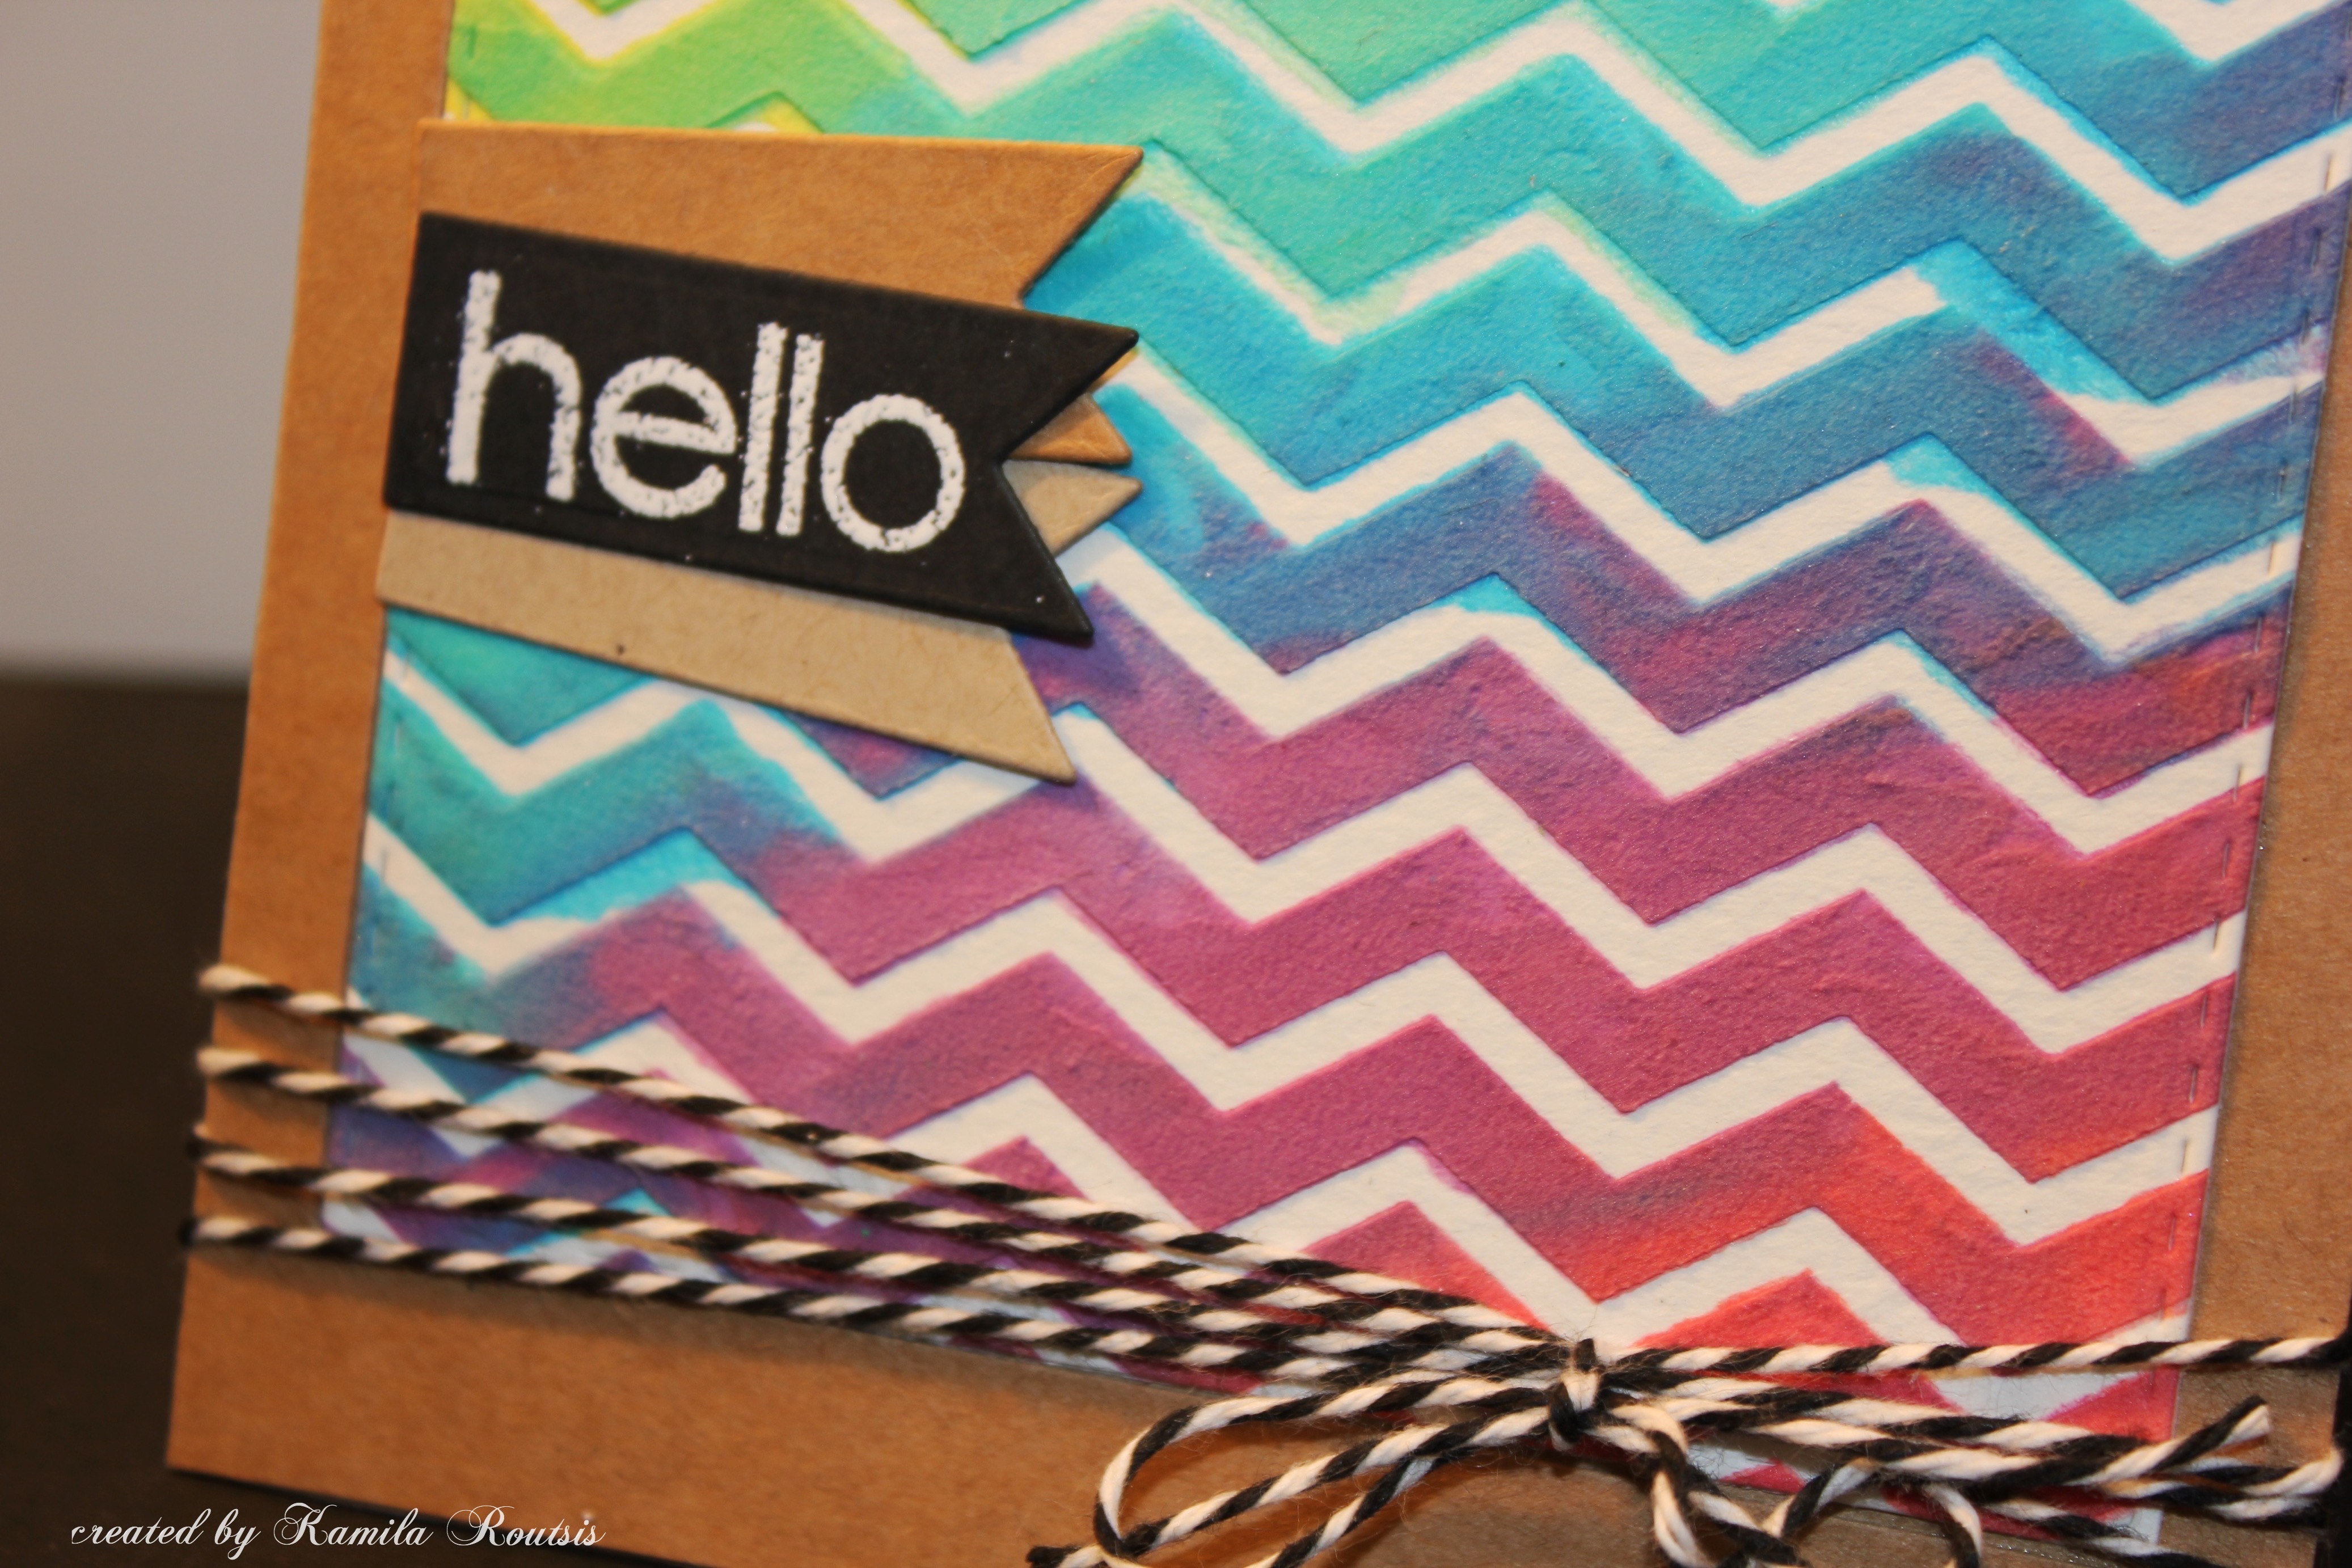
Next card is made using the Memory Box Modern Chic Chevron stencil. Of course you can use any kind of patterned stencil, I used what I had, I think this was actually one of my first stencils I purchased 🙂 For this card I was going for that polaroid in laid die look. I hope I achieved that 🙂 I also added some Doodlebug twine with a little bow to match the sentiment which was stamped on a black banner. I used My Favourite Things – stitched square die set to cut out the window you can see the nice stitching on the close up photo. By the way this set was a lovely birthday gift from my dear friend Bozena! – Thank you very much!!
This card is my favourite of them all I think because I just love the mixed colours on it. I also used the Scrapberry’s stencil here and I added just a subtle sentiment heat embossed in white on a piece of vellum. I popped the whole card front on some fun foam and on the craft card base from Neenah Desert Storm card stock. Sentiment is also from Avery Elle – Cake & Candles set.
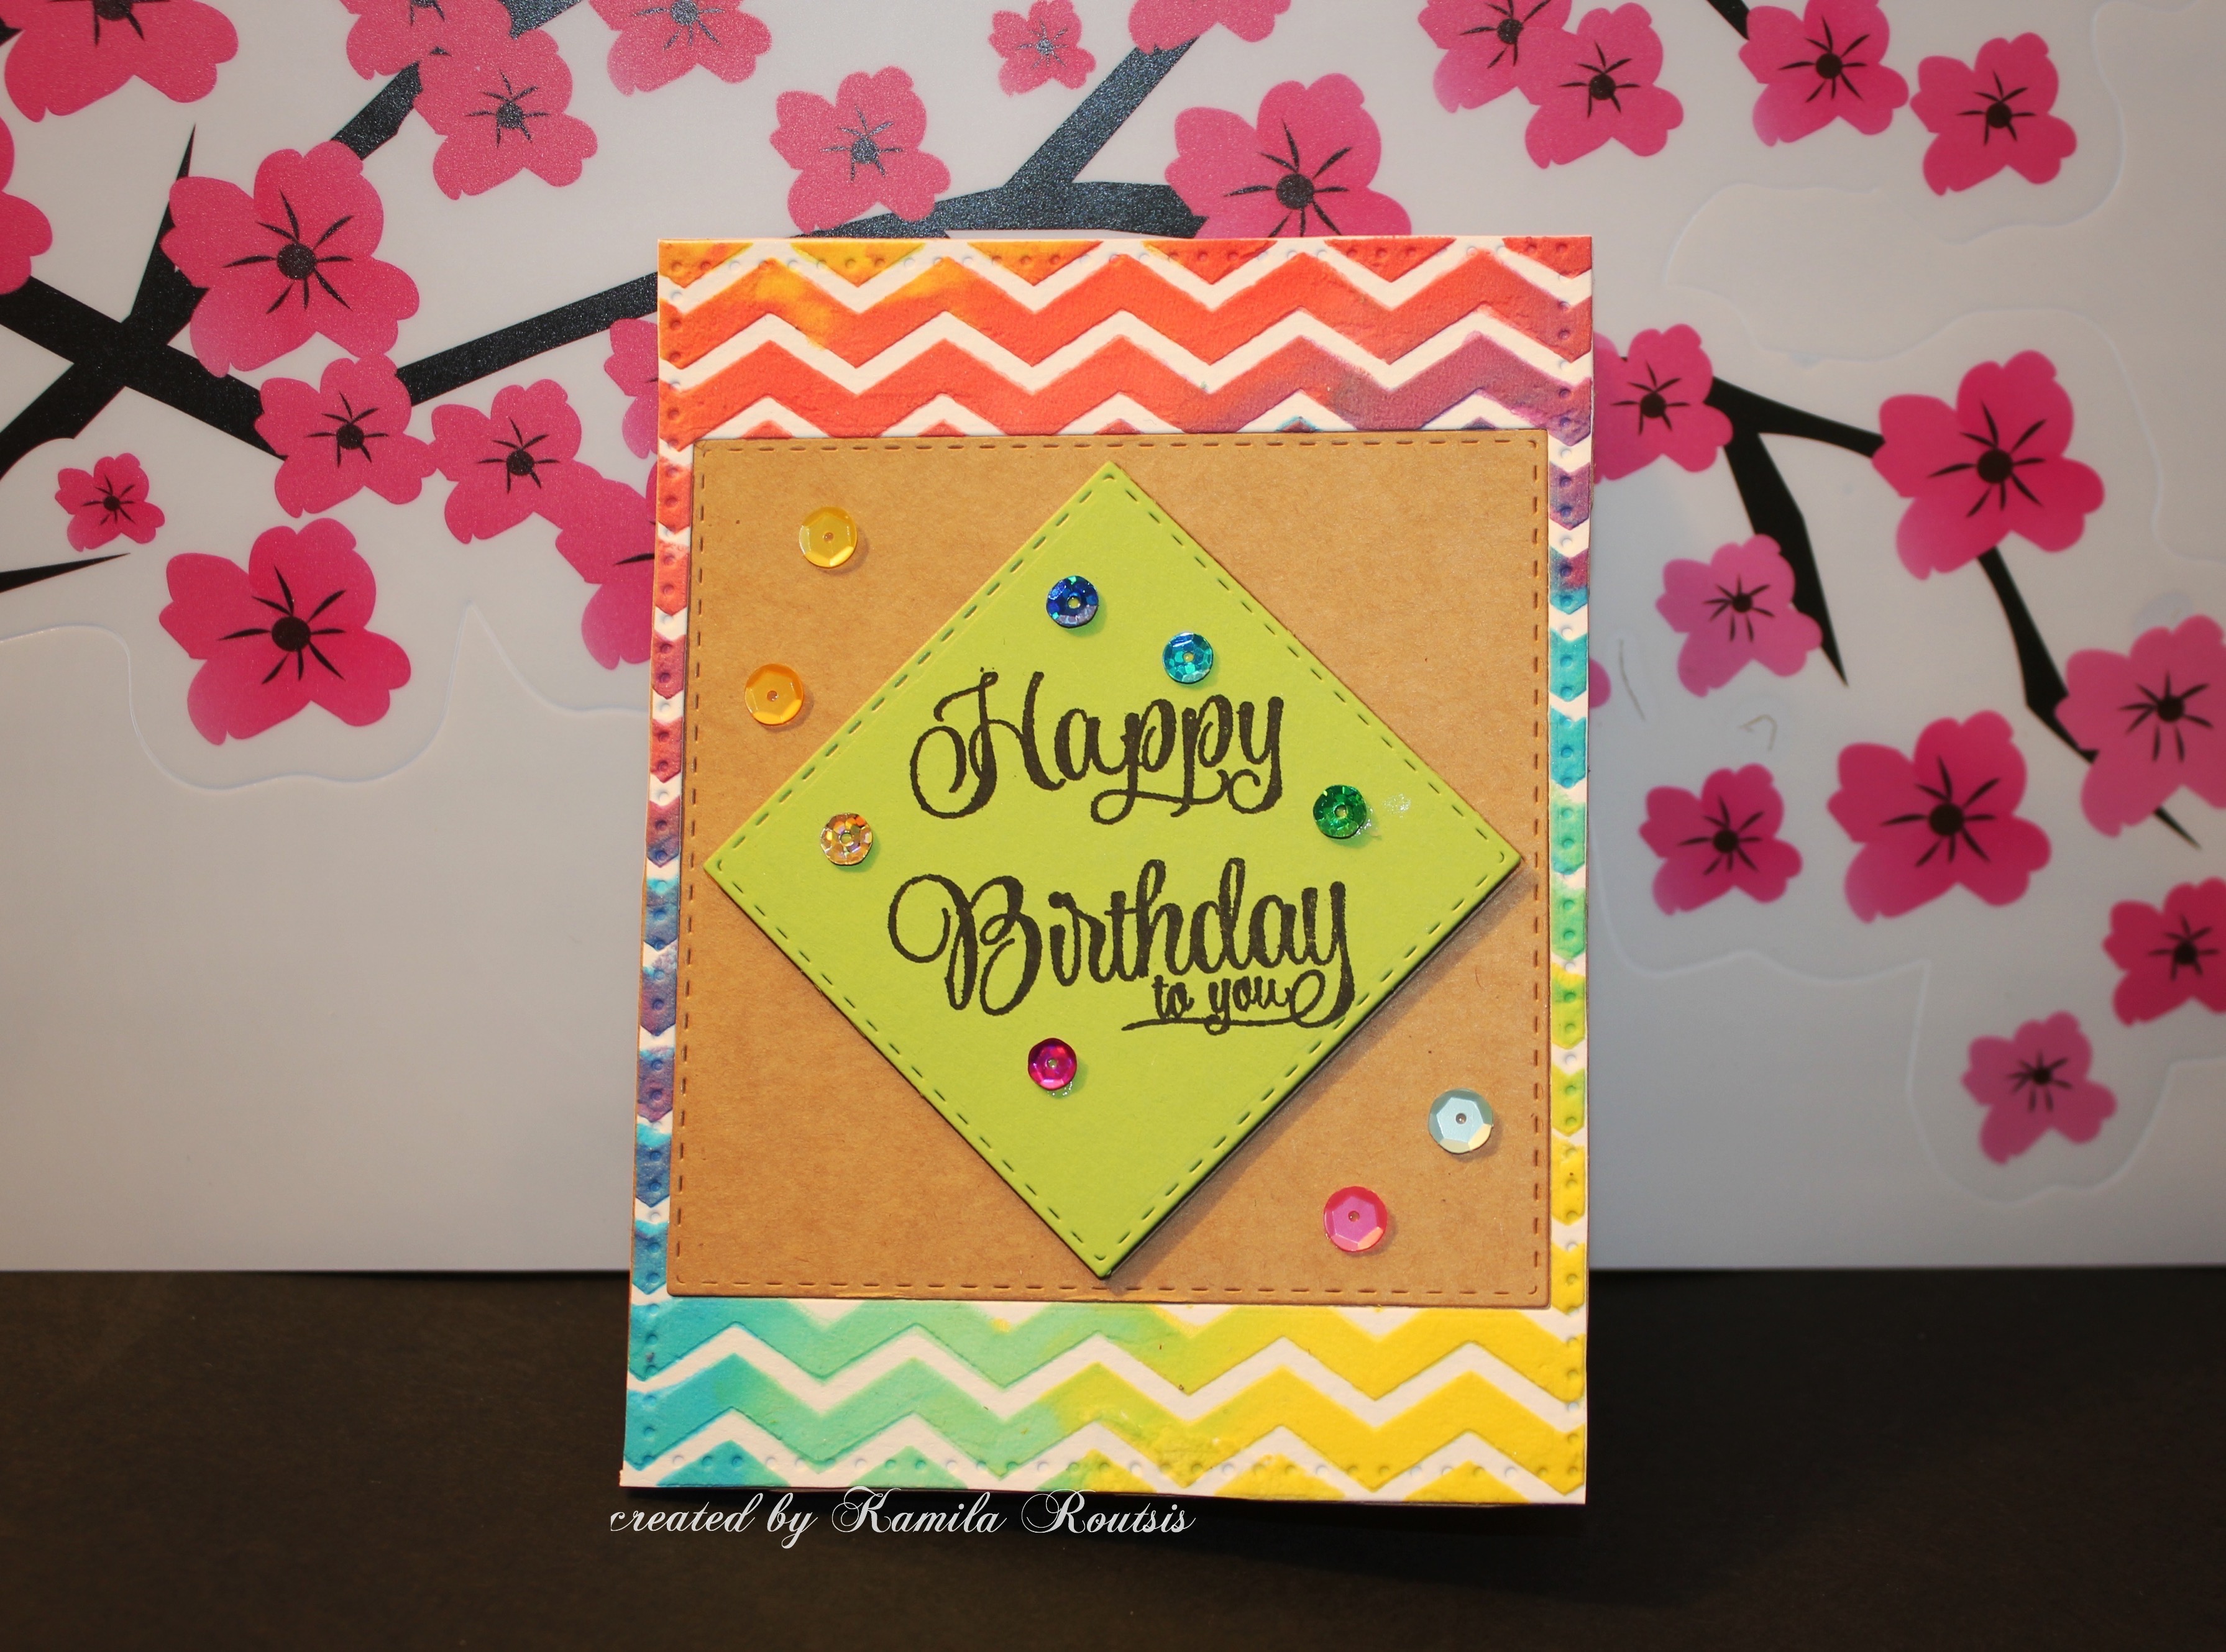
Last card was made using the lefovers from the chevron panel I made for the earlier card. I just did not want it throw it away – besides there is nothing in the craft room that is really eligible for the bin – anything can be re-used – right? 🙂 I used the Avery Elle dotted frame die to cut down the panel, popped it on the craft card base that I cut down to size. Then I die cut 2 squares using the MFT stitched squares dies, one I placed in the middle is more of a diamond shape I guess and it is also popped on some foam squares. I then added some sequins by Pretty Pink Posh and Neat and Tangled. Sentiment was a modified Happy Birthday to you from Avery Elle that I cut in half to place one under another – I could have masked it but hey that way was easier 🙂
I hope you enjoyed watching the video and seeing my new cards! I hope I gave you some new ideas and made your day a better one!
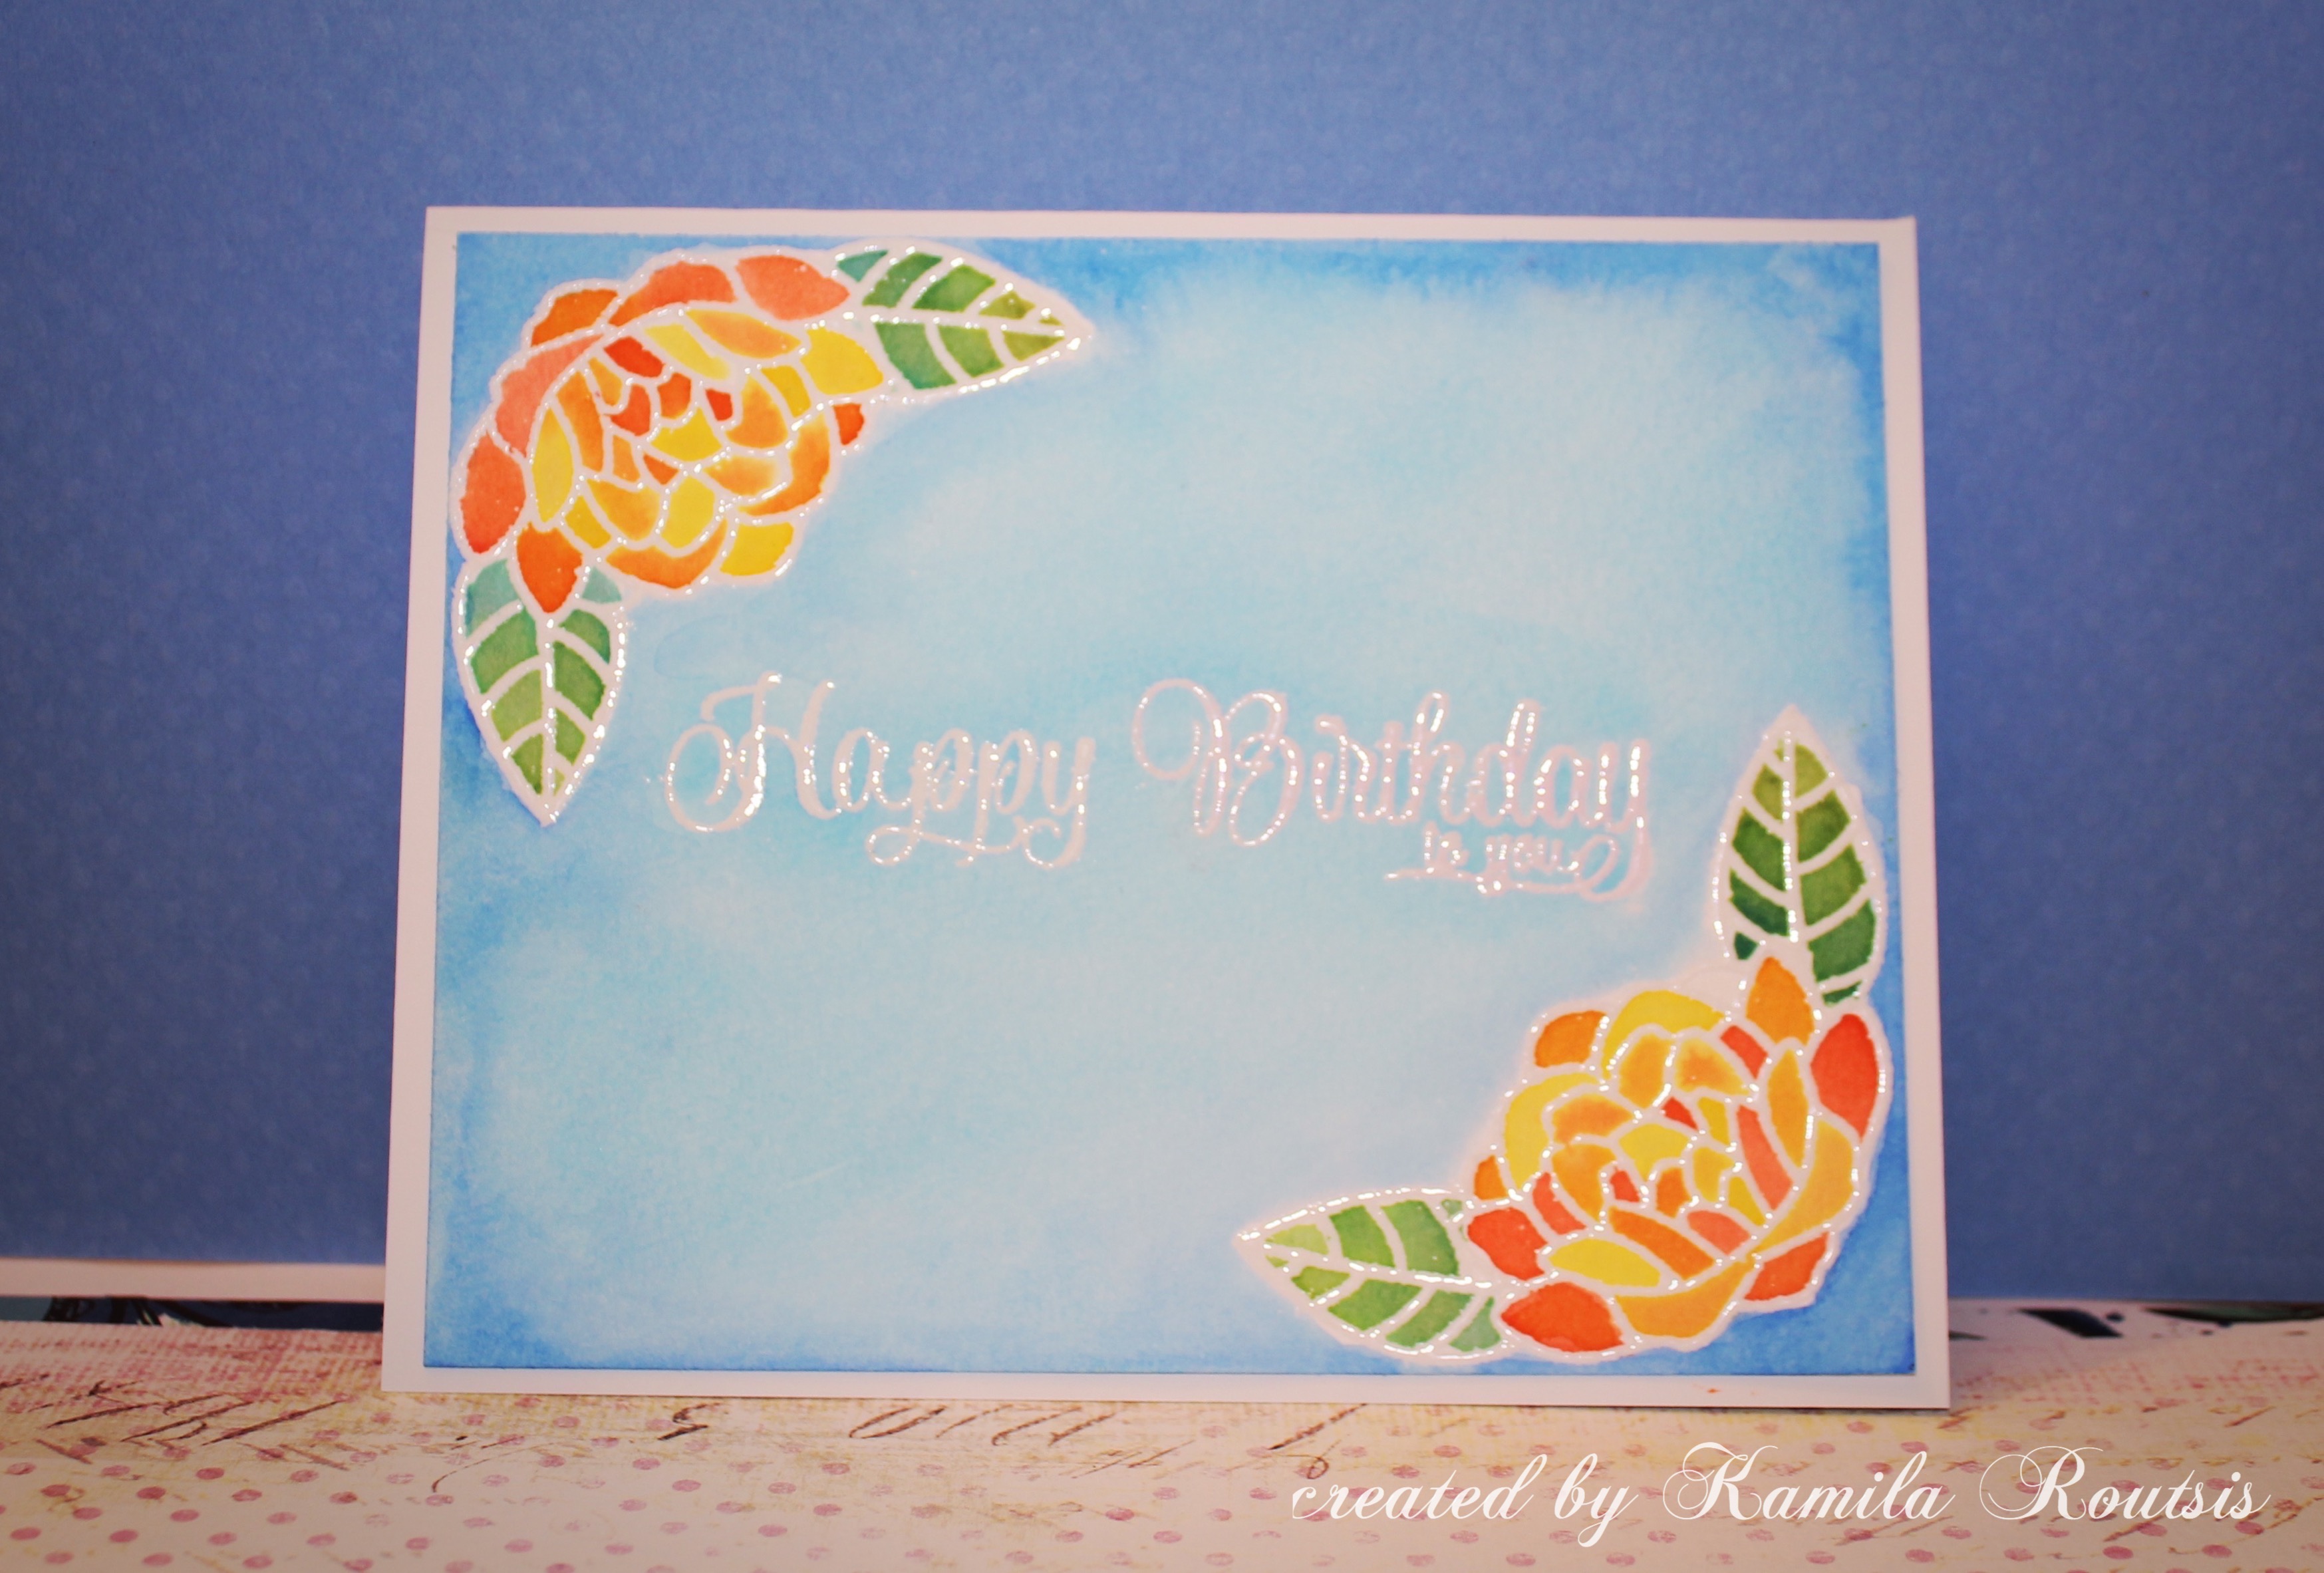
This is my second entry for the Pretty Pink Posh watercolour blog hop! I finally had some time and will ;o) to make all my ideas into cards today.
Here is no. 2
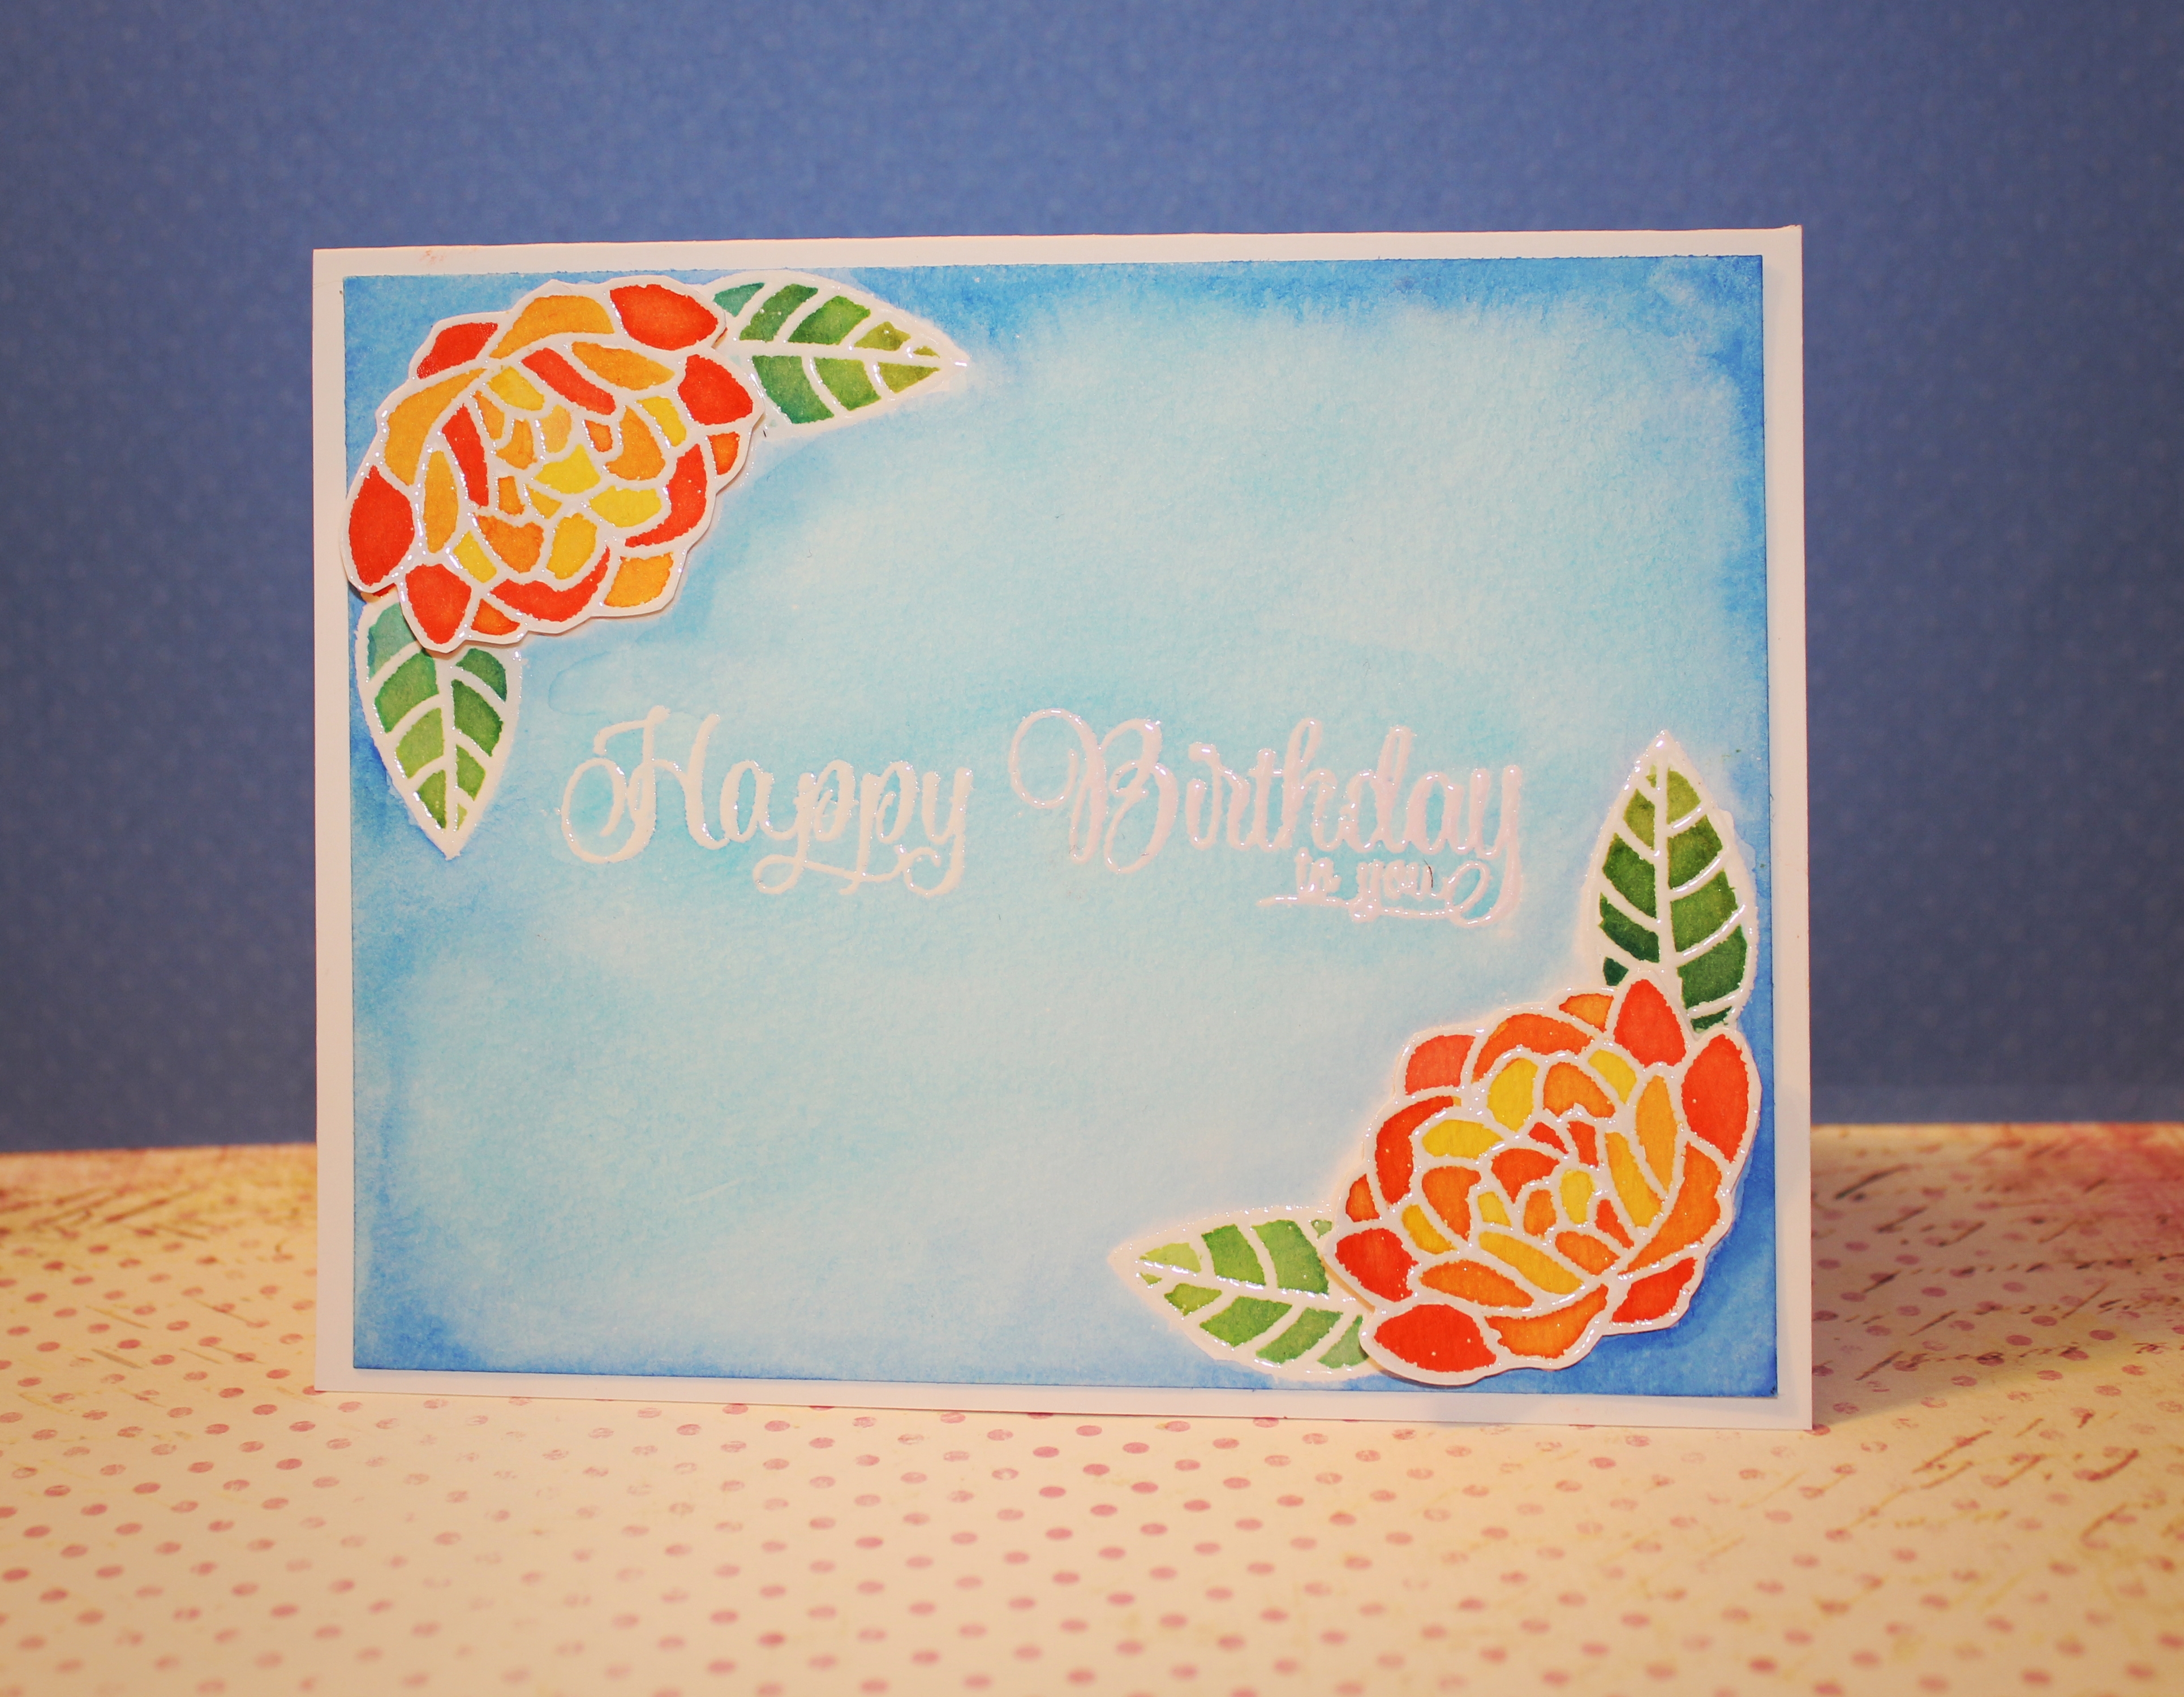
This one evolved 🙂
At first I made this one layer card with a hard to read sentiment 🙂
Then I added a layer of flowers for dimension, sentiment was still not satisfactory – I do not know why I didn’t correct everything at the same time so don’t ask haha
And finally this is how the card looks like as a finished product 😉
I used Distress Inks as my watercolours here because I just love these colours! 🙂 For the sentiment I went with Avery Elle Cake and Candles I love the se big Birthday sentiments! The flowers are from the Lawn Fawn Flutter by stamp set I embossed in clear embossing powder using Versa Mark and clear embossing powder from Papermania.
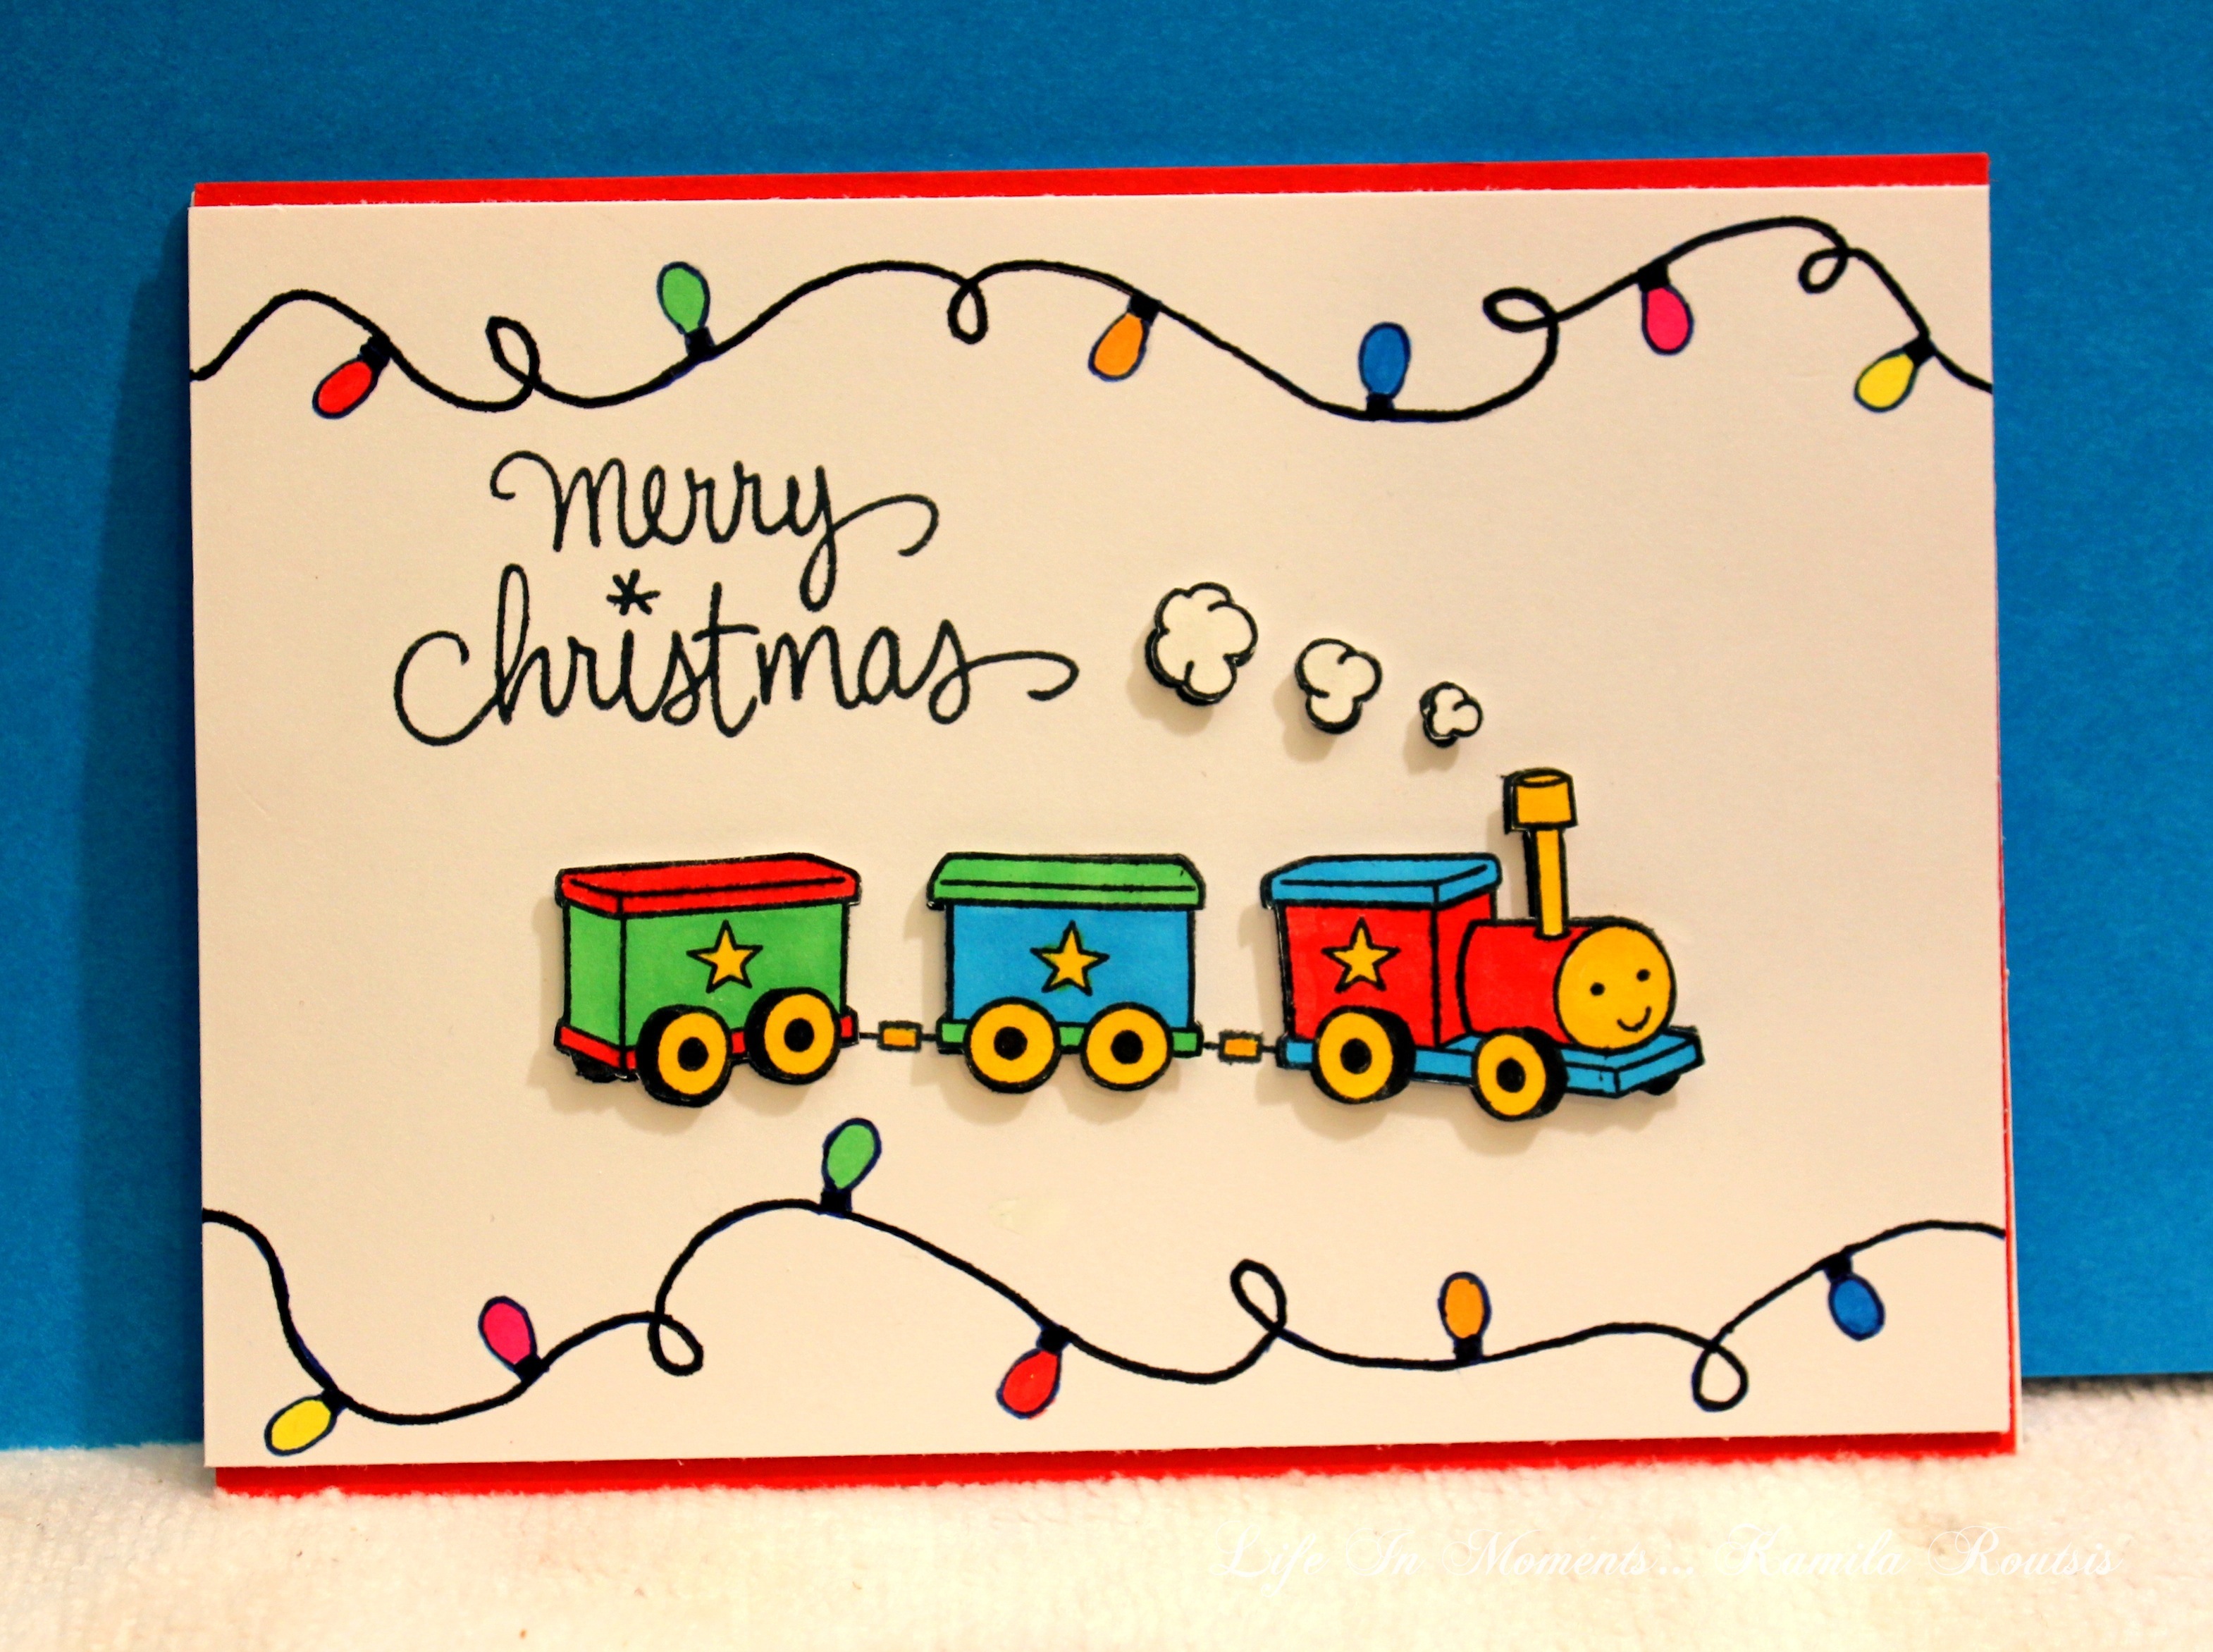
I wonder if you remember my post a while ago when I made a card with a train and christmas lights around it – here is the link to that post and the previous card –
I had many ideas for cards with xmas lights. Here is one of them:
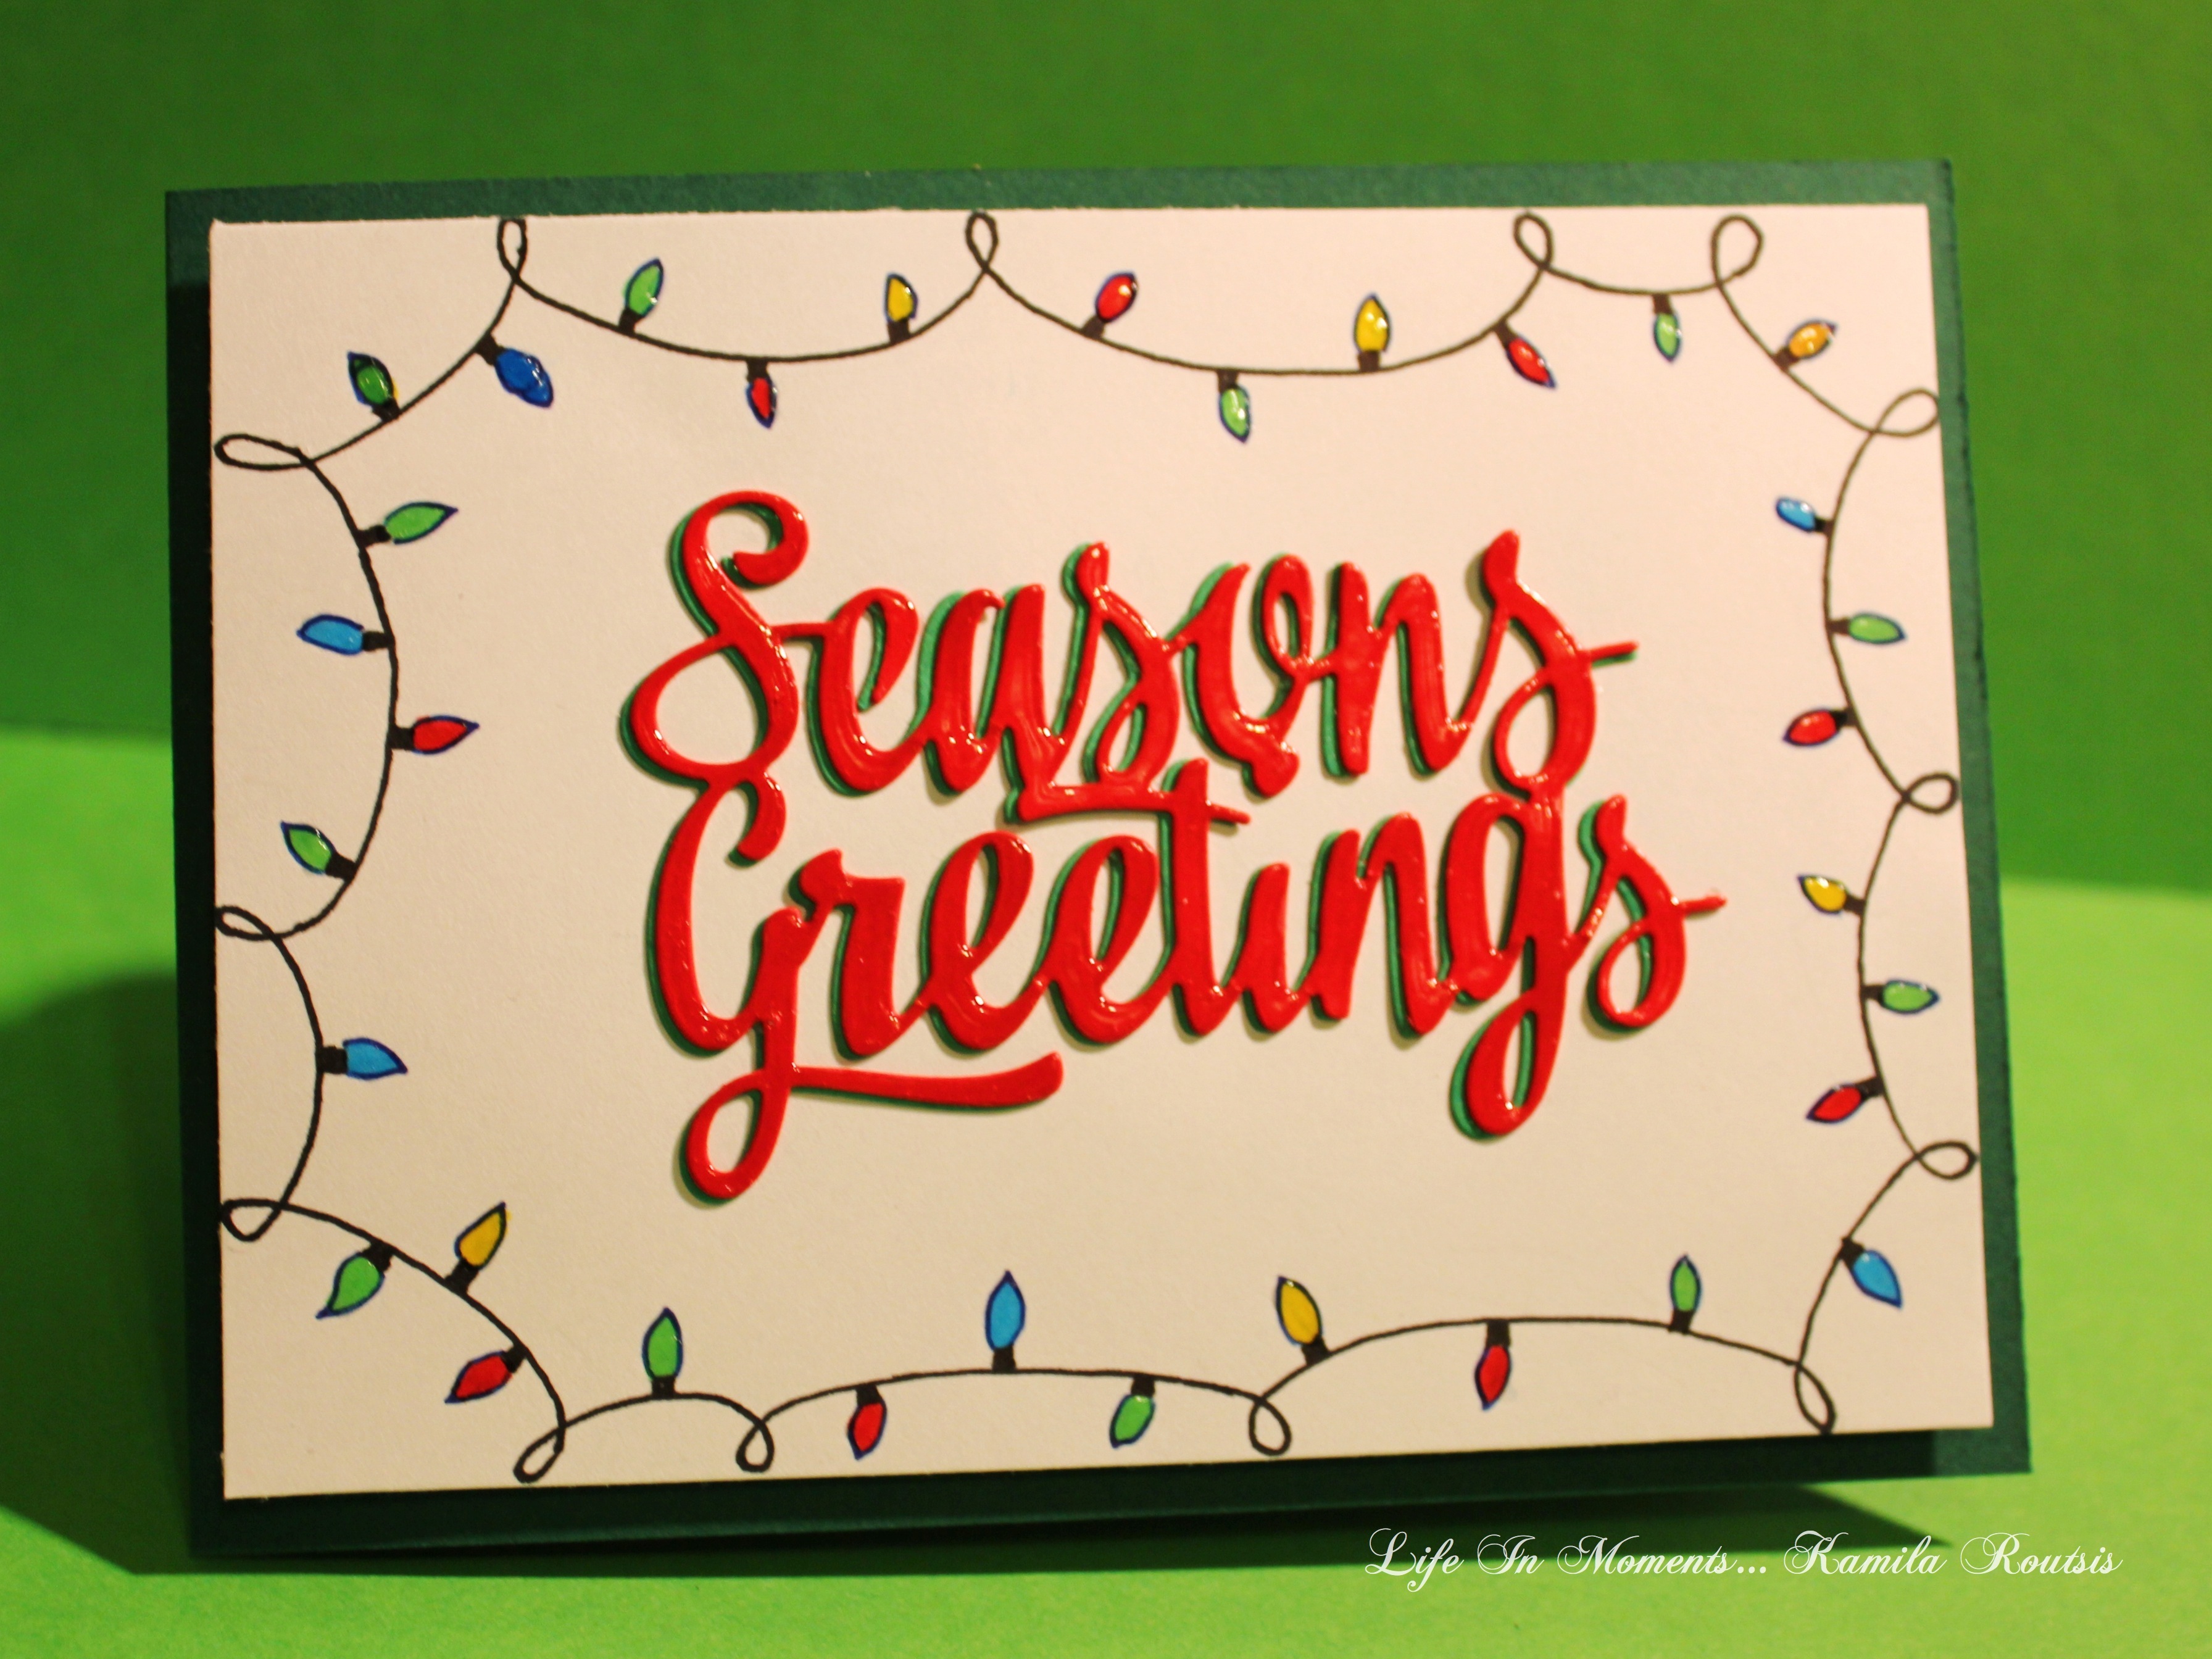
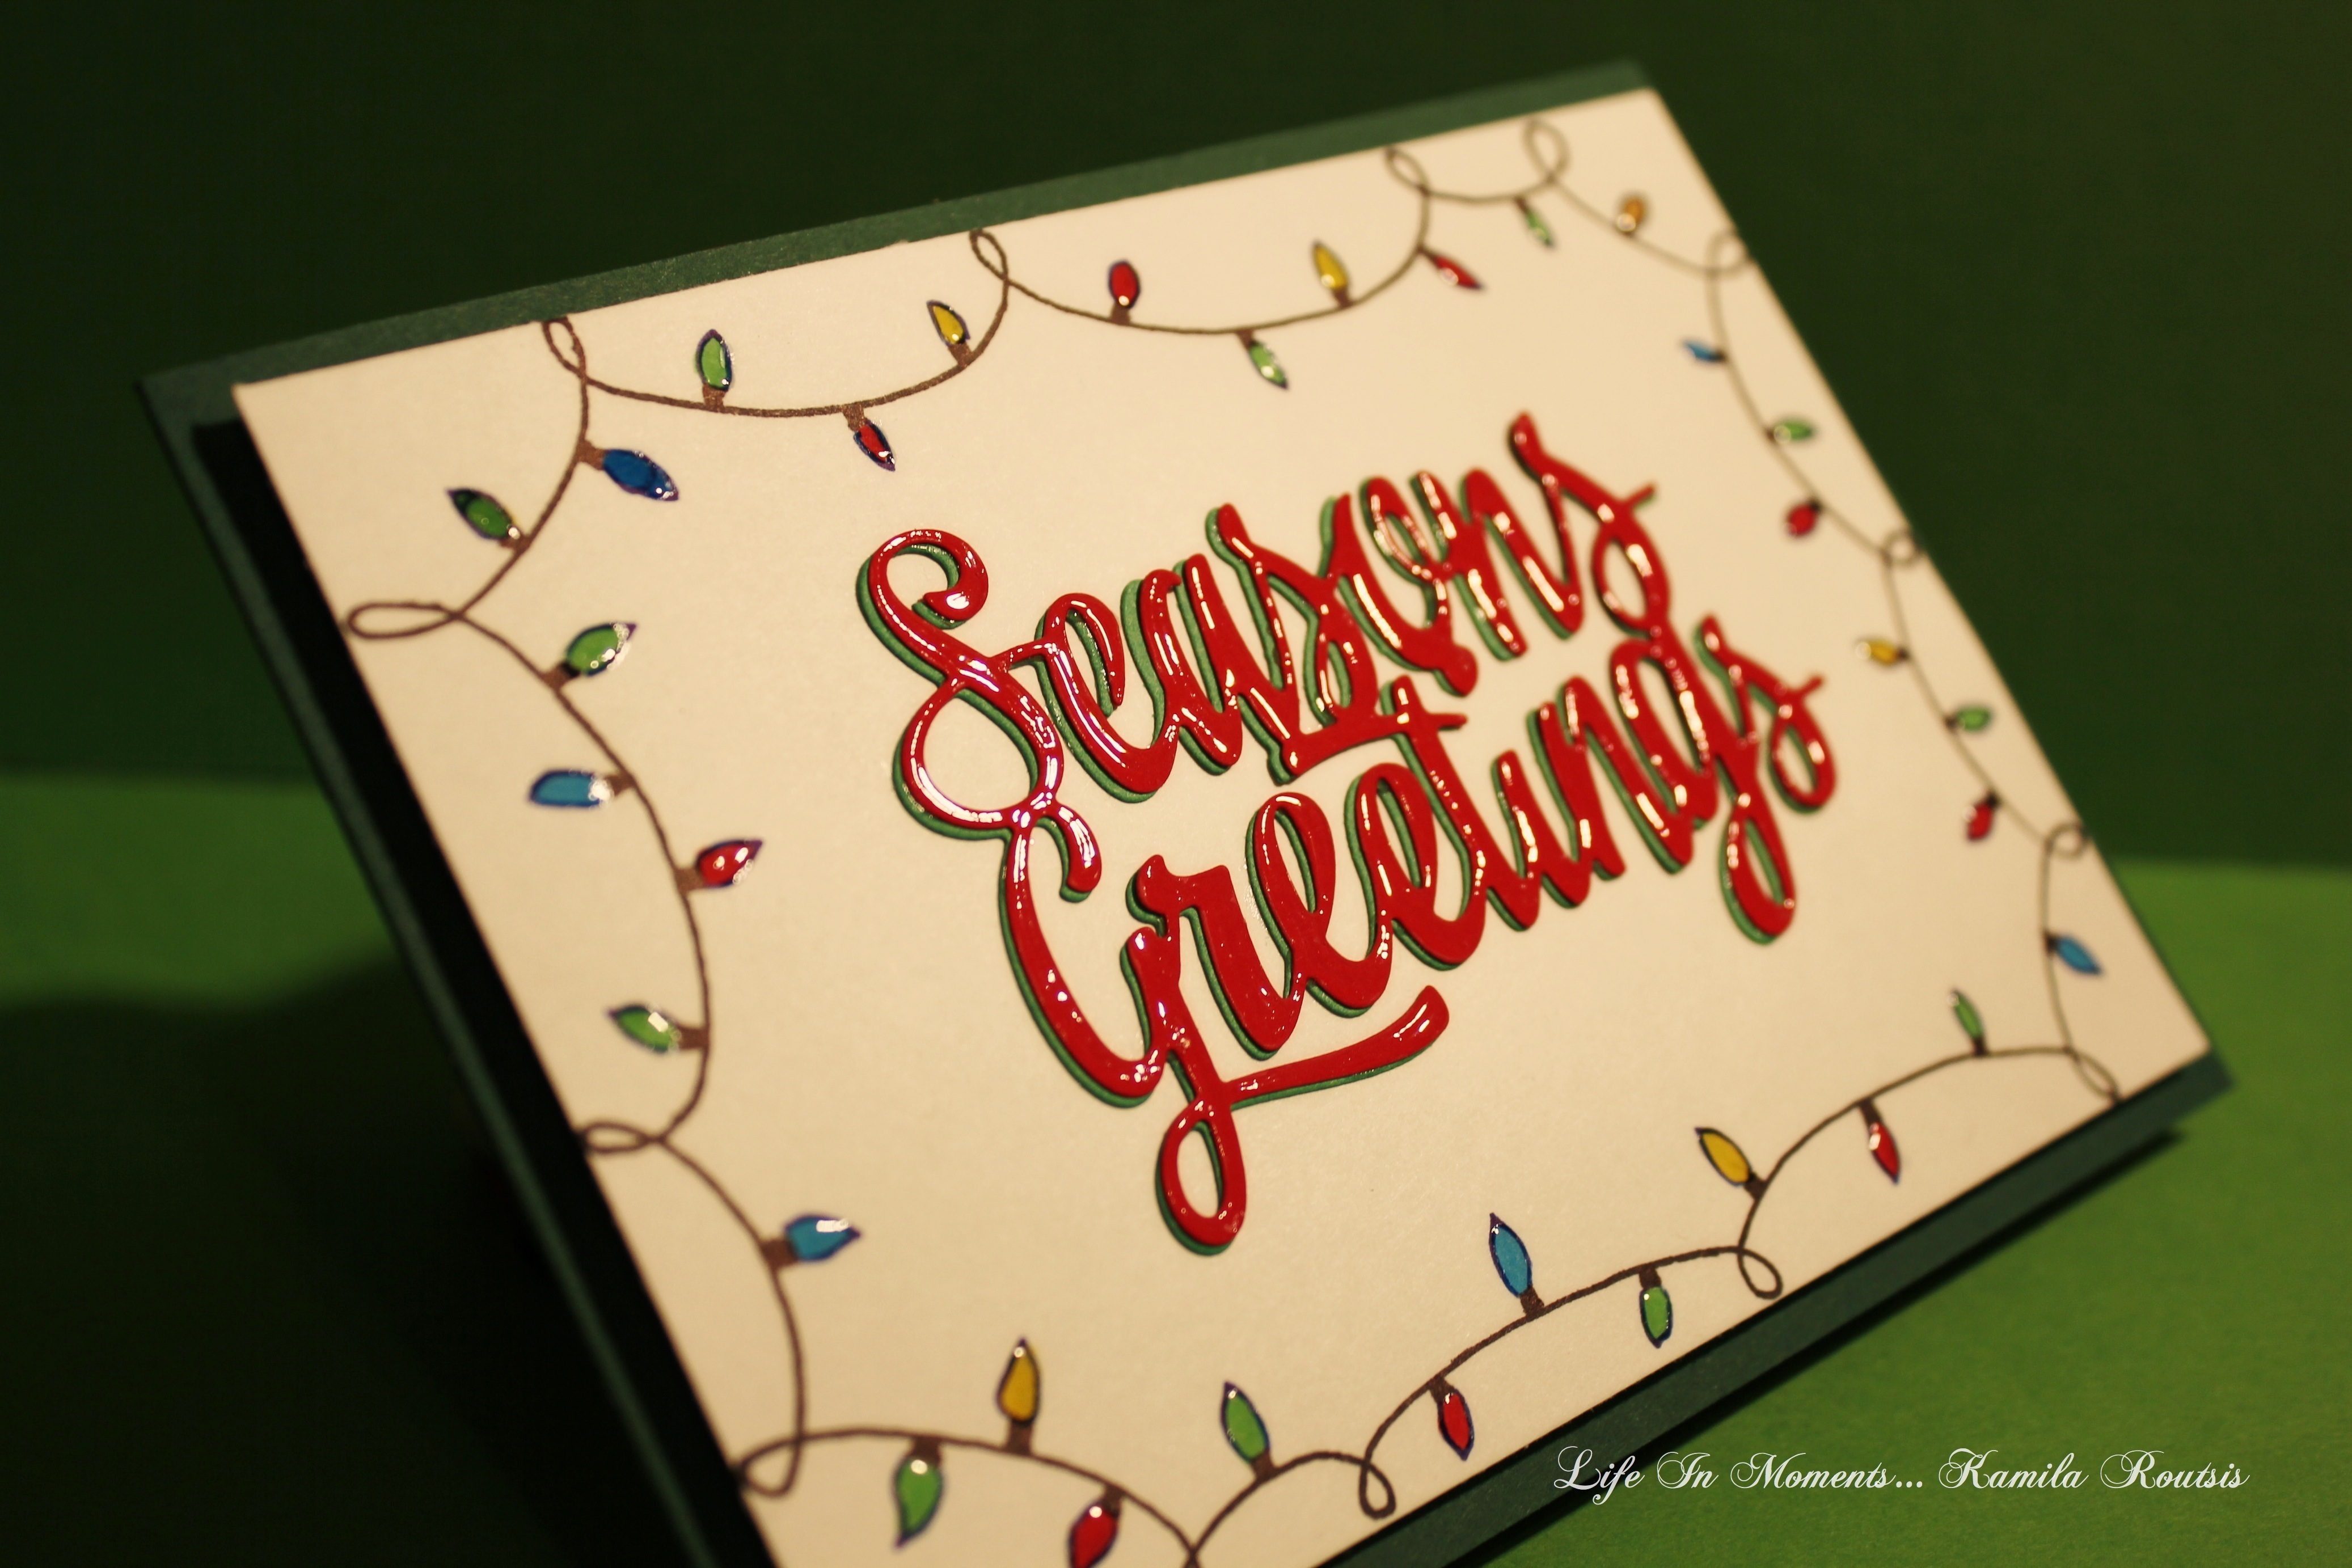
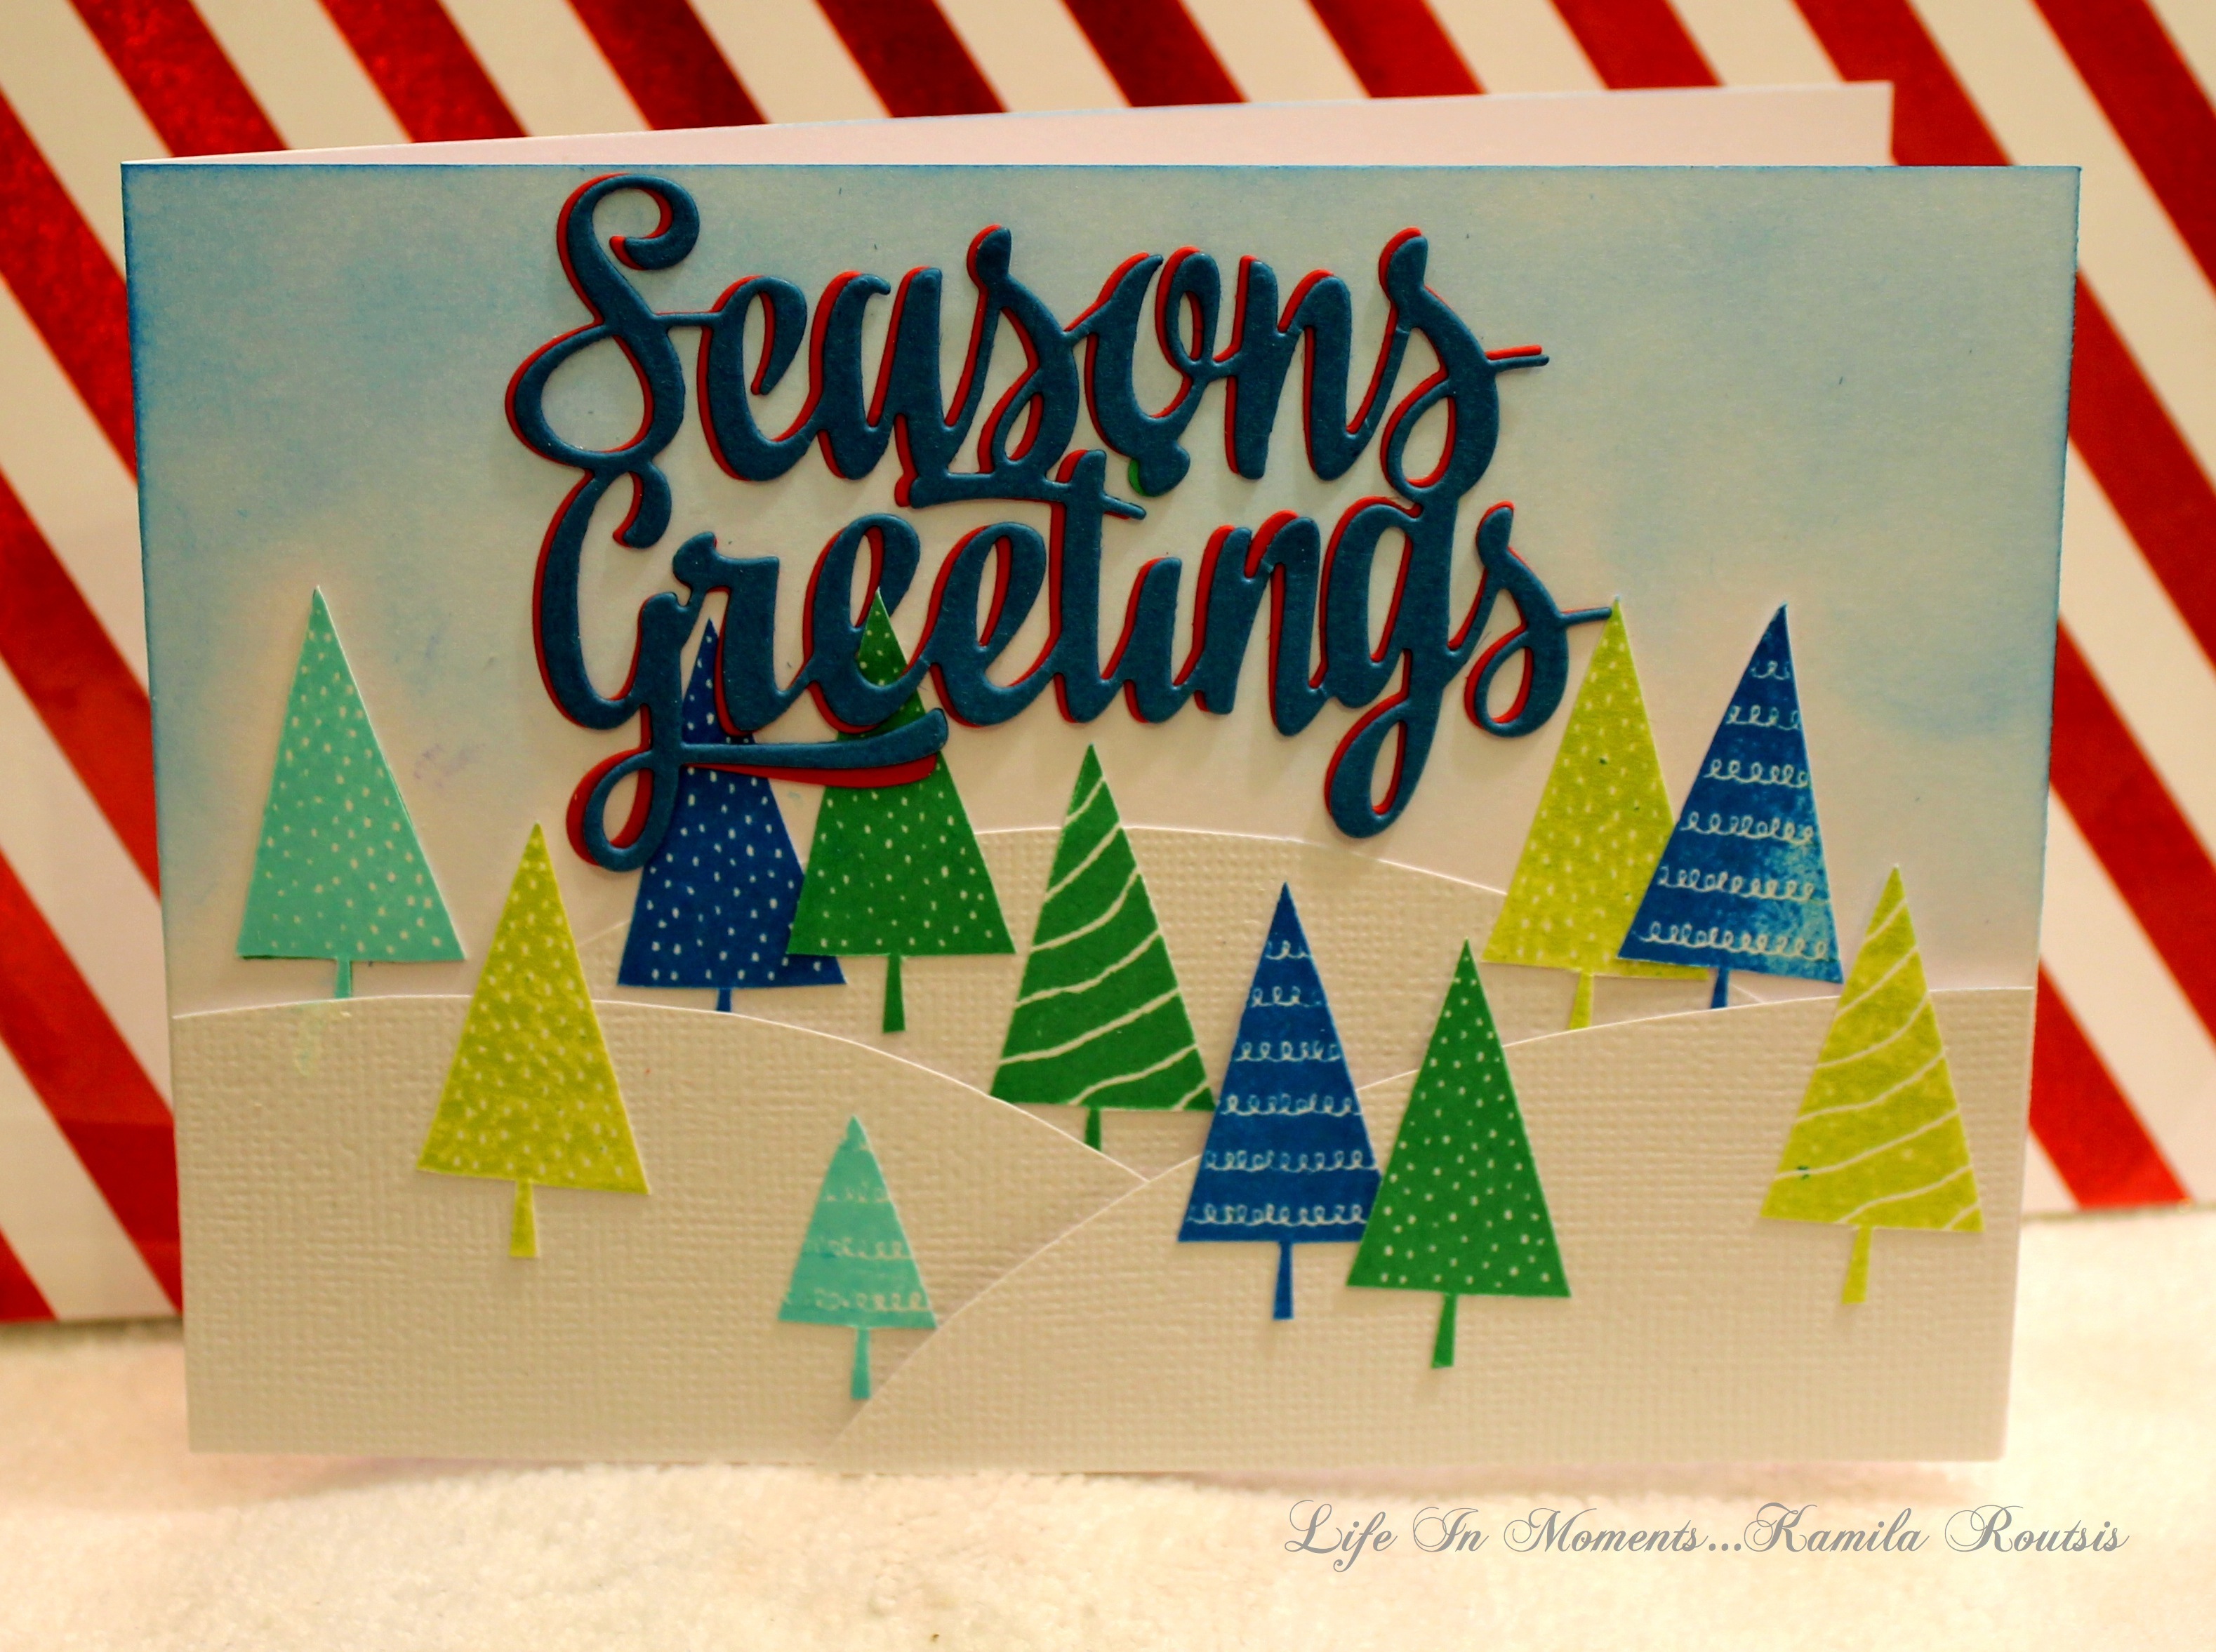
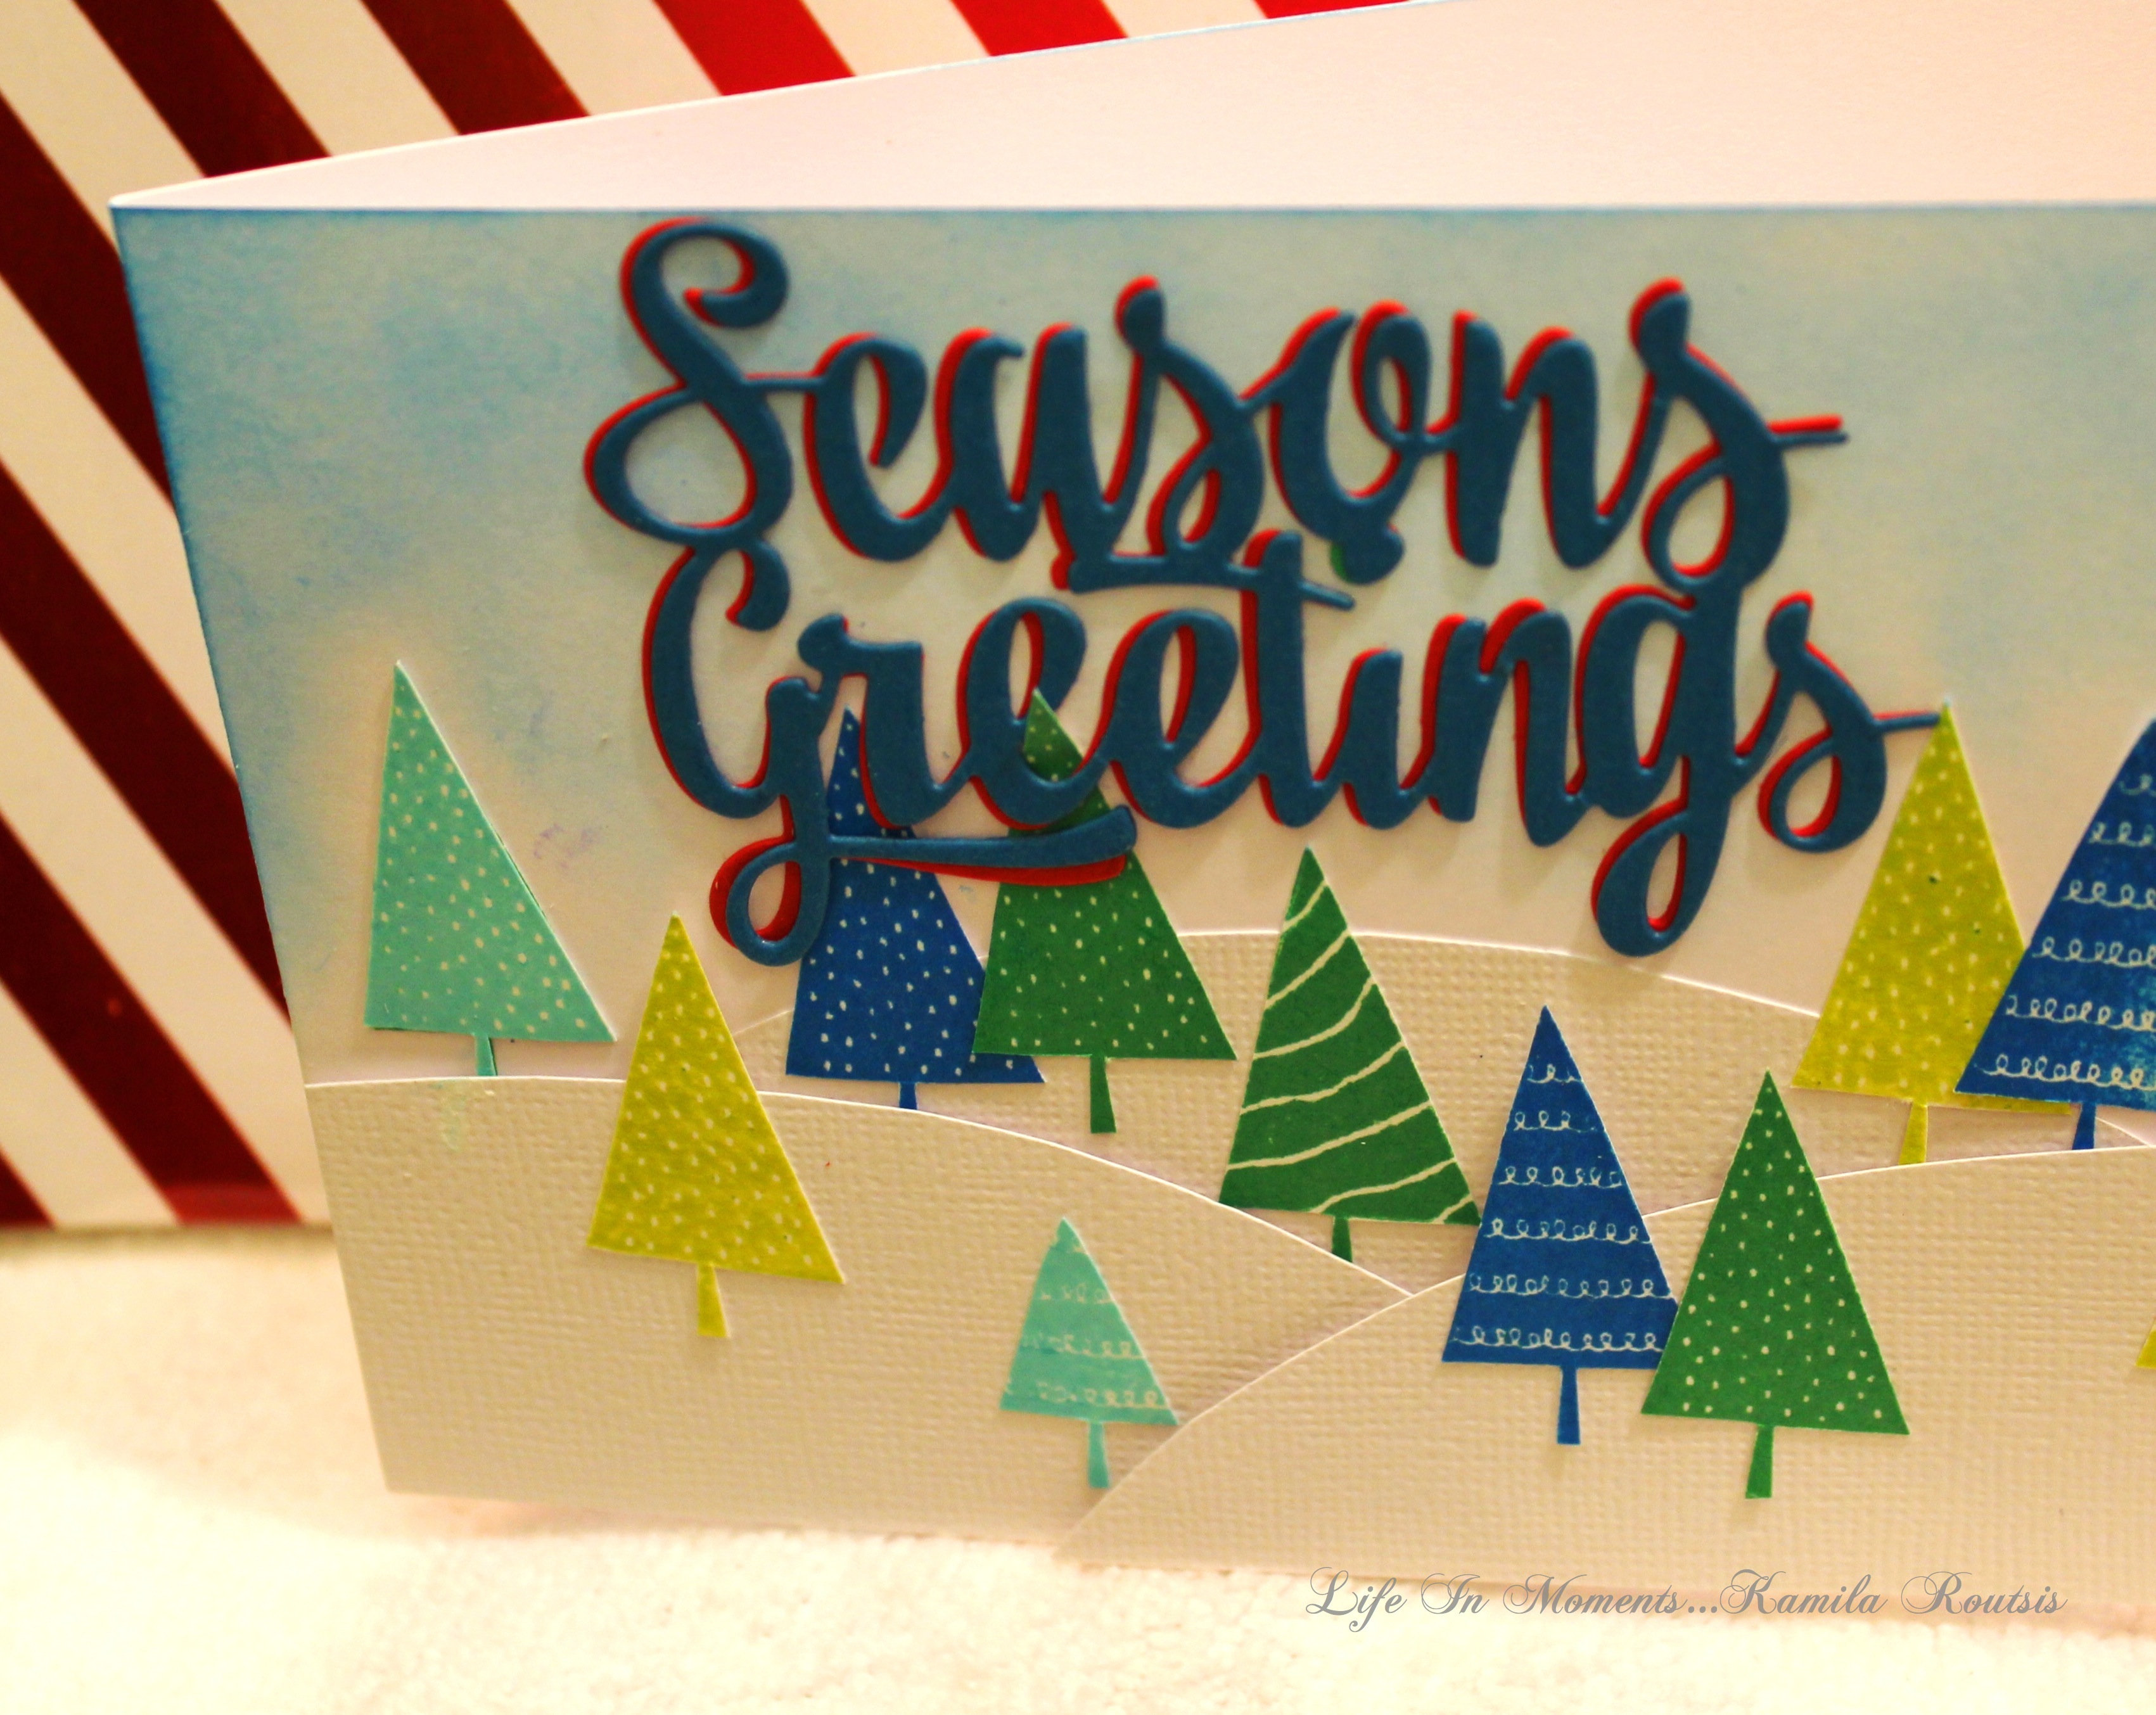
I used a big Avery Elle die Season’s Greetings as my focal point, but I surrounded it with many colourful lights that I drew myself. I die but the sentiment in red and green and used them on top of each other but do that you can see the green underneath a little bit. I then use glossy accents on the lights and the sentiment.
I really like how it turned out. It was quite a lot of work but it paid off.
I will also enter this card in Simon Says Stamp card challenges
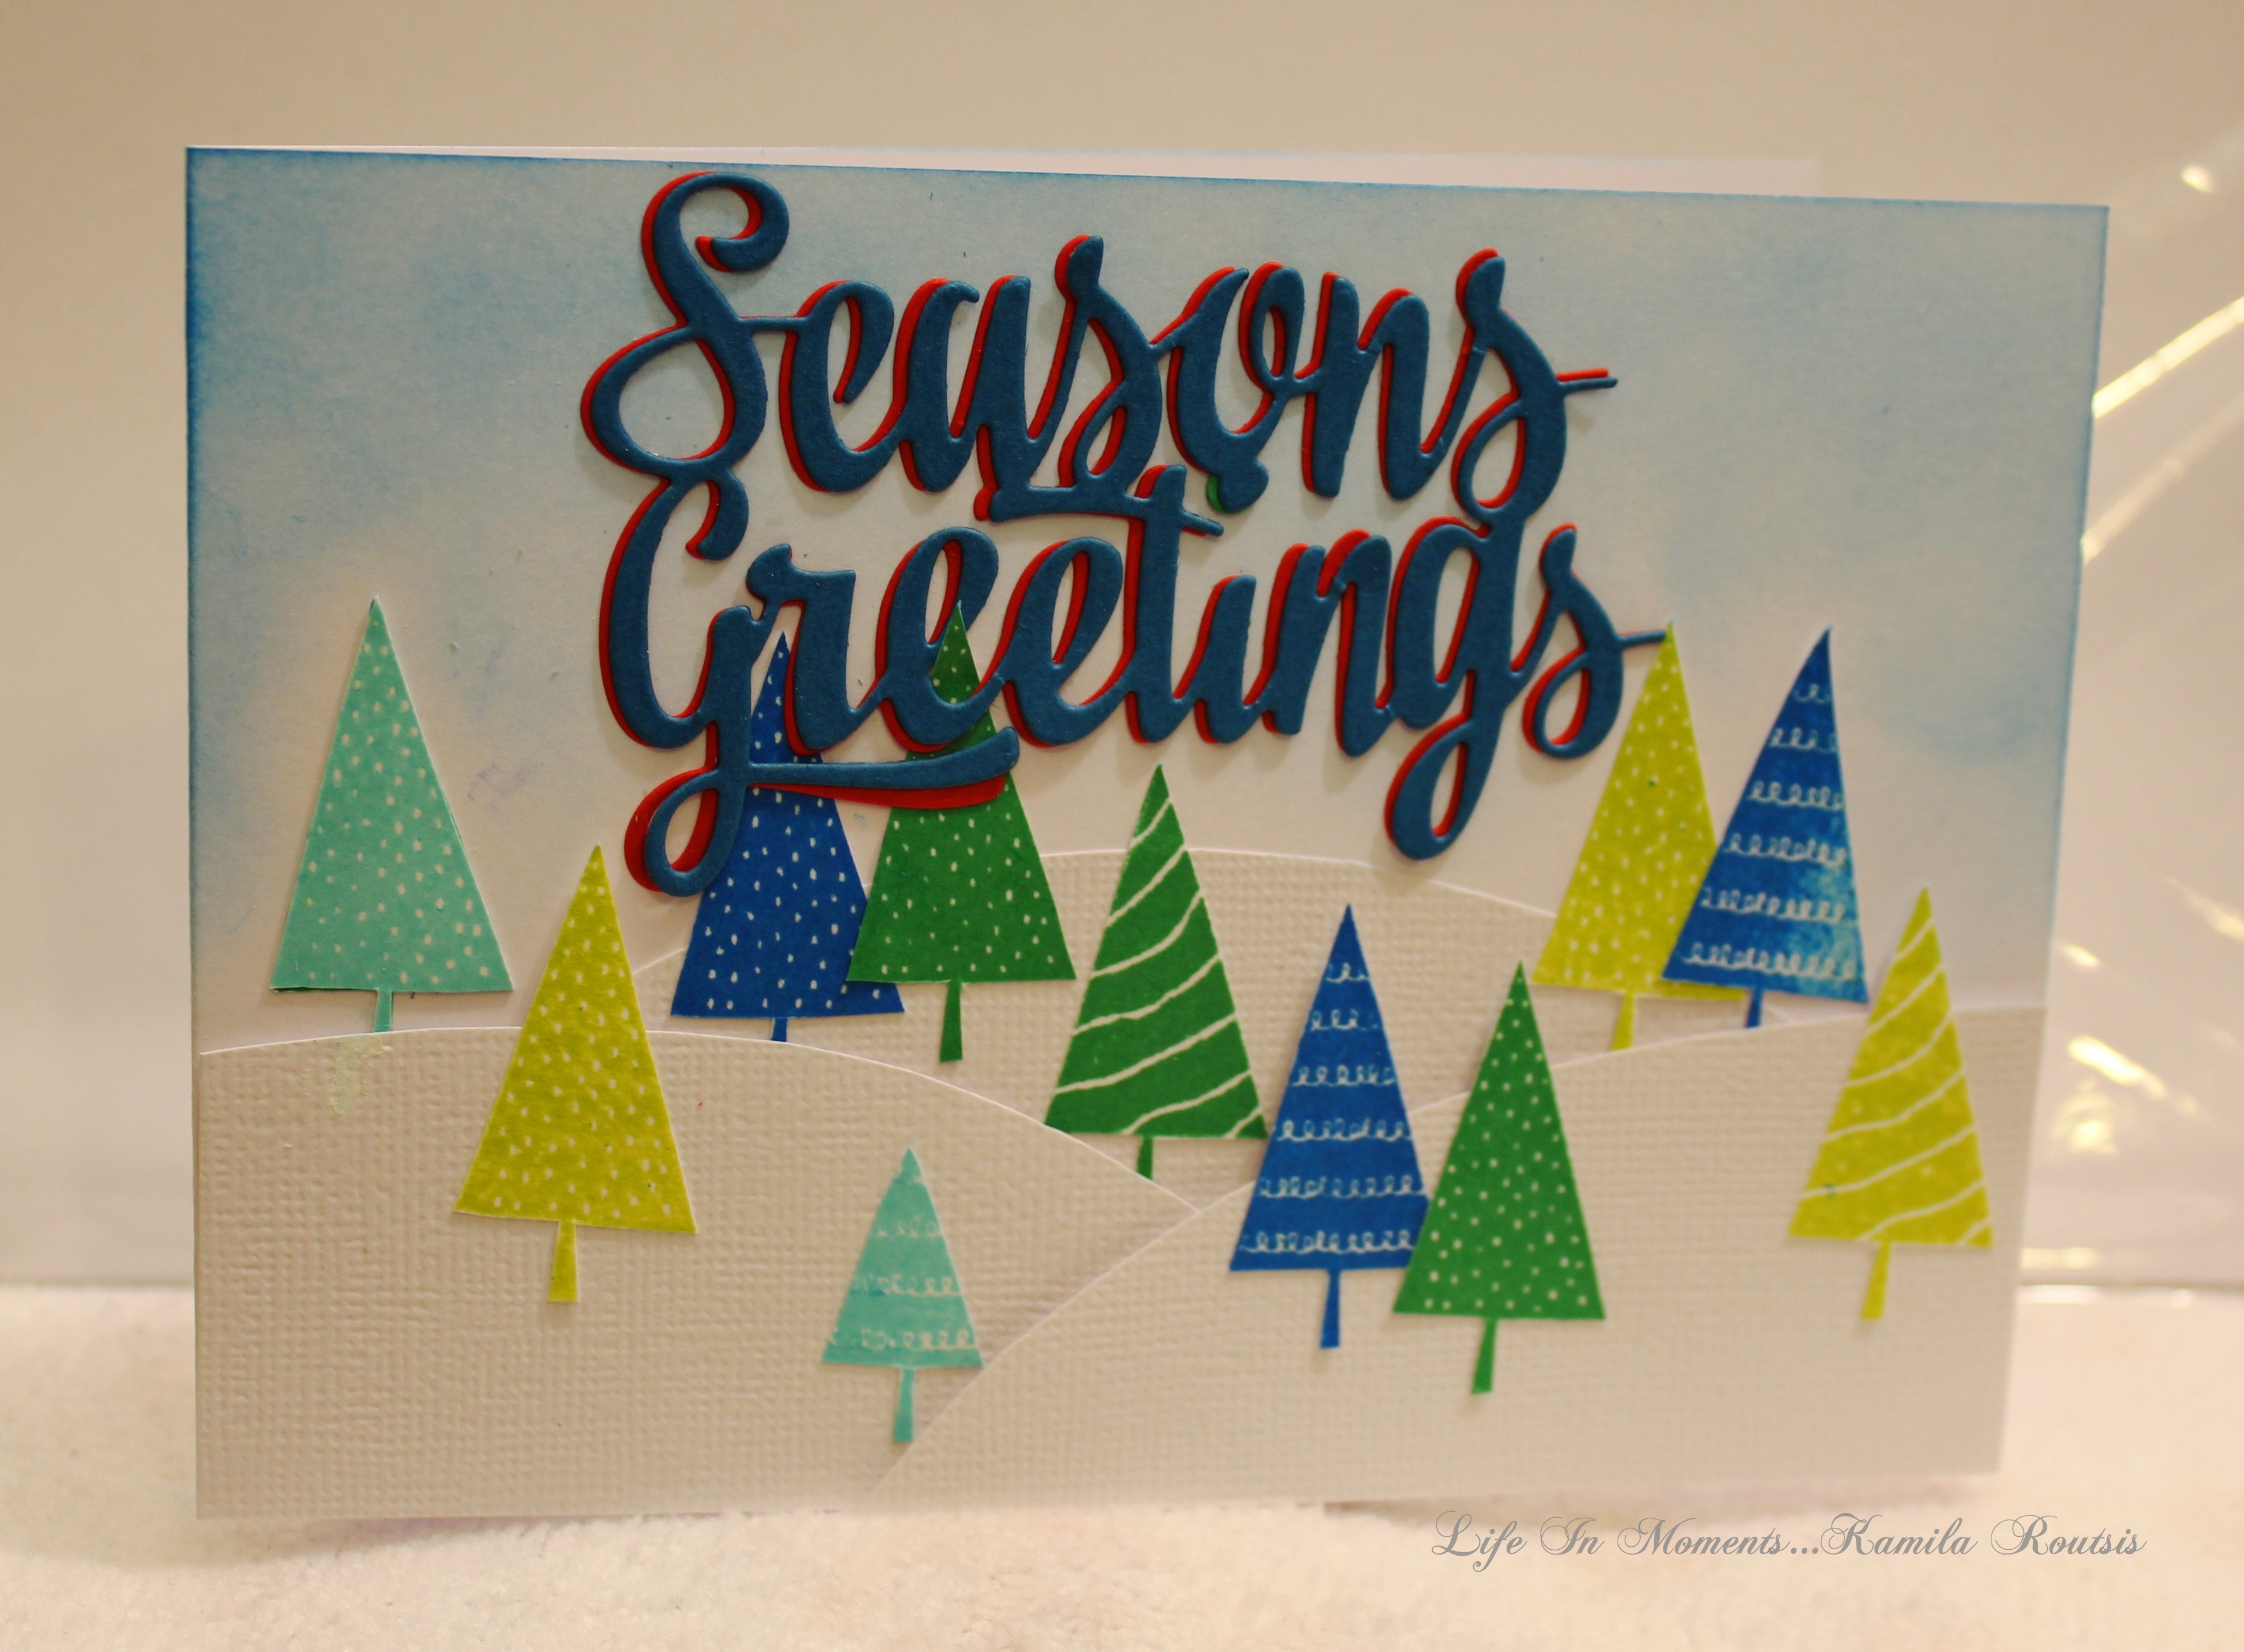
I made my own snowy hills and stamped quite a few trees with my Recollections clear stamp set Merry Merry 🙂 I think they are cute with various patterns on them. Then I used different shades of my green and blue Archival and Memento Inks, then I sponged some Salty Ocean Distress Ink for the sky and last I put a big sentiment die cut from Avery Elle – Season’s Greetings, which I first cut out of red card stock then decided to tone it down with adding blue on top. That’s that! I finally made a little snowy scene!


![Challenge 32_thumb[2]](https://kamroutsis.wordpress.com/wp-content/uploads/2016/01/challenge-32_thumb2.png?w=300&h=186)